
Window alarm sensors are one of the few security upgrades that can travel with you. If you rent, that matters. You still want a clear signal when a window opens unexpectedly, but you usually do not want to drill through trim, run new wiring, or pay to undo a heavy install at move-out.
This guide keeps the focus practical: what renters usually mean by window alarm sensors, how to mount the most common setup with minimal damage, how to cut down false alerts in a real apartment, how a contact sensor alarm can work alongside cameras, and how to think about cost in layers. General information only.
Lease rules, HOA rules, and local alarm ordinances vary. Check your agreement and local requirements before you install anything that makes noise outside your unit or records common areas.
What Window Alarm Sensors Usually Refer to In a Rental
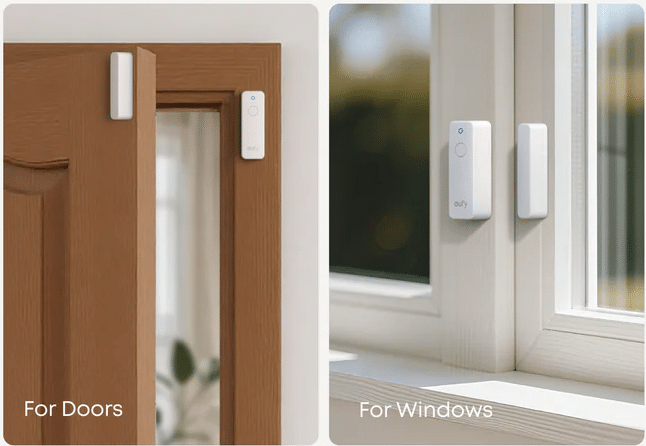
On shopping pages and in casual conversation, the phrase “window alarm sensors” is general . For renters, it mostly often means a contact sensor alarm (a magnetic door/window contact sensor). You have two parts: a small sensor body and a magnet.
When the window opens far enough, the magnetic field changes and the sensor sends an alert. Some systems add a keypad, siren, or app rules on top of that base signal. You may also see marketing for glass-break sensors, vibration sensors, or film-style detectors. Those can be useful in some homes, but the magnetic contact sensor is usually the starting point because it is simple, easy to test, and easy to understand when it trips.
Why Renters Reach for Contact Sensors First
Renters often care about three things: speed to install, how easy it is to remove, and whether the hardware can move to the next place. Contact sensor alarm components are usually small enough to sit on a window frame and sill.
Many installers use adhesive or narrow screws in a spot that is easy to patch later. That is not the same as “zero risk to paint,” but it is usually a lighter touch than cutting walls for wired contacts. Placement still needs thought. You want a clean gap measurement so the sensor is not right at the edge where the sash rattles on windy days.
You also want to avoid spots where normal flex makes the parts drift apart over time.
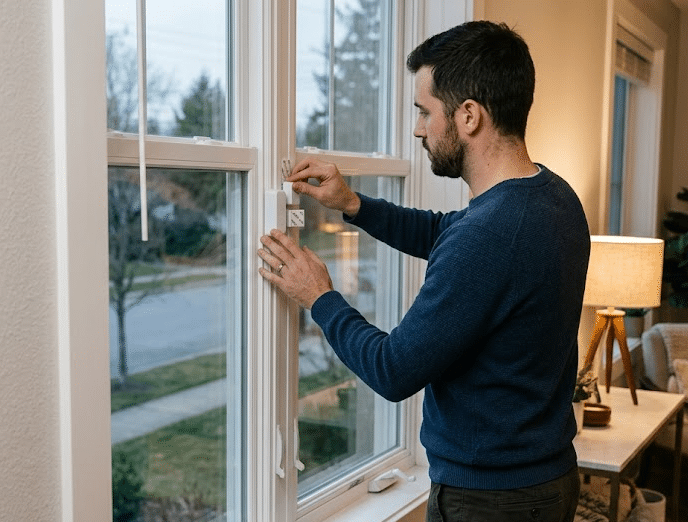
Install without Damaging Your Rental

Start by reading the product instructions for your exact kit. Different brands use different tapes, screws, and gap tolerances. A few habits that tend to help in apartments:
- Mount on the moving sash and the fixed frame so the alert means “opened,” not “vibrated.”
- Clean the surface first. Dusty paint is where peel-and-stick mounts fail first.
- If your lease is strict about holes, ask before you use screws. Some landlords are fine with one or two tiny holes in an inconspicuous frame edge. Some are not.
- Test opening and closing slowly after installation. If the sensor trips while the window is still closed, adjust the gap before you rely on alerts.
False Alerts and How to Keep Them Rare
False alerts usually come from one of a few places: a loose mount, a weak magnet alignment, airflow that rattles the sash, pets bumping a low sill sensor, or rules that treat every motion as an emergency. Most fixes are simple. Do them in this order:
- Check the mount: press on both pieces; if either one wiggles, reattach it.
- Tighten alignment: keep the magnet and sensor close and parallel within the gap your kit allows.
- Account for building movement: if the window rattles in the wind, move the sensor away from the loosest corner.
- Reduce bumps: if pets hit the sill, mount higher when possible.
- Tune notifications: use short delays or sensitivity settings if available, and use bypass for planned ventilation.
Pairing Sensors with Cameras without Doubling the Chaos
Sensors and cameras answer different questions. A contact sensor is good at “did the perimeter change state.” A camera is better at “what does the scene look like after that.” In this guide, think “contact sensor” when you see door/window language: it is the same basic magnetic sensor, just mounted on a door or a window. In practice, many renters like a simple split:
- Sensors on first-floor windows and the primary entry door
- One or two cameras covering shared areas where recording is permitted, such as your own doorway or a private balcony facing your unit
If you use one ecosystem, you can often keep alerts in a single app and cut down duplicate notifications. When you want quick visual confirmation after an alert, an indoor camera like the eufy Indoor Cam S350 can make sense in a main living area where pan-and-tilt coverage helps you keep more of the room in view—anywhere you can power it and stay within your lease and privacy boundaries.
On the sensor side, a magnetic contact sensor such as the eufy Entry Sensor E20 can cover the windows and doors you actually use, and its bypass option is handy when you are intentionally airing out a room and do not want repeated notifications.
Budget Tiers that Map to How Long You Will Stay
You do not need to buy everything at once. A tiered plan tends to match renter life pretty well.
Tier One: A Few Contact Sensors on The Highest Risk Openings
Cover the door you actually use daily, then any window that is easy to reach from a fire escape, roof edge, or low ledge. This is the smallest spend that still changes behavior, because alerts arrive early.
Tier Two: Add Motion Coverage Inside the Entry Path If someone gets past a window without tripping a contact sensor, indoor motion can still catch movement in a hallway or living area. This tier costs more and needs more tuning, but it closes gaps. I
f you plan to pair sensors with cameras or lights, treat any automation notes, including app version requirements, as a compatibility check, not a promise every setup will behave the same in every apartment. To compare kits and add-ons beyond contact sensors for example, a keypad, siren, or motion sensor, use the eufy door alarm sensor collection.
Conclusion
Window alarm sensors are a renter friendly way to add a perimeter signal without pretending you own the whole building. Start with a small set of contact sensors on the openings that matter most, tighten the installation so wind does not become your biggest threat, then add motion or camera layers if you still have blind spots.
To keep the system usable long-term, treat it like a routine, not a one-time purchase: test each sensor after installation, re-check alignment after a few weeks of daily use, and keep notifications tuned so you do not end up ignoring them. If you open windows often for ventilation, plan for a bypass or “home” mode so normal life does not look like an intrusion. And if you expect to move, prioritize setups you can remove cleanly and reinstall in your next place without starting over.