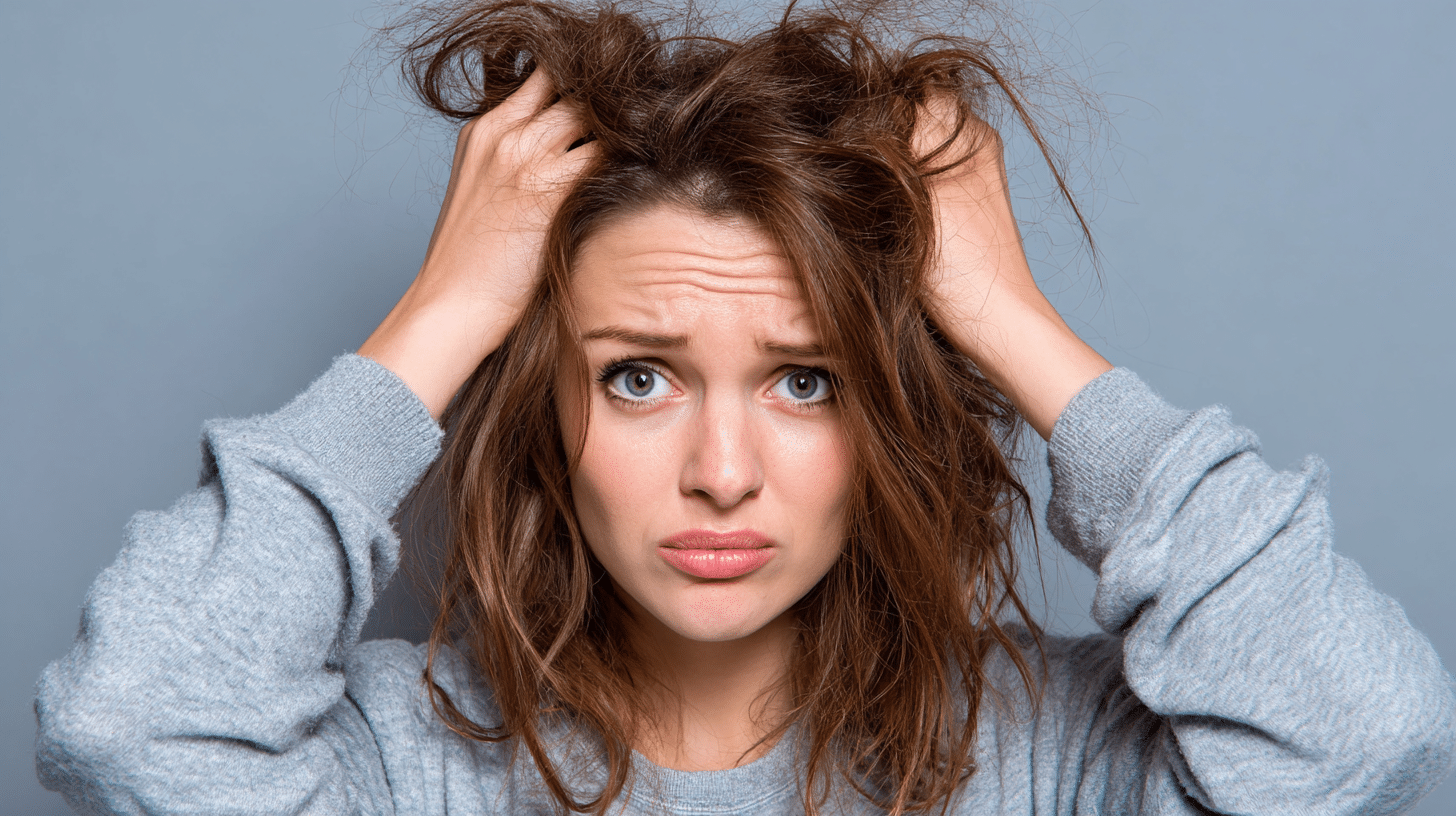

A diffuser can completely change how your hair looks after washing. Instead of dealing with frizz and flat curls, you get defined, bouncy hair that actually holds its shape.
Most people skip this tool because they think it is complicated or only meant for curly hair. But it works great on both wavy and straight hair.
Learning how to use a diffuser the right way takes just a few steps. Once you get the hang of it, drying your hair will feel less like a battle and more like a simple routine that actually gives results.
What is a Hair Diffuser?
A hair diffuser is an attachment you clip onto the end of your hair dryer. It has a wide, bowl-shaped head with small prongs or vents.
These prongs hold your hair in place while the vents spread the airflow evenly across a larger area.
Most hair dryers come with a diffuser attachment included in the box. If yours did not come with one, you can easily find a universal diffuser online or at any beauty supply store.
How a Diffuser Attachment Works
A regular hair dryer pushes air in one direction at full force. This disrupts your curl pattern and causes frizz.
A diffuser slows down that airflow and spreads it out. Your curls get dried without being blown all over the place.
Benefits of Using a Diffuser
Switching to a diffuser offers real advantages for your hair. Here is what makes it worth using:
- Reduces frizz by limiting direct airflow
- Improves curl definition and bounce
- Adds volume at the roots
- Distributes heat more evenly, so no one section gets too hot
- Speeds up drying time compared to air drying
All of these benefits come simply from changing how air reaches your hair, which is why so many people prefer it over regular blow-drying.
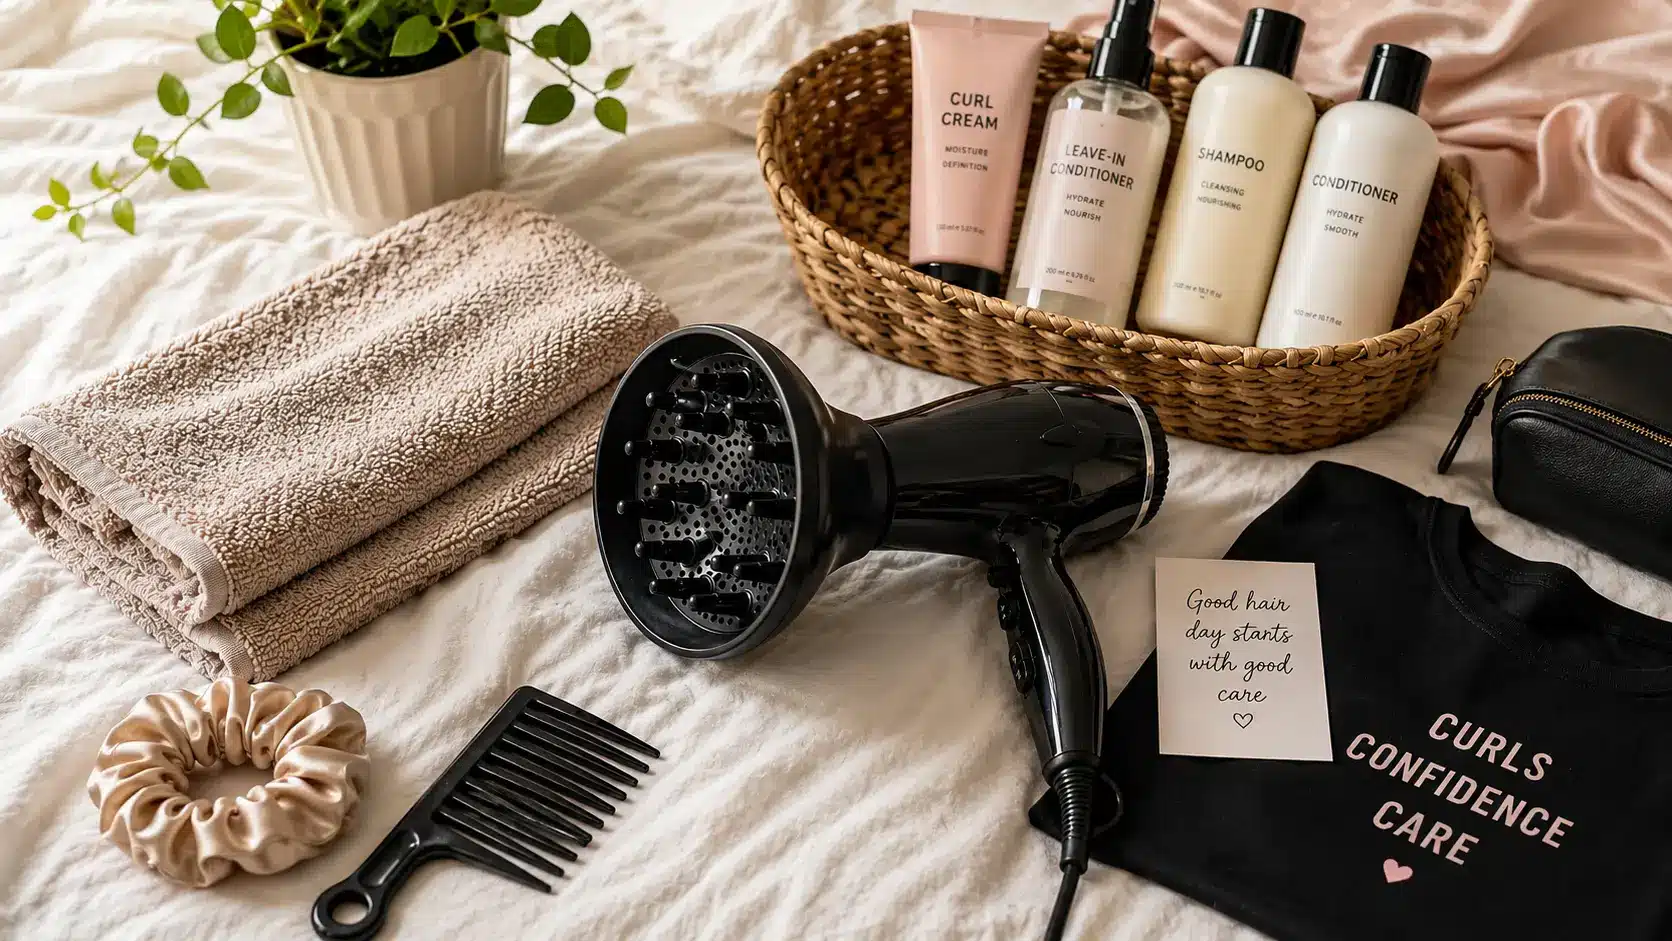
What You Need Before Using a Diffuser
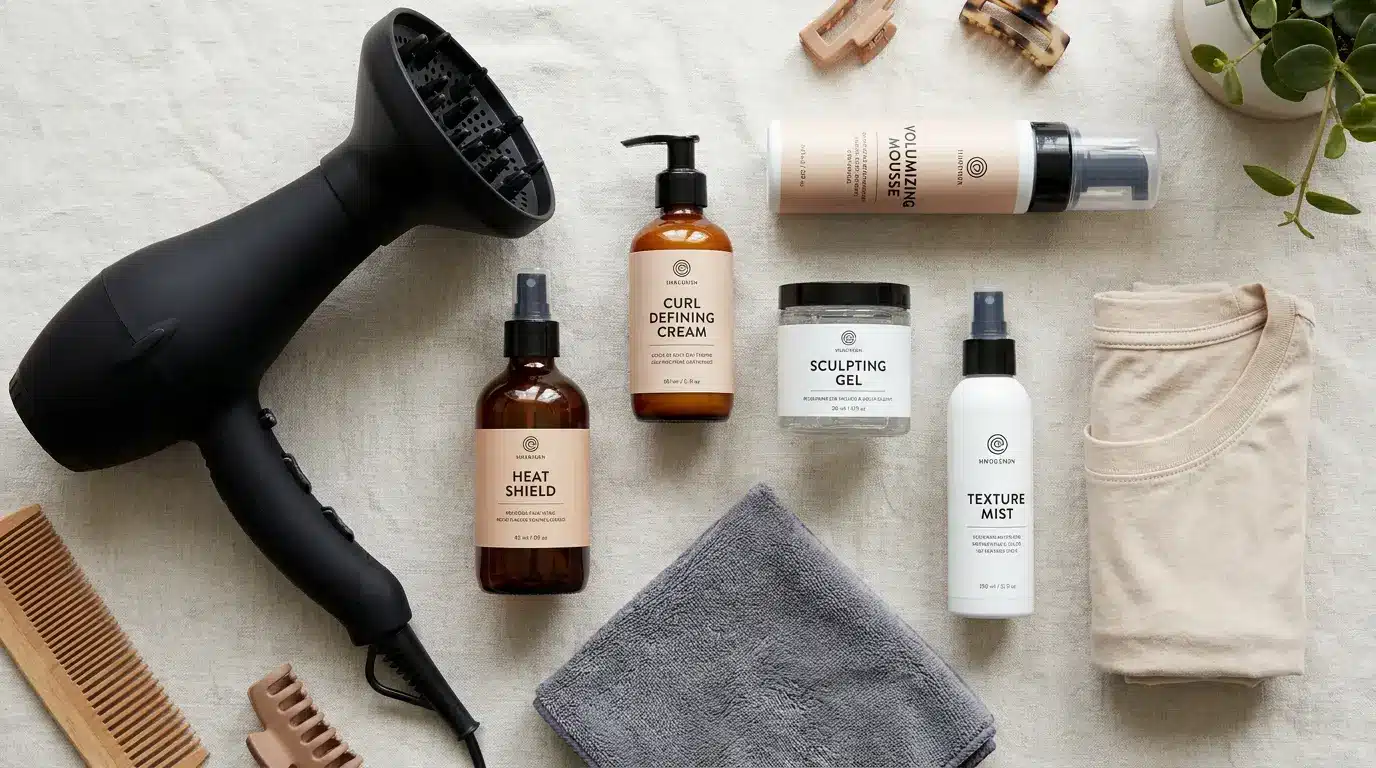
Before you start diffusing, having the right tools and products ready makes the whole process much smoother. Here is everything you need:
Hair Dryer with a Diffuser Attachment: Most hair dryers come with a diffuser included. If yours did not, you can buy a universal diffuser online. Make sure it fits your dryer before using it.
Heat Protectant: Always apply a heat protectant before using any heat tool. This creates a barrier between your hair and the heat so your strands stay healthy over time.
Styling Products: The right product makes a big difference. Here are the common ones used before diffusing:
- Curl cream: Adds moisture and softens the curl pattern
- Mousse: Gives volume and hold without weighing hair down
- Gel: Creates strong definition and holds curls in place
- Texture spray: Works well for straight hair or loose waves
Microfiber Towel or Cotton T-Shirt: Avoid rubbing your hair with a regular towel. It roughens up the hair shaft and causes frizz. Use a microfiber towel or an old cotton t-shirt to squeeze the water out of your hair. Press the fabric against your hair and scrunch upward rather than rubbing, which creates friction and causes frizz.
Once you have all of these ready, you are fully set to start diffusing and get the best results from your styling routine.
How to Use a Diffuser Step by Step
Now that you have everything ready, it is time to get started. Follow these steps in order, and you will get the best results every single time.
Step 1: Wash and Condition Your Hair
Start with freshly washed hair. Use a conditioner that suits your hair type. Do not skip the conditioner since it helps your curls form properly and reduces frizz.
Leave the conditioner in for at least a minute before rinsing so your hair gets the full benefit of moisture.
Step 2: Remove Excess Water Gently
After rinsing, use your microfiber towel or t-shirt to scrunch out the water. Press the fabric against your hair and squeeze upward.
Do not rub. You want your hair to be damp, not dripping wet, before you move on to the next step.
Step 3: Apply Styling Products
While your hair is still damp, apply your chosen products. Work them in from the ends up to the roots using a scrunching motion.
Make sure every section is coated evenly so your curls dry with a consistent shape and hold.
Step 4: Attach the Diffuser
Clip the diffuser onto your hair dryer. Make sure it is locked in place before you turn it on. A loose attachment can fall off mid-use, disrupting your whole styling session.
Step 5: Use Low Heat and Low Airflow
This is the most important step. Always start on the lowest heat and the lowest speed setting.
High heat and high airflow are the main causes of frizz when diffusing, and studies on heat damage research show how direct heat affects the hair fiber over time.
Taking your time with low settings gives your curls a much better finish than rushing with high heat.
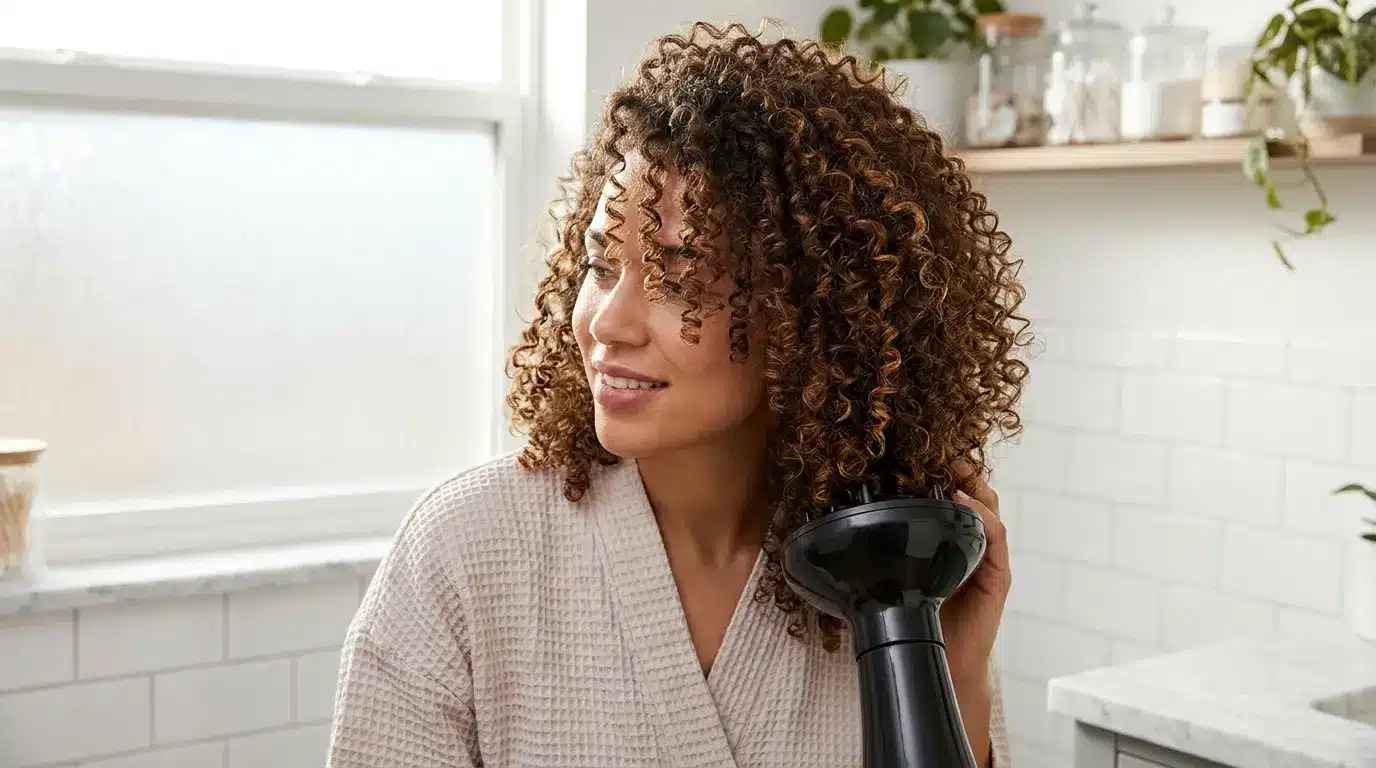
Step 6: Diffuse Section by Section
Lean forward and let your hair hang down. Place a small section of hair into the bowl of the diffuser.
Press it gently toward your scalp and hold it there for a few seconds before moving to the next section.
Working in small sections ensures that every part of your hair dries evenly without rushing.
Three ways to diffuse:
- Root diffusing: Focus the diffuser near your scalp to lift the roots and add volume
- Hover diffusing: Hold the diffuser a few inches away from your hair without touching it, great for looser waves
- Cup diffusing: Place curls directly into the bowl of the diffuser and hold them there
Step 7: Dry Until 80 to 90 Percent Dry
Do not over-dry your hair. Stopping when it is still slightly damp helps the curls set better and reduces frizz.
Your hair will finish drying on its own within a few minutes. Over-drying is one of the most common mistakes people make, and it leads to stiff, crunchy curls that lack softness.
Step 8: Finish with Cool Air and Scrunch
Switch your dryer to the cool air setting and give your hair a final pass. Once your hair is fully cool and dry, gently scrunch out any stiffness from the gel or mousse.
The cool air helps seal the hair shaft and keeps your curls looking smooth and defined for longer.
Video Tutorial
Special thanks to Sophiemariecurly for their video demonstration, which helped to diffuse curly hair using the diffuser easily.
Best Diffusing Techniques for Curly Hair
Not every diffusing technique works the same way for every curl type. Try these methods and stick with the one that gives your hair the best results:
- Hover Diffusing: Hold the diffuser a couple of inches away from your hair without pressing it against your scalp. This works well for loose curls and waves, as it dries the hair with minimal disturbance to the curl pattern.
- Pixie Diffusing: Flip your hair forward and place the diffuser bowl under a section of hair. Press it up toward the scalp and let the prongs hold your curls in place. This works really well for tighter curl types.
- Hammock Diffusing: Hammock diffusing involves propping your dryer and diffuser on a counter or shelf, then scrunching your hair up toward the diffuser using a microfiber towel or t-shirt. This supports your curls against gravity as they dry, helping create extra bounce and prevent stringy ends. It works well for medium-to-long wavy and curly hair.
- Upside-Down Diffusing: This is a variation of hover diffusing in which you flip your head completely upside down and hold the diffuser a few inches above your roots. It is the most popular approach for adding lift and volume at the crown.
Once you find the technique that suits your curl pattern, getting consistent, defined results every wash day becomes much easier.
How to Use a Diffuser on Curly Hair
Curly hair needs a little extra care when diffusing to keep the curl pattern intact. Follow these simple steps for the best results:
- Start with damp hair and apply curl cream, mousse, or gel
- Set your dryer to low heat and low airflow
- Cup small curl sections in the diffuser bowl
- Hold each section still for a few seconds before moving on
- Stop when hair is 80 to 90 percent dry, then finish with cool air
Sticking to these steps consistently will make a noticeable difference in how your curls look and feel after every wash.
Pro Tips for Using a Diffuser on Curly Hair
Getting the steps right is a great start, but these small tips can take your results even further. Keep these in mind every time you diffuse:
- Avoid touching your curls while drying since this breaks up the curl pattern and causes frizz
- Diffuse upside down for more root volume
- Let any gel cast fully cool before scrunching it out
- Low airflow is your best friend for keeping curls smooth
The more consistent you are with these habits, the better your curls will look over time. Small adjustments like these are often what separates a good curl day from a great one.
How to Use a Diffuser on Straight Hair
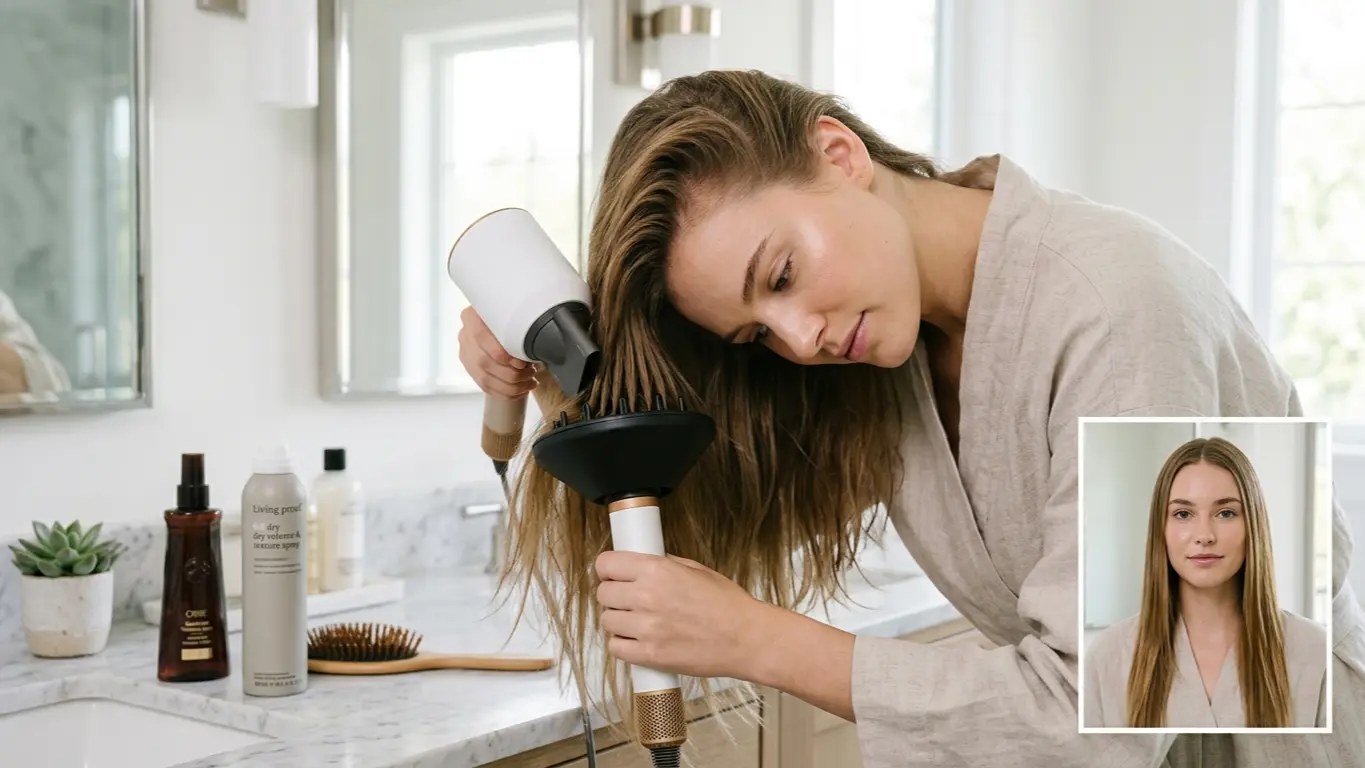
Most people think diffusers are only for curly hair, but that is not true at all. Straight hair can benefit from a diffuser just as much, especially when you want more body and lift.
If your hair tends to look flat and lifeless after washing, a diffuser might be exactly what you need.
Can a Diffuser Create Curls on Straight Hair?
A diffuser will not give you tight curls if your hair is naturally straight. But it can add volume, texture, and soft waves, especially when combined with the right products and techniques, such as braiding or twisting, before diffusing.
Using a diffuser on straight hair is all about working smarter with the right technique. These steps will help you get the most volume and texture out of every styling session:
- Start with damp hair and apply a lightweight mousse or texture spray
- Flip your head upside down for root lift
- Set the dryer to low heat and low airflow
- Lift sections into the diffuser bowl and focus mainly on the roots
- Finish with cool air and a light-hold spray for texture
Pro Tips for Using a Diffuser on Straight Hair
Following the steps is a great start, but these extra tips will help you avoid common mistakes and get even better results. Keep these in mind before and during your styling routine:
- Use light products so your hair does not fall flat once it dries
- Focus on volume at the roots rather than trying to create curls
- Try sleeping in loose braids or twists the night before, and diffuse in the morning for soft waves
- Stay away from heavy creams or oils before styling since they weigh straight hair down
Diffuser Tips for Different Hair Types
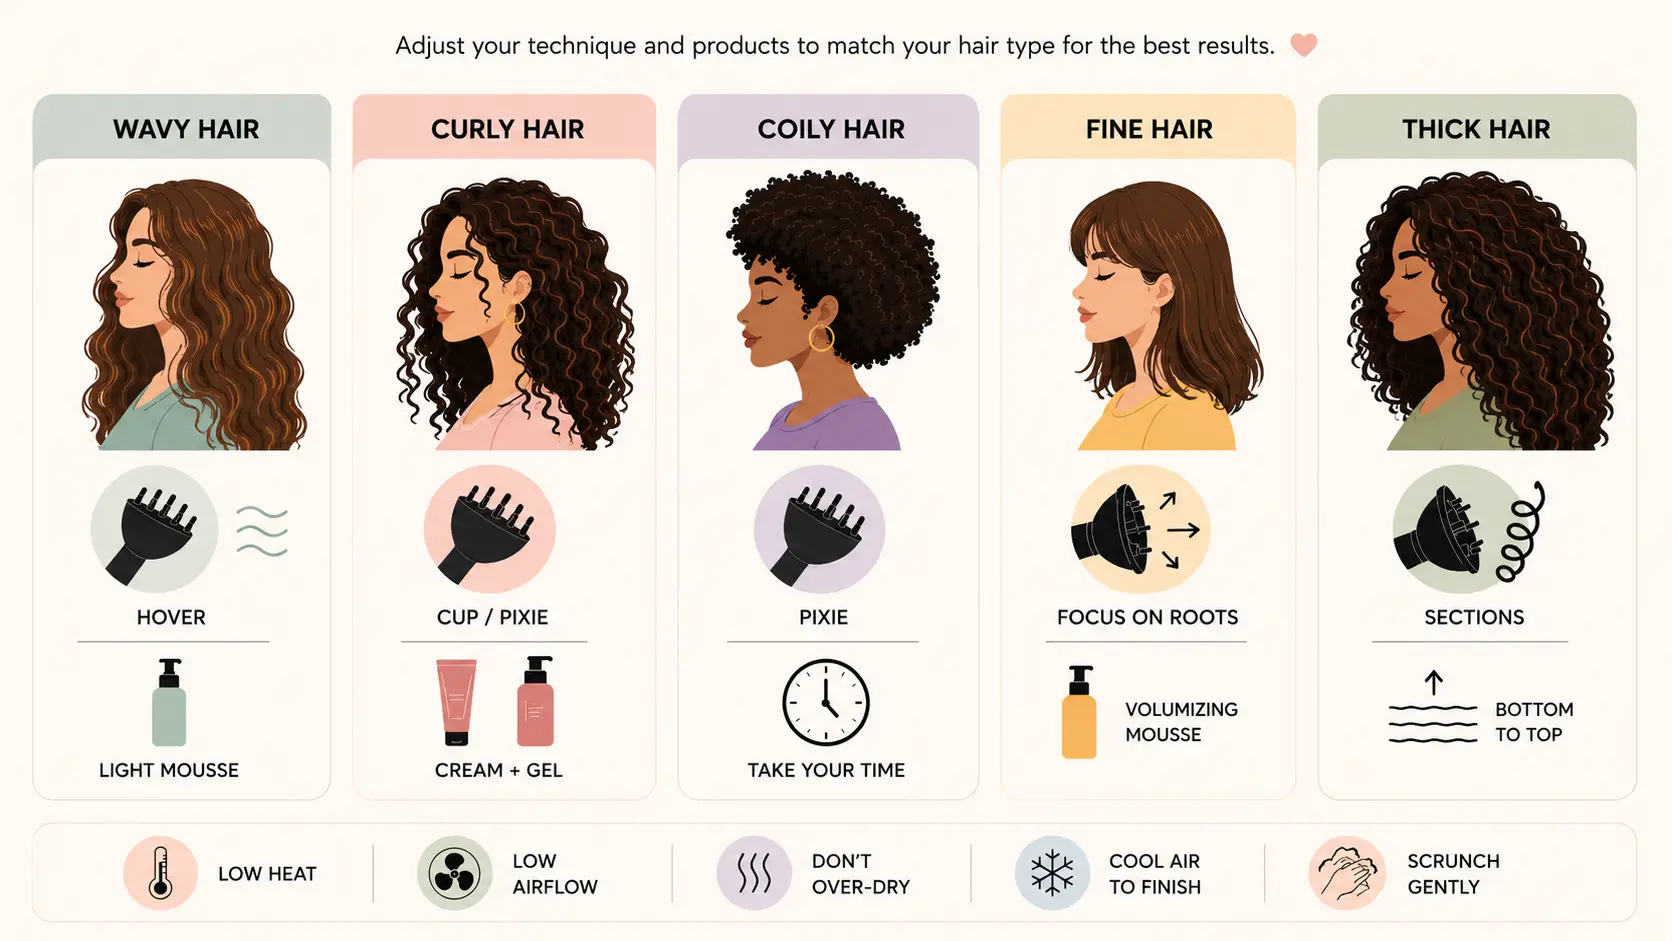
Every hair type responds differently to diffusing, so small adjustments go a long way. Wavy hair does best with hover diffusing and a light mousse to keep the wave pattern intact.
Curly hair gets the most definition from cup or pixie diffusing paired with a curl cream and gel combo.
Coily hair benefits from the pixie method too; work in smaller sections and take your time since it takes the longest to dry.
Fine hair needs a volumizing mousse and a focus on the roots, while thick hair should always be diffused in sections starting from the bottom layers and working up.
Common Diffuser Mistakes That Cause Frizz
Even with the right tools and products, a few simple mistakes can ruin your results. Here are the most common ones to watch out for and how to avoid them:
- Using High Heat: High heat dries your hair fast but breaks up the curl pattern and puffs up the hair shaft. Always use a low or medium heat setting.
- Using High Airflow: Strong airflow tosses your curls around while they are wet. This is a common reason curls come out undefined and frizzy. Stick to the lowest speed.
- Touching Hair Too Often: Every time you touch your curls while they are wet, you interrupt the drying process. Keep your hands away as much as possible.
- Diffusing Soaking-Wet Hair: Putting soaking-wet hair under a diffuser takes forever and usually results in frizz. Squeeze out most of the water first with a microfiber towel before you start.
- Over-Drying Curls: Leaving the diffuser on too long strips moisture from your hair, making curls look crunchy and dry. Stop at 80-90 percent dry.
Difference Between Air Drying vs Diffusing
Both methods have their place, but they do not deliver the same results. Here is a quick comparison to help you decide which one works best for you:
| Feature | Air Drying | Diffusing |
|---|---|---|
| Drying Time | Slower | Faster |
| Curl Definition | Moderate | Better |
| Volume | Lower | Higher |
| Frizz Control | Less Predictable | More Control |
| Styling Control | Limited | Better |
As you can see, diffusing gives you more control over your final look and works much better when you want defined curls and lasting volume.
Best Products to Use Before Diffusing
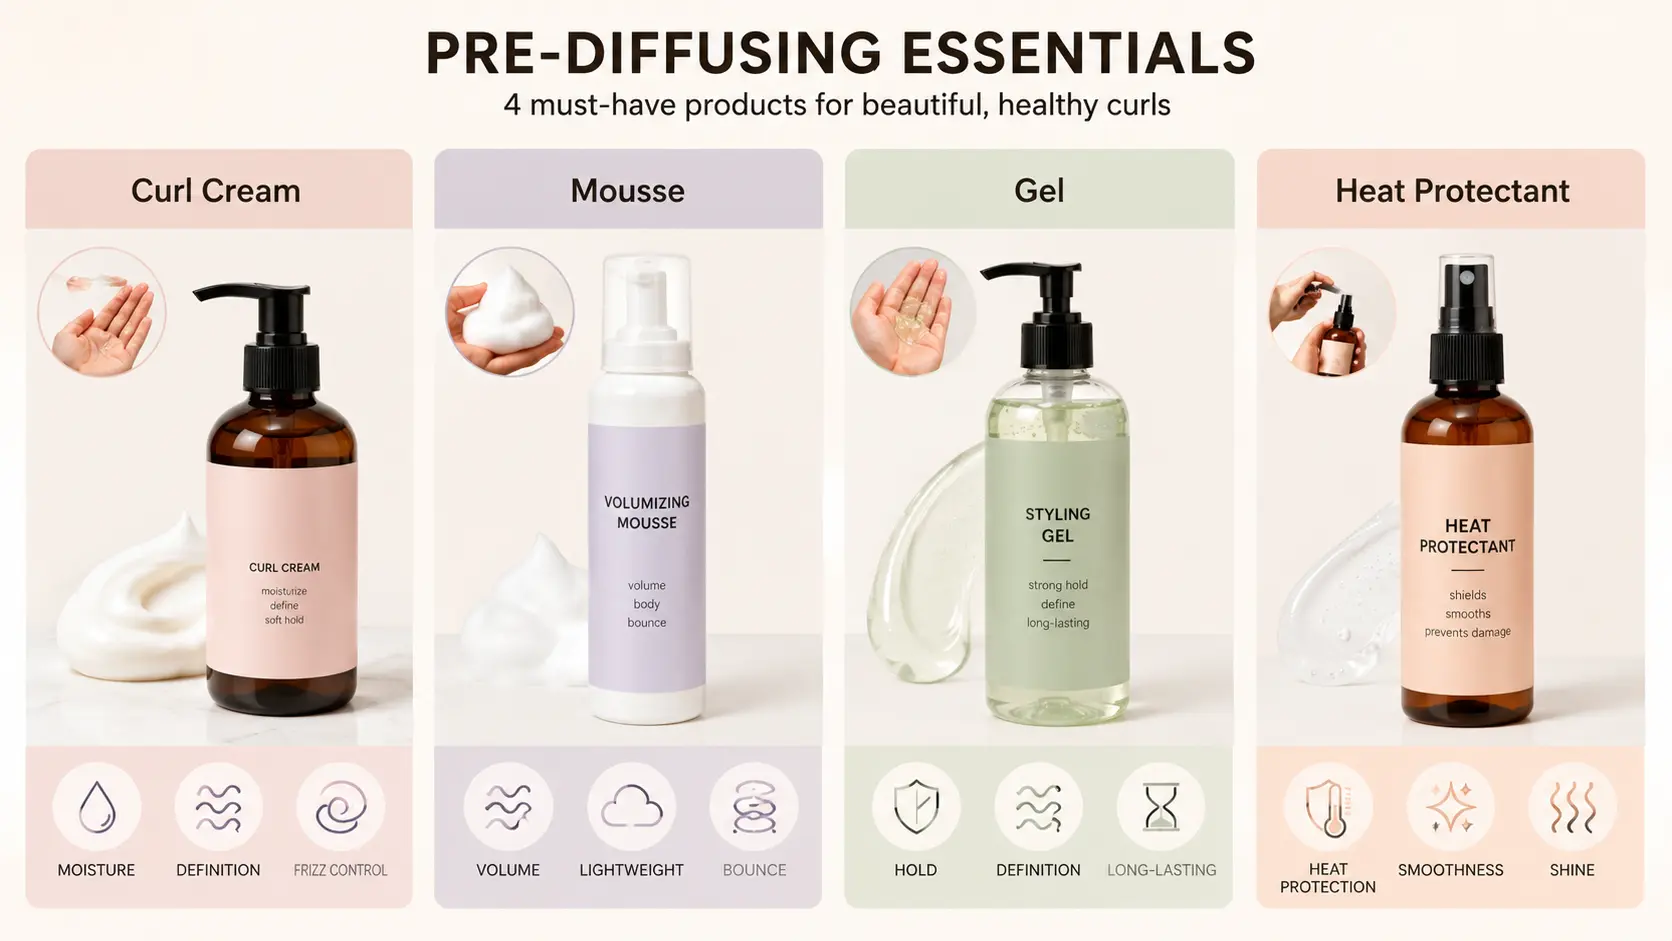
Using the right products before diffusing makes a bigger difference than most people realize. Here are the ones worth keeping in your routine:
- Curl Cream: Adds moisture and softens the curl pattern. Best for type 2 and type 3 curls that need definition without stiffness.
- Mousse: Lightweight and great for adding volume. Works well for wavy, fine curly, and straight hair that needs a lift.
- Hair Gel: Gives a strong hold and shine. Apply over a curl cream or leave-in conditioner to avoid dryness.
- Heat Protectant: A non-negotiable step before using any heat tool. Spray or apply it evenly through damp hair before adding any other products.
You do not need to use all of these at once; pick the ones that match your hair type and styling goals.
Conclusion
Using a diffuser is one of the easiest ways to get better-looking hair without much effort. Start with damp hair, apply your products, and always keep your dryer on low heat and low airflow.
Curly hair does best with the cupping method, while straight hair benefits most from root lifting. The more you practice, the faster and easier the whole process becomes.
Adjust your technique based on your hair type and see what works for you. With the right steps and a little patience, you will notice less frizz, more volume, and much better results every single time.
Frequently Asked Questions
How Do I Know if My Diffuser Attachment Fits My Hair Dryer?
Check the diameter of your dryer’s nozzle before buying a diffuser. If the attachment feels loose or wobbly once clipped on, it is not the right fit for your dryer.
Should I Diffuse My Hair in an Upward or Downward Motion?
Always press the diffuser upward toward your scalp for better root volume and curl definition. Diffusing downward tends to flatten the roots and reduce the lift you would otherwise get.
Can I Scrunch My Hair While Diffusing to Get Better Curl Definition?
Scrunching while the hair is still wet breaks up the curl clumps and causes frizz. Wait until your hair is fully dry and cool, then scrunch gently to soften the gel cast.