You have seen it on Instagram. That perfect stack of necklaces sitting just right on someone’s collarbone. Clean, effortless, and stylish. And you have probably tried it yourself, only to end up with a tangled mess that took 10 minutes to undo.
The truth is, learning how to layer necklaces is simpler than it looks. You do not need a jewelry stylist or an expensive collection to get it right. You just need to know a few basic rules about lengths, textures, and which pieces work well together.
Once you understand those rules, everything clicks. Your necklaces stop tangling. Your stack starts looking intentional. And getting dressed becomes a lot more fun.
Understanding Necklace Lengths Before You Layer
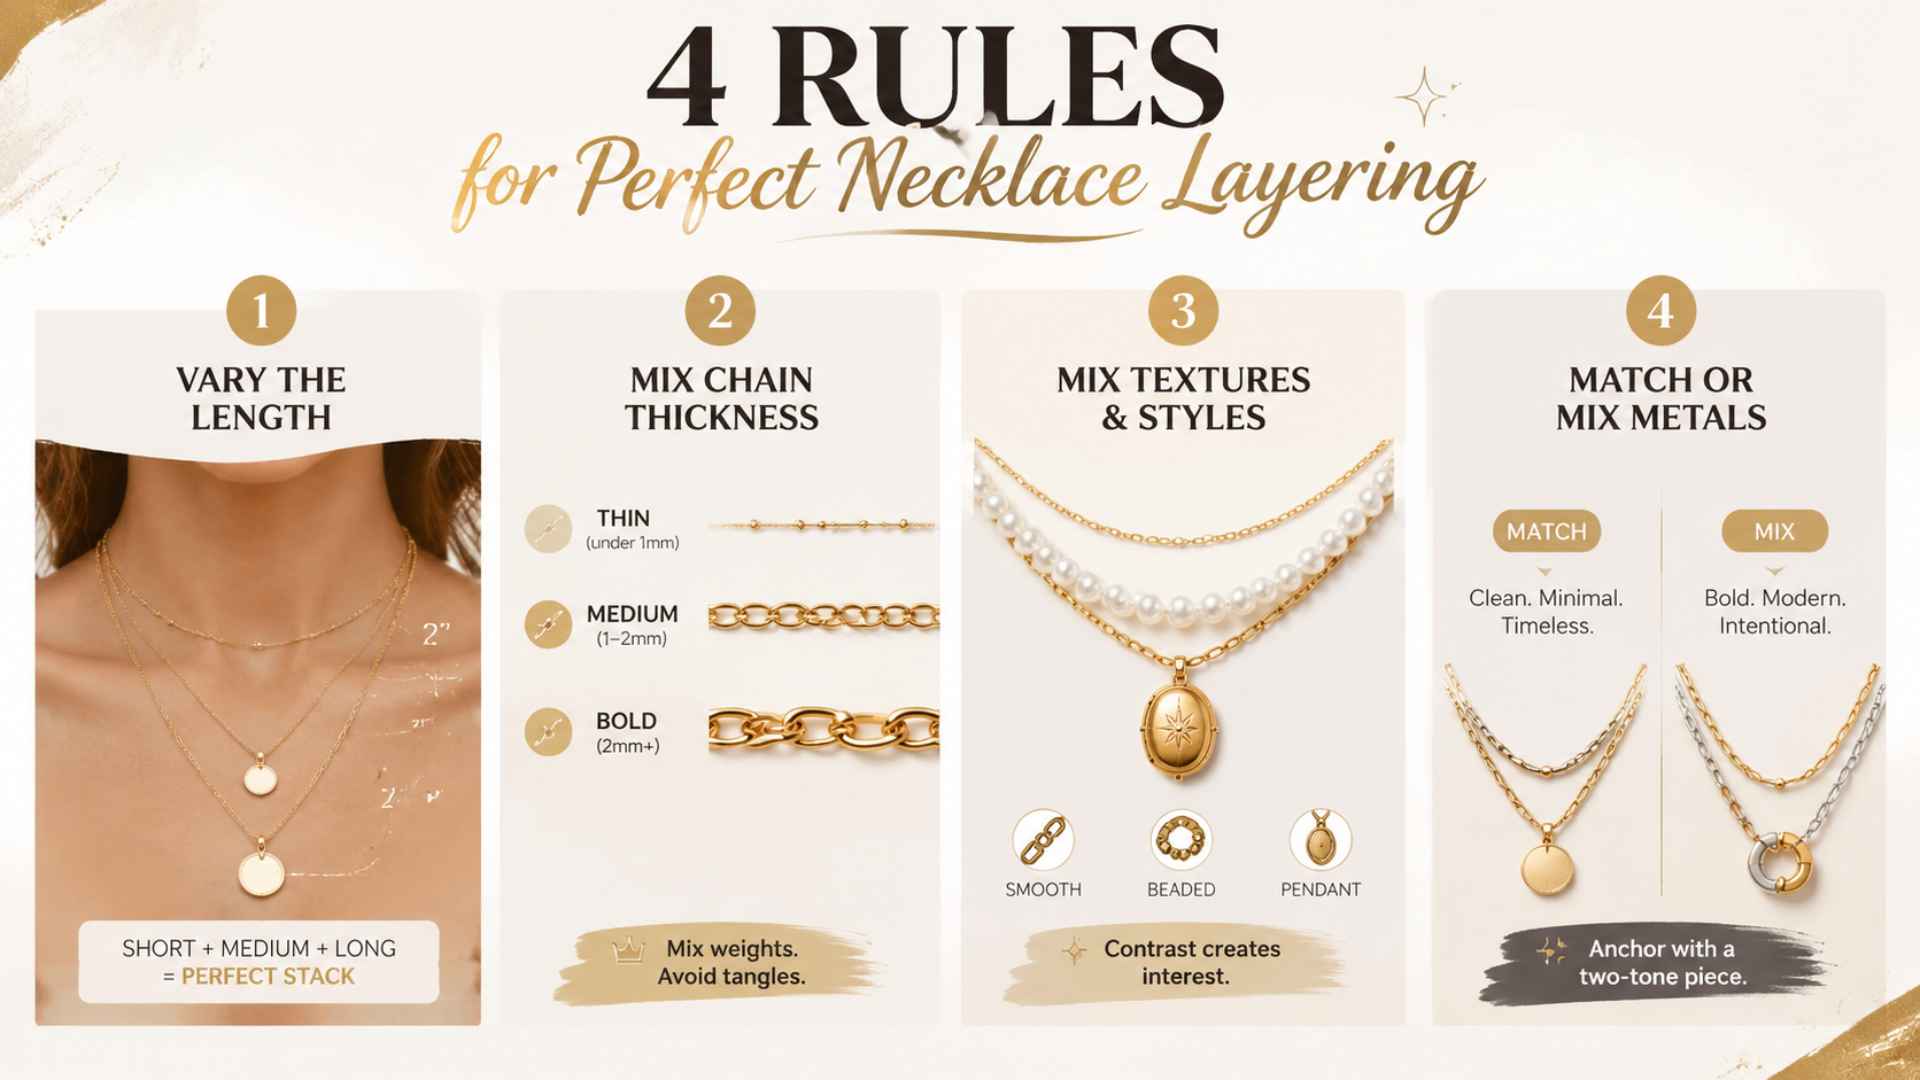
Before you layer, know your lengths. The right combination creates a clean, cascading effect. The wrong one causes tangles and a cluttered look.
| Length | Where It Falls | Best Used As |
|---|---|---|
| 14–16″ | Base of neck/choker | First (shortest) layer |
| 18″ | Collarbone | Foundation/anchor piece |
| 20–22″ | Upper chest | Middle layer |
| 24″ | Mid-chest | Statement pendant layer |
| 28–30″ | Below chest | Third layer / long chain |
| 32–36″ | Near navel | Dramatic, maximalist layer |
| 41″ | Past waist | Wraps or layers over outfits |
| 72″ | Past waist | Long wrap, dramatic statement |
Note: Your neck size, height, and body proportions affect where each length actually sits. Always try a combination before committing to it.
What You Need Before You Start Layering
You do not need many necklaces to start layering. But having the right basics in place makes the whole process easier, and your stack will look better for it.
First, check what you already own. Lay all your necklaces out flat and sort them by length. This gives you a clear picture of what you have, what is missing, and which pieces could work together.
Most people already own at least one or two pieces that layer well without realizing it.
Second, pick up a few small accessories. A pack of jump rings and a necklace detangler costs very little and solves most tangling problems instantly. These two things alone will change how your stacks hold throughout the day.
That is genuinely all you need to get started. A few necklaces at different lengths, one anchor piece you love, and the simple tools to keep them in place.
How to Layer Necklaces in 5 Simple Steps
Layering necklaces is easier than it looks. Follow these five steps in order, and you’ll get a clean, tangle-free stack that works for any outfit or occasion.
Step 1: Start With a Signature Foundation Piece
Pick one necklace you love and build everything around it. This is your anchor, the piece that sets the tone for the whole stack.
An 18” necklace works best as your base. It sits at the collarbone, giving you room to layer shorter pieces above and longer ones below. Choose something with a little personality; a pendant, a locket, or a textured chain.
Step 2: Add a Shorter Layer (14–16″)
Once your foundation is set, add a choker or short chain as your first layer. This sits closest to the neck and frames your collarbone beautifully.
Keep this one simple. A thin, delicate chain or a dainty choker works best here. You don’t want two statement pieces competing at the same level. Less is more for this layer.
Step 3: Add Your Middle Layer (18–20”)
This layer sits just below your foundation piece and is where most of the visual interest lives. If your shorter layer is plain, this is the right place for a pendant or charm.
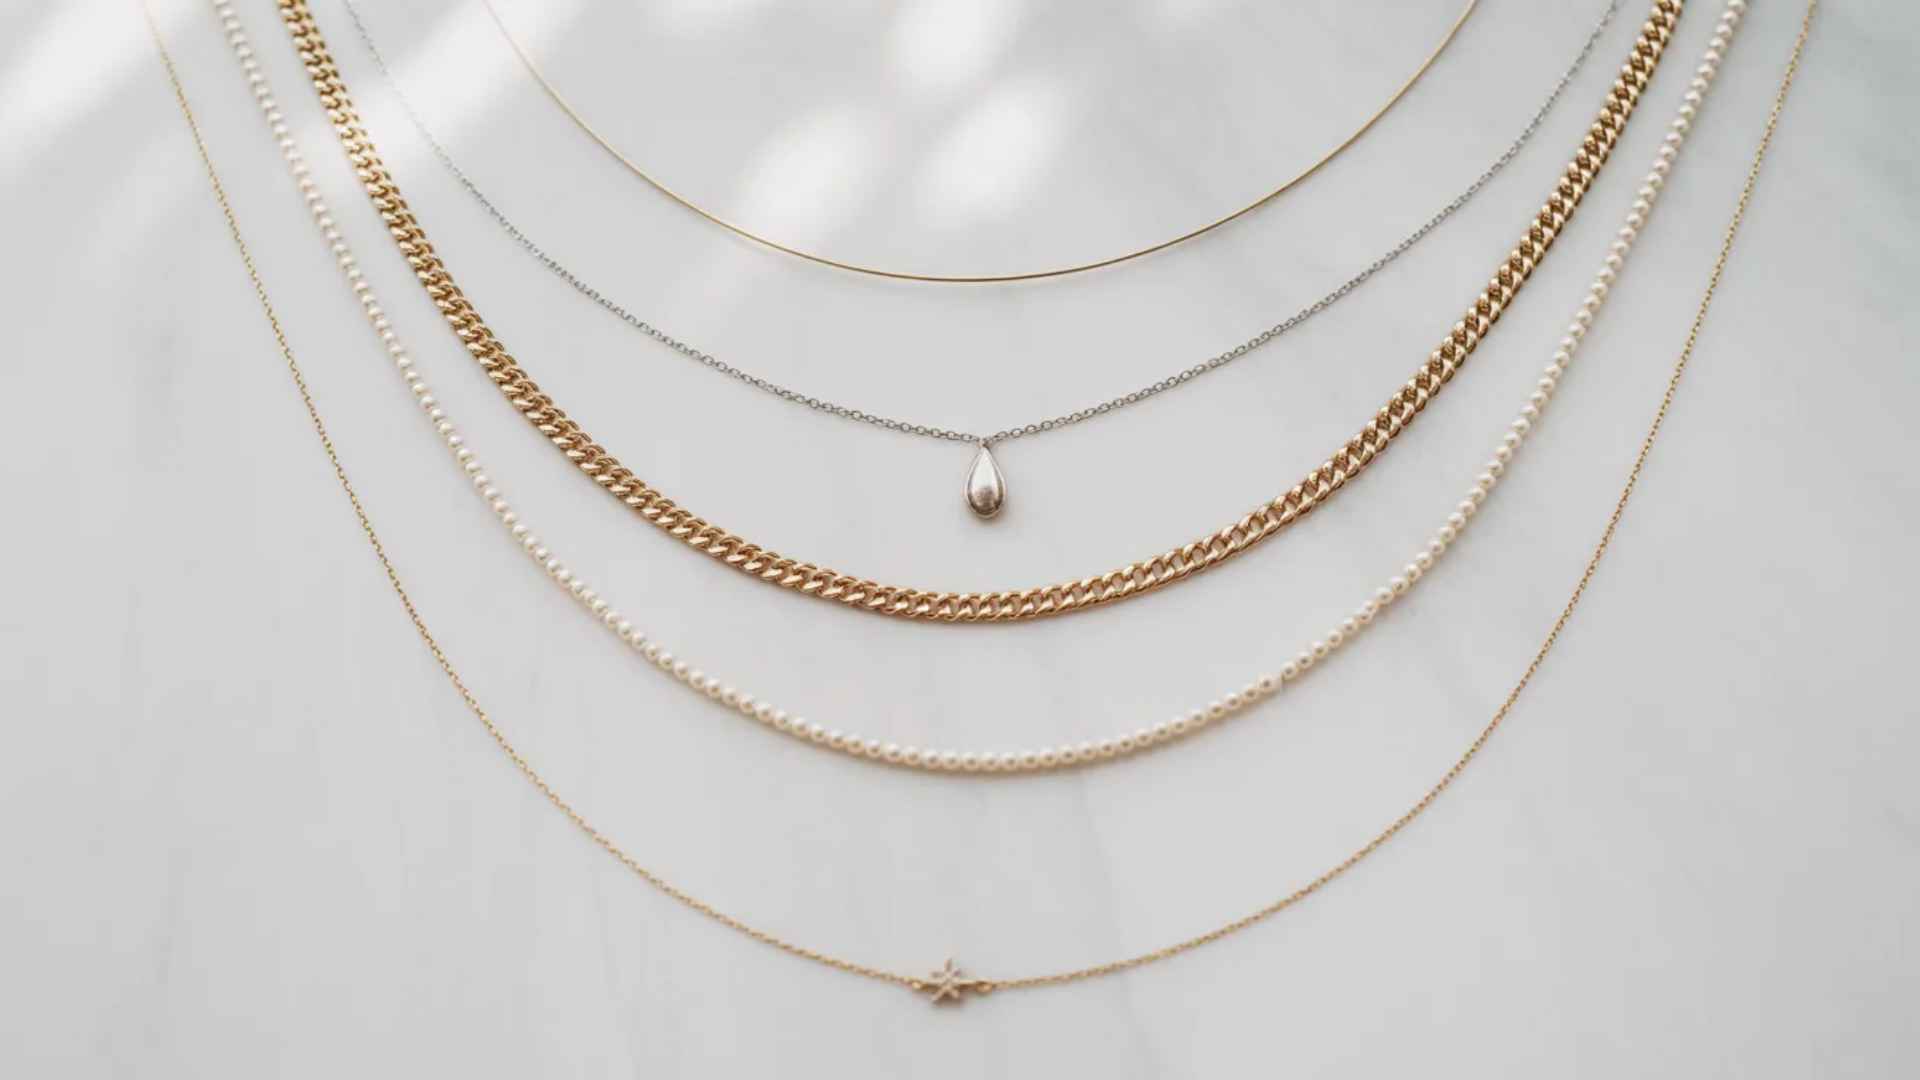
Vary the texture here deliberately. If your choker is a smooth chain, try a beaded one or one with a small pendant drop. Contrast between layers is what makes the stack look intentional and styled.
Step 4: Add the Longest Layer Last (22–28”)
The longest necklace creates the cascading effect that makes layering look polished. This layer draws the eye downward and adds depth to the whole stack.
Long chains with subtle pendants, lariats, or tassel ends work great here. Keep it relatively simple; your middle layers are already doing the heavy lifting. This piece finishes the look without overwhelming it.
Step 5: Secure the Layers to Prevent Tangling
This is the step most people skip, and it’s why their necklaces end up in knots. Once all layers are on, hook two or more clasps onto the same jump ring at the back.
You can also use a necklace detangler or spacer for extra hold. This keeps all layers locked in place throughout the day so your stack stays exactly how you styled it.
Layering Necklaces for Different Necklines
Your neckline changes everything. The wrong necklace length on the wrong neckline makes it look cluttered. The right one ties your whole outfit together effortlessly.
1. V-Neck
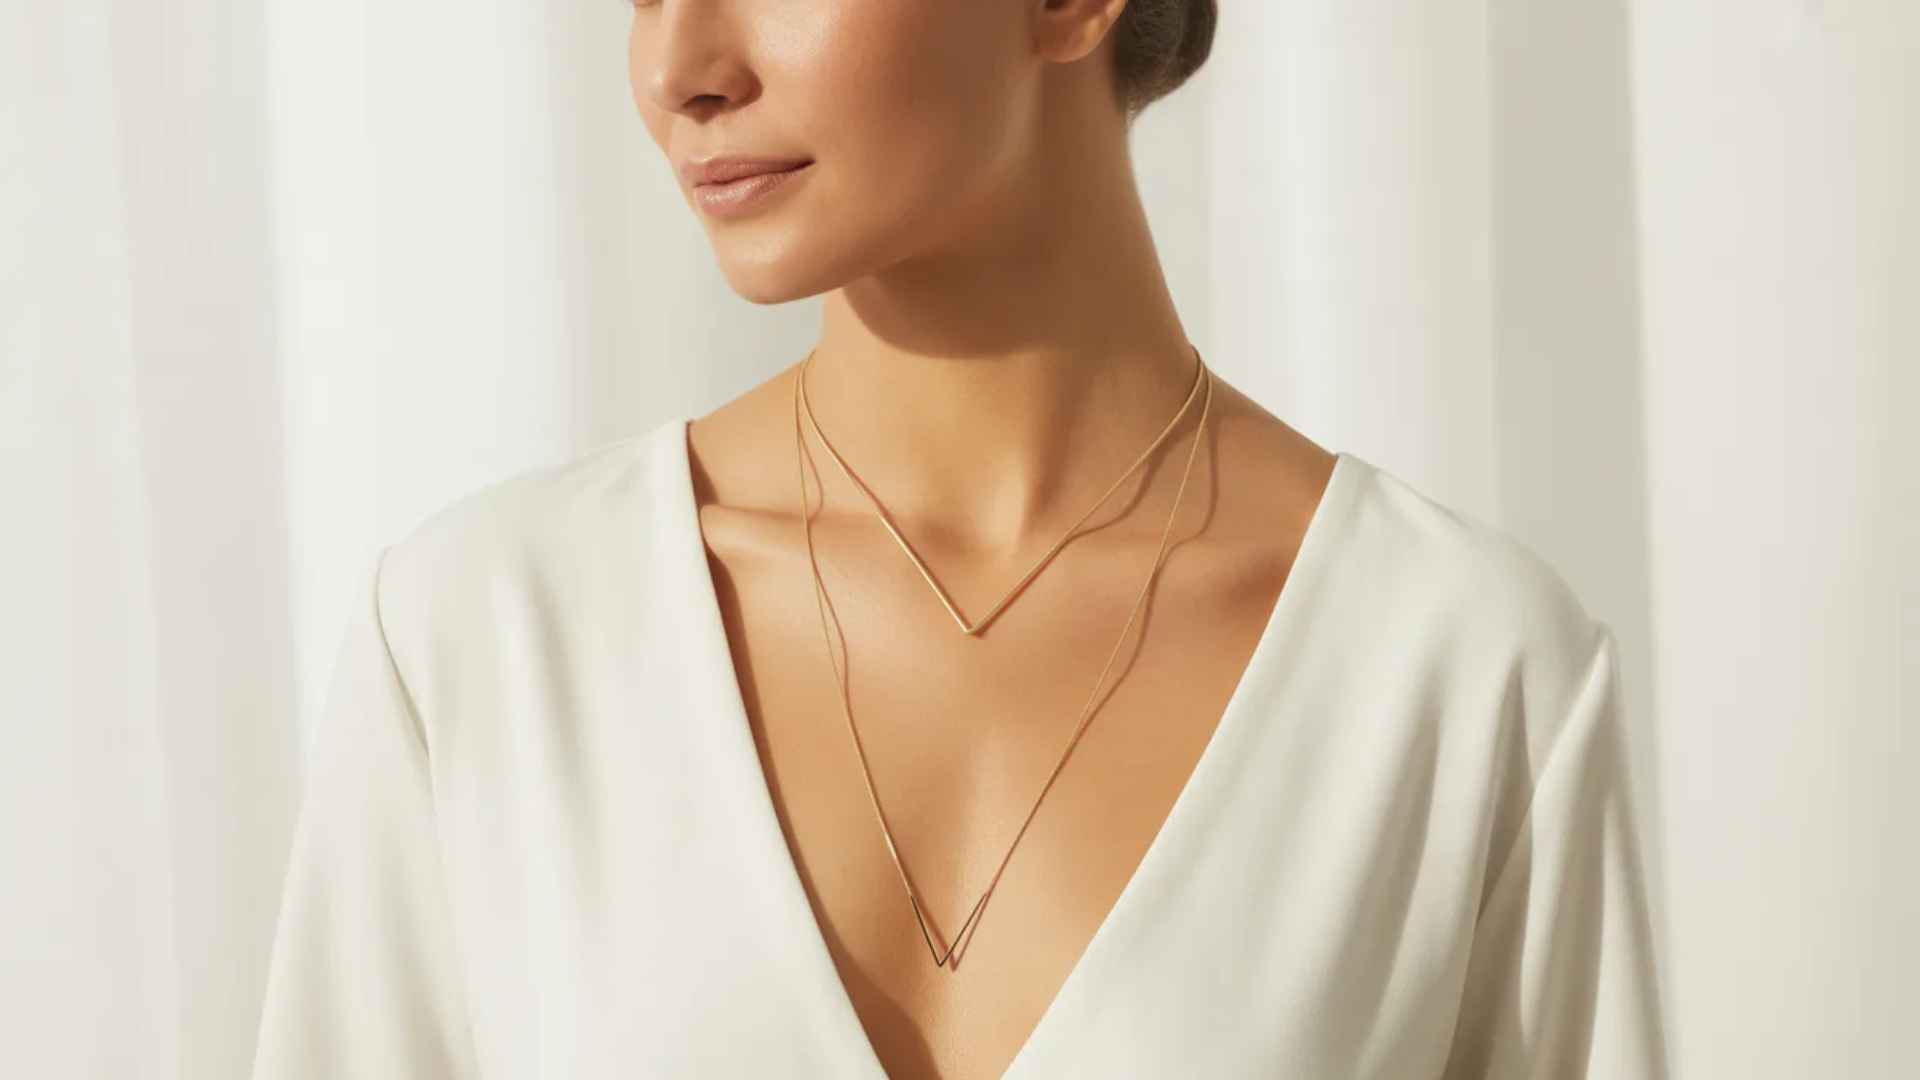
A V-neck naturally draws the eye downward. Follow that line with a V-shaped pendant as your base layer, then add a longer chain inside the V for depth. Avoid chokers here, as they run counter to the neckline’s natural direction.
Pro Tip: Let your longest layer follow the V-shape to elongate the neck beautifully.
2. Crew Neck / Round Neck
Start your layers above the fabric with a choker or 16” chain. Then build outward with longer pieces that sit over the neckline. The fabric serves as a natural backdrop, so bolder layers stand out well here.
Pro Tip: A chunky chain over a crew neck creates an effortlessly cool, street-style look.
3. Off-Shoulder / Strapless
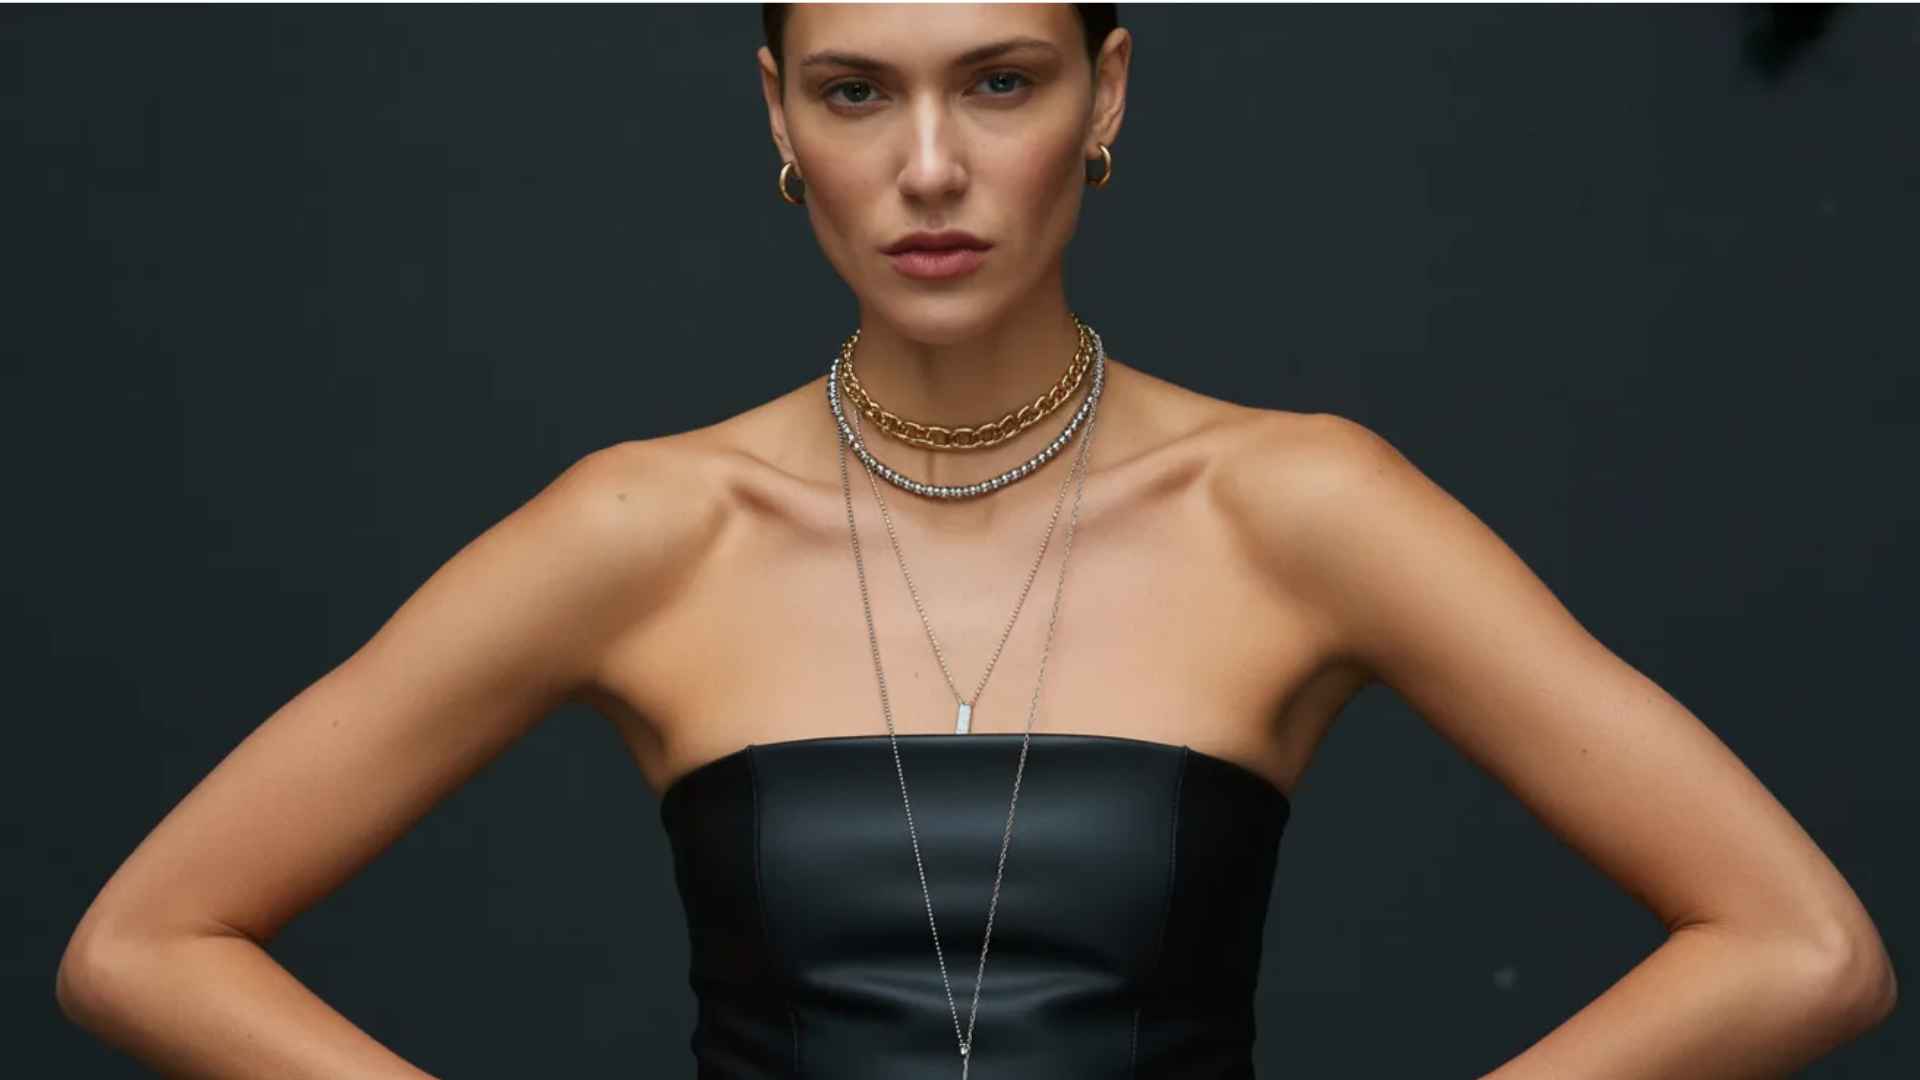
With no neckline competing, you have full freedom here. This is the best neckline for maximalist layering. Go bold with statement chains, mixed metals, and dramatic lengths. Let the stack be the focal point of the entire outfit.
Pro Tip: This is the one neckline where 4 to 5 layers always works. Go for it.
4. Turtleneck
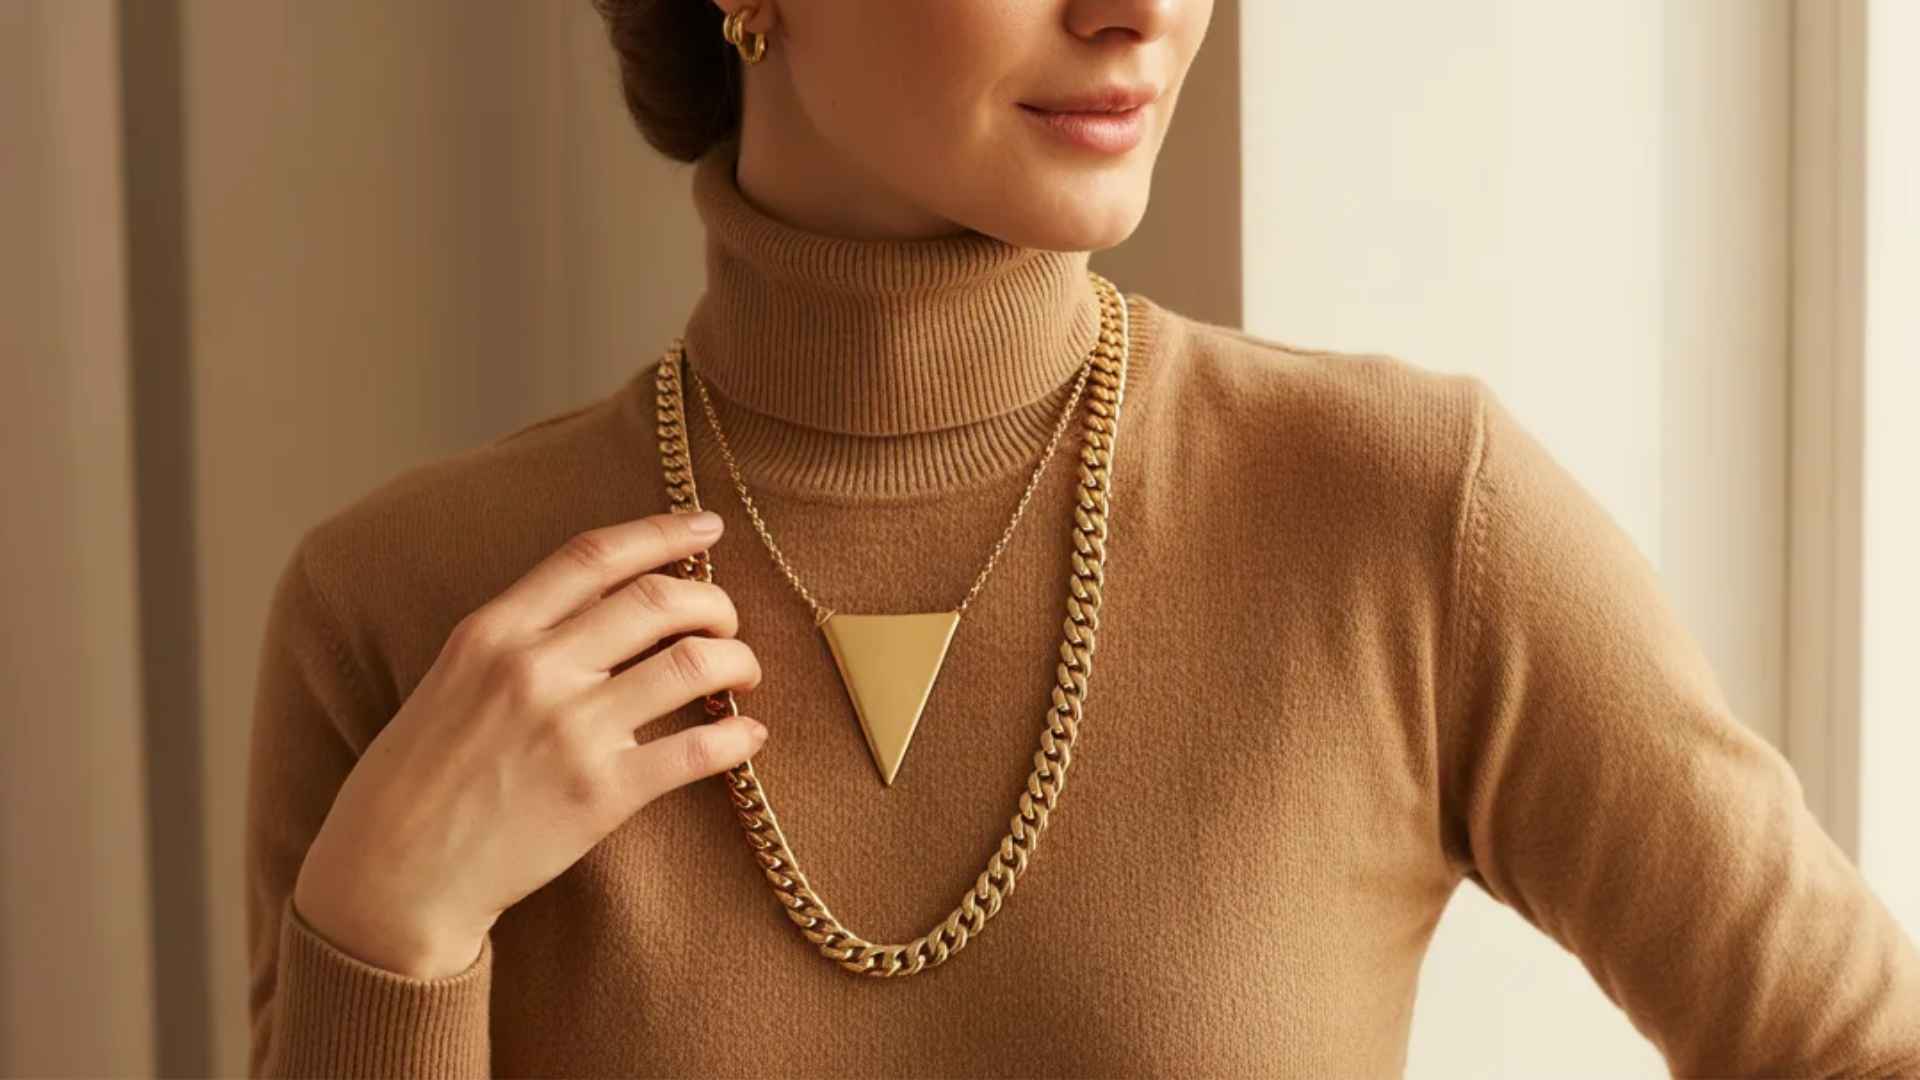
Short necklaces disappear completely into a turtleneck. Skip anything under 20″. Instead, layer two or three longer chains of 22″ and above over the fabric. Bold, chunky chains with large pendants create the most impact over a high neckline.
Pro Tip: One oversized pendant on a 24″ chain over a turtleneck is a complete look on its own.
5. Scoop Neck
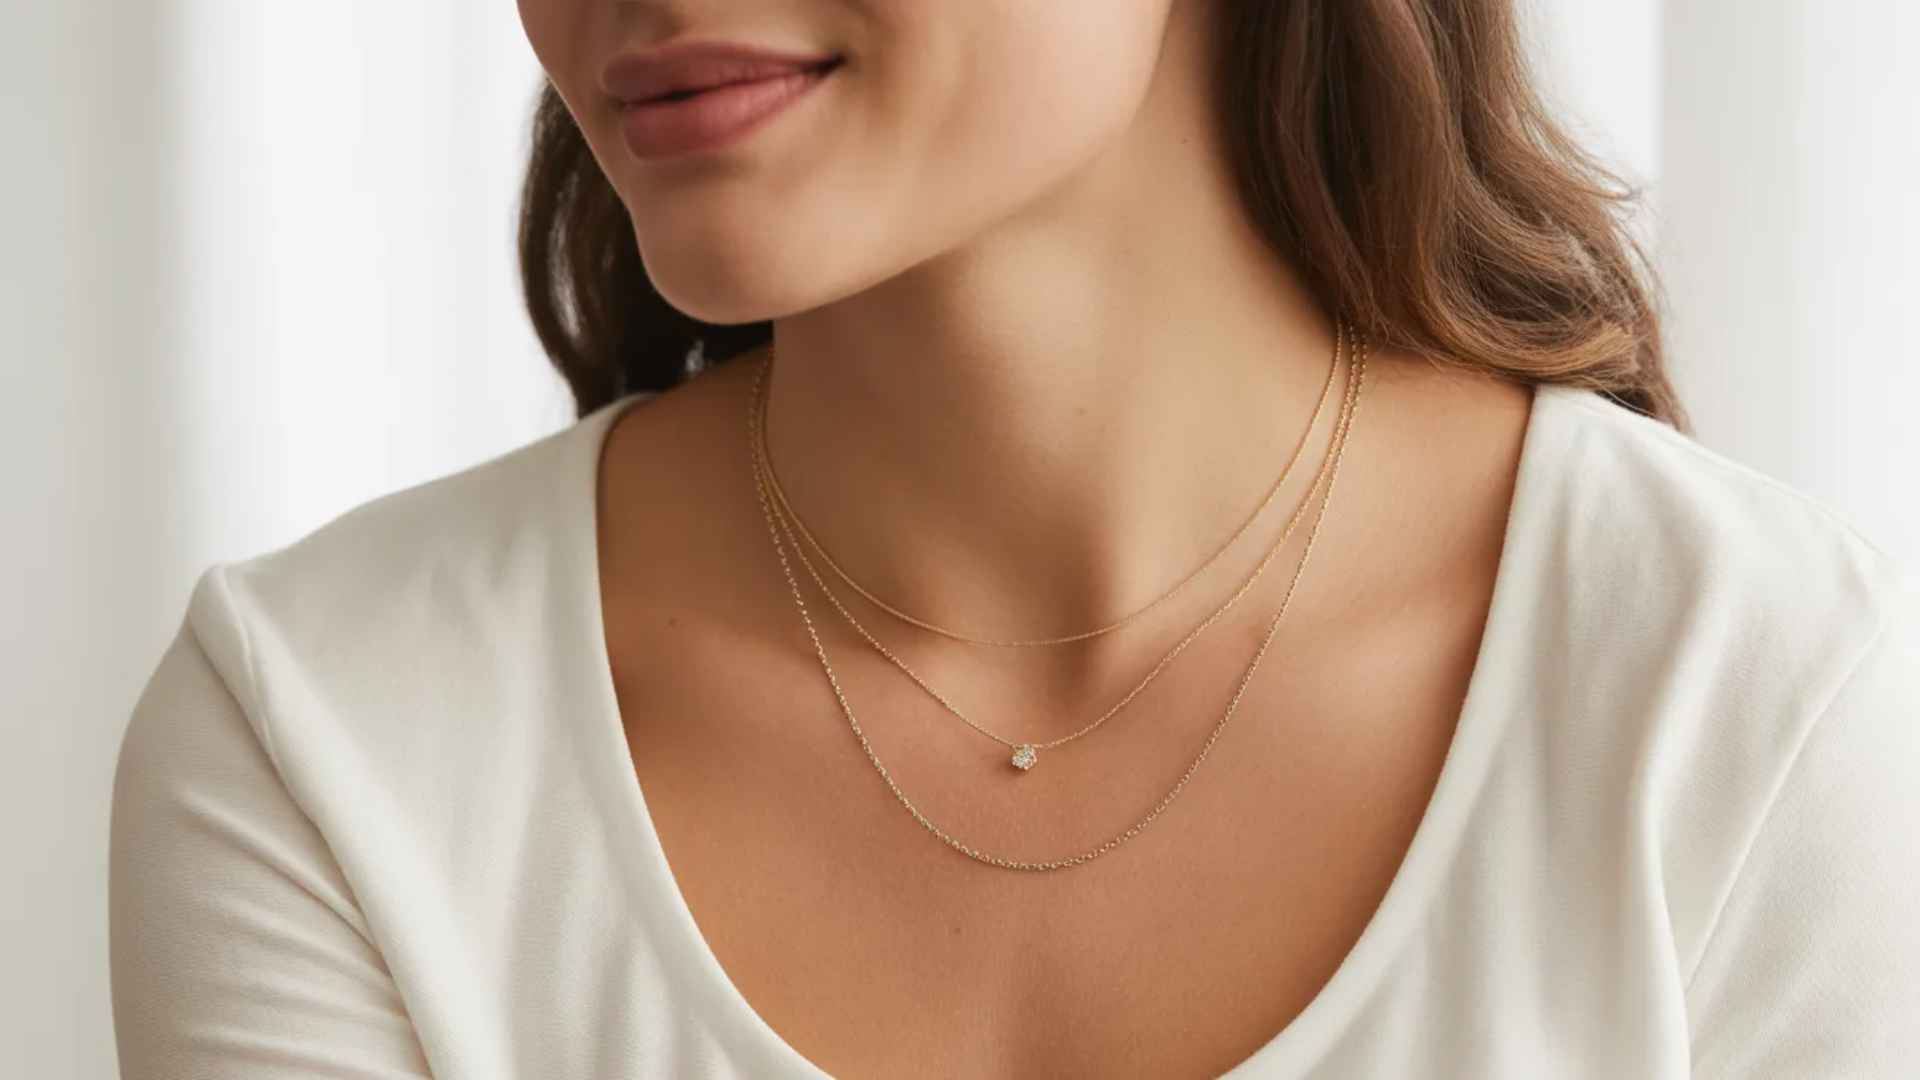
Scoop necks are the most versatile necklines for layering. All lengths work here. Start with a 16” base, add an 18” pendant, and finish with a 24″ chain. For a fashion-forward touch, try an asymmetric layer that sits slightly off-center.
Pro Tip: Delicate layered chains inside a scoop neck create an elegant, understated everyday look.
Two Ways to Layer Necklaces: Simple or Statement?
Not everyone wants the same look. Some prefer clean and subtle. Others want bold and expressive. Here is how to nail both styles quickly.
| Basis | Minimalist Layering | Maximalist Layering |
|---|---|---|
| Number of Necklaces | 2 to 3 | 4 to 5+ |
| Chain Style | Thin, delicate chains | Mix of thick, thin, beaded |
| Metals | Stick to one metal | Mix gold and silver freely |
| Pendants | Simple, small pendants | Bold charms, gemstones, lockets |
| Colours | Neutral, no color | Colorful gemstones welcome |
| Best For | Every day, office, casual | Evenings out, events, statements |
| Anchor Piece | Thin signature chain | One bold statement piece |
| Overall Vibe | Clean, polished, subtle | Expressive, layered, dramatic |
Both styles follow the same core rules. Vary your lengths, mix your textures, and always anchor with one piece you love. The rest is personal.
Necklace Layering Ideas for Every Occasion
The same stack does not work everywhere. Here is how to adjust your layers depending on where you are headed and what you are wearing.
- Everyday Casual: Two layers max. A 16” thin gold chain paired with an 18″ small pendant. Easy, lightweight, and it works with everything in your wardrobe.
- Work / Office: Stick to one metal family. Two thin refined chains in matching metals look polished and professional without being distracting or too heavy for a long workday.
- Night Out: Go bold. Add a gemstone piece or a chunky chain to your stack. Mix metals freely and do not hold back on length. Make the necklaces the focal point.
- Weddings / Formal Events: Keep it elegant. Pearls layered with one fine gold chain and a small, delicate pendant. Nothing that jingles or catches on delicate fabrics.
The occasion sets the tone, and your stack should match it. Start with two layers for simple days and build up to four or five when the moment calls for it.
How to Layer Necklaces Without Them Tangling
Tangles ruin a good stack, but they are almost always preventable. The most important rule is to keep at least 2 inches between each necklace.
When lengths sit too close together, chains knot within minutes. A simple formula to follow is 16” + 18” + 22” + 24″, as each layer gets its own space to sit and stay visible.
The next trick most people don’t know is to hook all your clasps onto one jump ring at the back. This locks every layer in place, so they move together instead of sliding over each other.
You can also clip a necklace spacer at the front to hold each chain at a fixed distance. For storage, keep each necklace in its own soft pouch, always clasped and stored flat. Bunching them together is where most tangles actually start.
Necklace Layering Mistakes to Avoid
Most layering problems come down to a few simple mistakes. Here is what to watch out for and how to fix each one fast.
- Same Length for Every Necklace: Chains pile up and tangle instantly. Keep at least 2 inches between each layer so every necklace stays visible.
- Layering Identical Chain Styles: Two chains of the same thickness visually merge into a single chain. Mix thin, medium, and bold chains to create contrast and depth.
- Ignoring Your Neckline: A beautiful stack on the wrong neckline looks off. Always match your layers to your neckline before building the stack.
- Pairing Delicate Stones Carelessly: Pearls and opals scratch easily. Only pair them with smooth fine chains and keep them away from rough metal links.
- Using Magnetic Clasps: They open without warning, and necklaces fall off unnoticed. Always use lobster clasps for anything layered or valuable.
Avoiding these mistakes alone will instantly improve your layered look. Small adjustments make the difference between a cluttered stack and a styled one.
Storing and Caring for Your Layered Necklaces
How you store your necklaces matters just as much as how you wear them. Always keep each necklace in its own soft pouch or in a divided jewelry box with separate compartments.
This prevents chains from rubbing against each other and stops tangles before they start. Always clasp each necklace before storing it and lay it flat rather than bundling it together with other pieces.
When it comes to cleaning, a soft dry cloth is all you need for gold and silver chains. Wipe them down gently after every few wears to remove oils and residue.
For gemstone necklaces, be extra careful and avoid harsh chemicals. One thing to never do is use baby powder or baby oil on fine jewelry. Both dull the finish over time and are difficult to reverse once the damage is done.
Note: For more information on jewelry standards, metal markings, and gemstone care, refer to the FTC Jewelry Guides published by the Federal Trade Commission.
2026 Necklace Layering Trends
Necklace layering in 2026 focuses on personal meaning, mixed metals, and thoughtful combinations, making each stack intentional, stylish, and reflective of your personality.
- Meaningful Layering: Choose pieces with birthstones, initials, or charms representing memories for a personalized, stylish stack.
- Personalized Charms: Add engraved pendants or tiny custom charms to anchor and highlight your layered look.
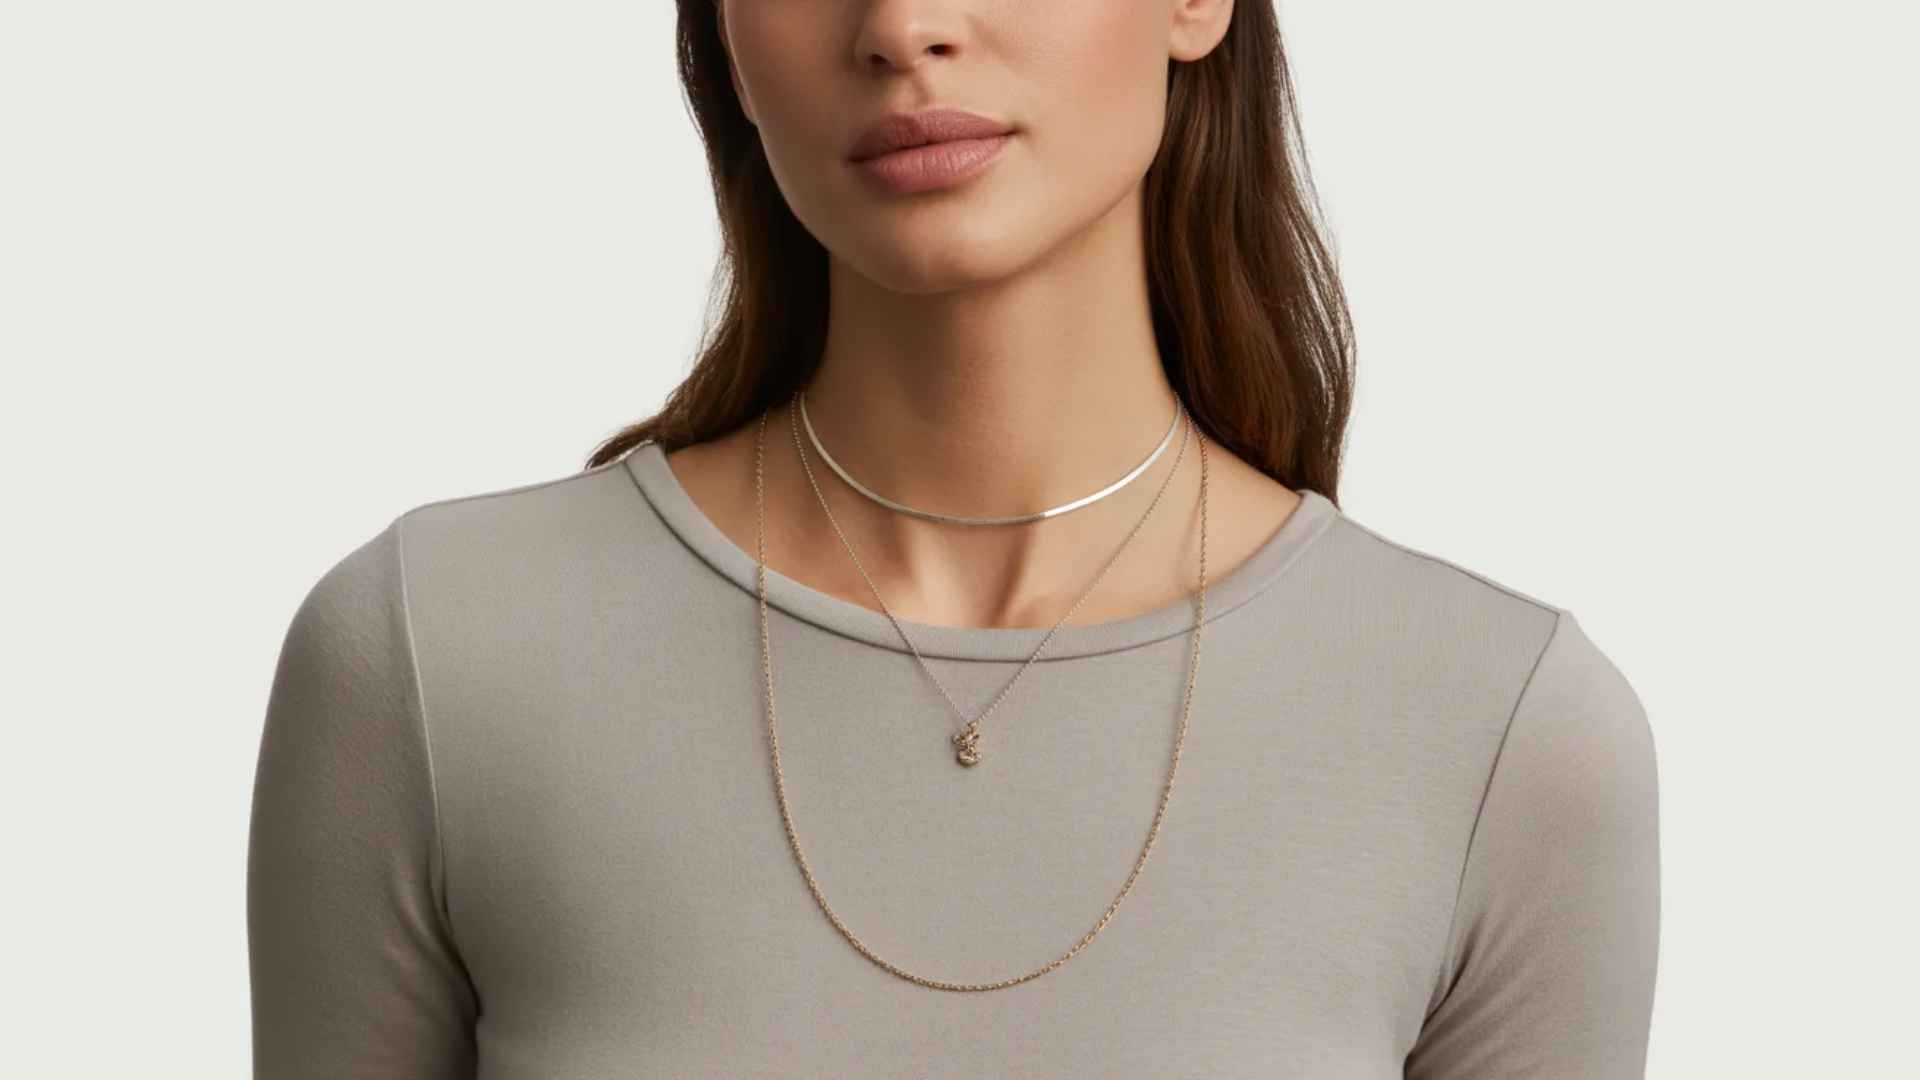
- Mixed Metals: Intentionally combine gold, silver, and rose gold; a two-tone anchor piece ties the layers together.
- Heirloom Pieces: Incorporate vintage or inherited chains to add depth and timeless style to your stack.
- Bold and Minimalist Combos: Pair a bold chain with delicate layers for a balanced, curated look.
In 2026, layering is about thoughtful choices. Each necklace should contribute to the stack’s balance, visual interest, and personal story for a modern, polished look.
Final Thoughts
Layering necklaces is not complicated once you know the basics. Start with the right lengths, vary your textures, anchor with one signature piece, and keep your clasps secure.
That is genuinely all it takes to build a stack that looks intentional and polished every time.
You do not need to buy new pieces to start. Lay out what you already own, pick three necklaces at different lengths, and try the five steps above. Most people are surprised by how much they can create with what they already have.
The best layered look is always the one that feels like you. Start simple, experiment often, and build from there.
Which necklace style are you trying first? Drop it in the comments below.
Frequently Asked Questions
How Many Necklaces Can You Layer at Once?
Two to three for a clean everyday look. Up to five for a bold maximalist stack.
Can You Layer Necklaces of Different Metals Together?
Yes. Mix gold and silver intentionally. Anchor with one two-tone piece to tie both metals together.
How Do You Stop Layered Necklaces from Tangling?
Keep two inches between each layer and hook all clasps onto one jump ring at the back.