

Most people who own a mini trampoline use it twice and push it under the bed. That’s a real loss.
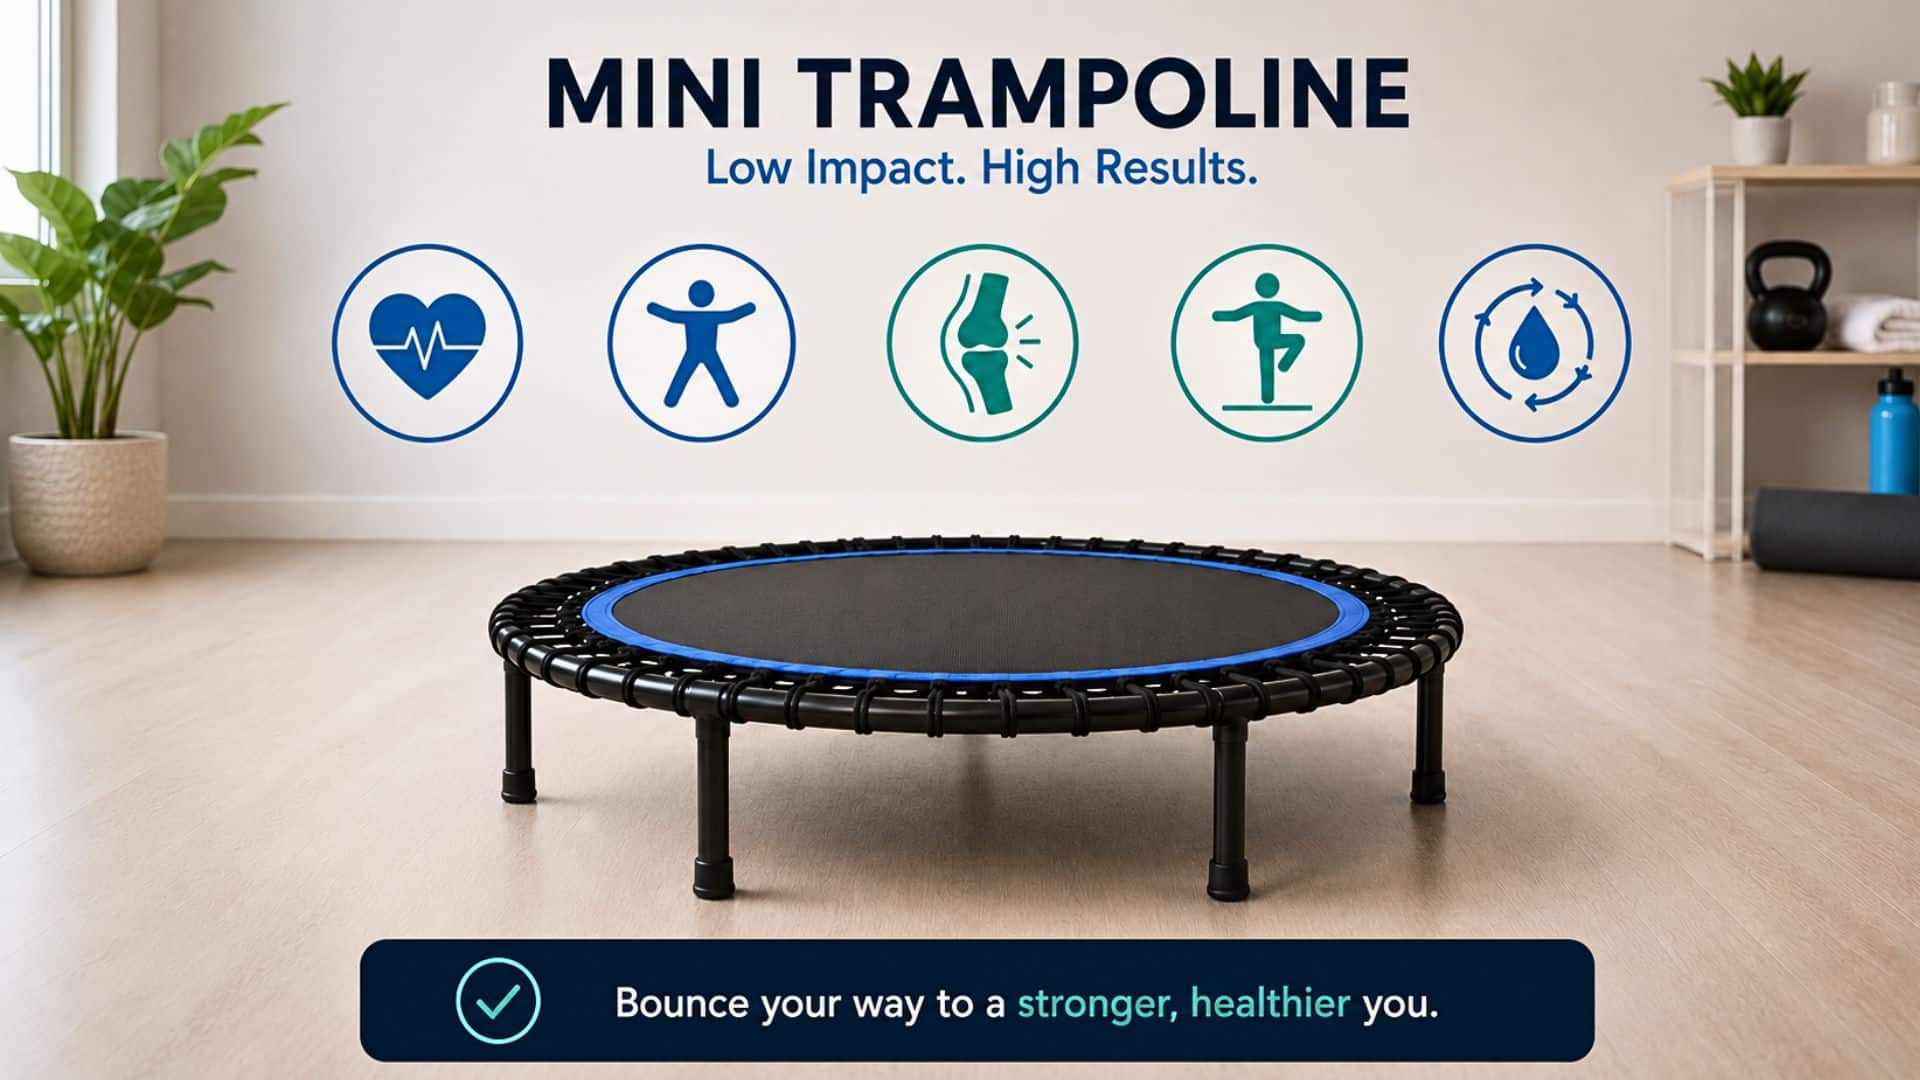
A solid rebounder workout gives you cardio, core activation, and full-body muscle engagement without the joint stress of running or jumping on hard floors.
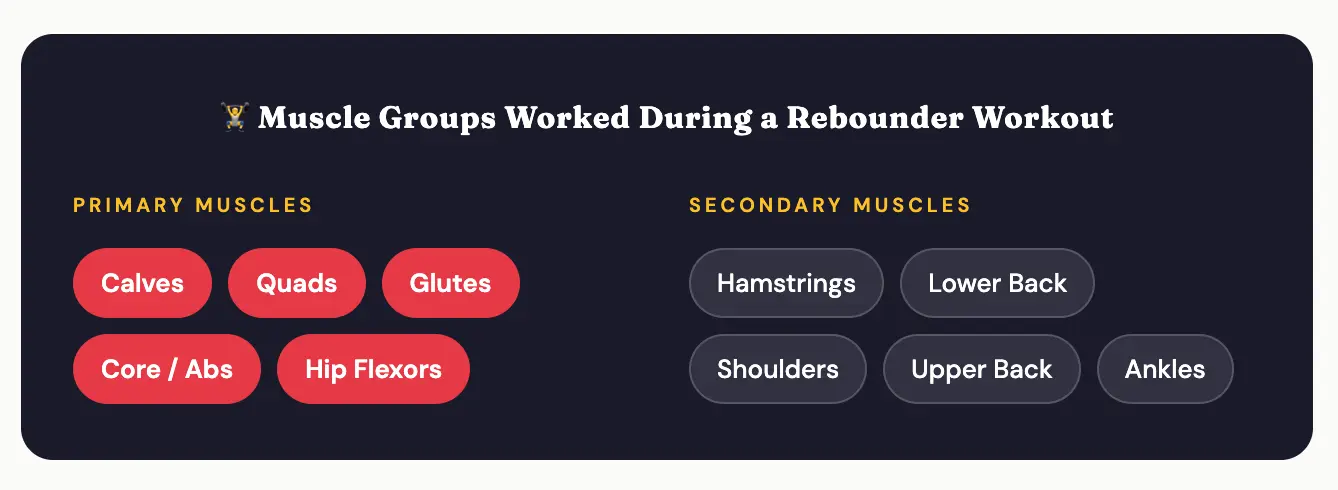
The G-force shift created by each bounce recruits muscles from your calves all the way up through your glutes, abs, and shoulders.
It works for beginners just getting started just as effectively as it does for HIIT enthusiasts adding new circuits to their training.
Every exercise, routine, and safety tip you need to make it count is right here.
What is Rebounding and How It Works
Rebounding is the practice of exercising on a mini trampoline, bouncing, running in place, jumping, and performing cardio movements on a spring-loaded or bungee-cord surface.
The mat absorbs a significant portion of the impact from each landing, which is what makes it fundamentally different from running on pavement or doing aerobics on hard flooring.
What makes rebounding genuinely effective goes deeper than just the soft landing. Every time you jump and land, your body experiences a rapid shift in gravitational force, from added G-force at the moment of landing to near-weightlessness at the top of the bounce.
That constant change keeps your muscles engaged throughout the movement, not just at the point of impact.
One often-cited NASA-supported study from 1980 found that rebounding elicited cardiovascular responses similar to those of treadmill running under certain test conditions.
Why Rebounding Works Better Than Some Cardio Exercises
|
Key Benefits of Mini Trampoline Workouts
The appeal of a rebounder workout isn’t just the novelty. There are concrete, real-world reasons people stick with it long after they’ve tried and dropped other home fitness equipment.
- Cardio Boost: A 20–30 min trampoline cardio workout rivals a steady jog, with lower perceived effort, making it easier to stay consistent
- Joint-Friendly: The mat absorbs up to 3x the impact force of running on pavement, ideal for injury recovery or long-term joint protection
- Full-Body Engagement: Calves, quads, glutes, and core all activate with every bounce; add arm movements to recruit shoulders and upper back
- Balance & Coordination: Unstable surface trains proprioception, with real carry-over benefits to sports and daily movement
- Lymphatic Support: Repeated up-down motion stimulates lymph fluid circulation, something cycling or swimming can’t replicate as effectively
Few home fitness tools deliver this combination of cardiovascular, muscular, and systemic benefits in a single low-impact session.
Beginner Equipment Checklist
|
Warm-Up Routine to Start Safely

Never step onto the rebounder cold and go straight into high-intensity work. Check out this video by Earth & Owl that makes a real difference in how your joints respond and how well your muscles perform during the main exercises.
- Gentle Basic Bounce (60 sec): Small, light bounces with heels barely leaving the mat. Let your body find its balance on the surface before adding any arm movement.
- Marching in Place (60 sec): Lift alternate knees slowly while maintaining a gentle bounce rhythm. Gets blood moving without shocking the joints.
- Shoulder Rolls (30 sec forward, 30 sec back): Keep bouncing gently while rolling shoulders in wide circles to loosen the upper body and neck.
- Heel Taps (60 sec): Tap each heel forward alternately in a slow, controlled rhythm while standing centered on the mat.
- Torso Twists (30 sec): Gentle hip rotations left and right while bouncing lightly, warming up the obliques and lower back before any twist-focused exercises.
Posture Throughout Warm-Up: Stand tall, with a soft bend in both knees at all times, eyes forward (not down at your feet), and core lightly engaged but not clenched. Breathe steadily, holding your breath is a habit that creeps in more than most people realize.
Best Mini Trampoline Exercises
These 11 exercises cover every level from gentle beginner bouncing to high-intensity HIIT intervals. Start with the beginner moves until you’re comfortable with the balance and coordination demands, then build from there at your own pace.
Basic Bounce
| ⏱ 60–90 Seconds | Rest: 20s | Intensity: Low | Suitability: Beginner |
- Stand in the center of the rebounder, feet hip-width apart, arms relaxed at your sides.
- Begin with small, controlled bounces, heels barely leaving the mat on each rep.
- Find your rhythm before adding any arm movement or looking away from a fixed point.
- Once stable, add gentle arm swings to increase heart rate and body awareness slightly.
- Keep your gaze forward and your spine upright throughout the entire set.
Pro Tip: If you feel unsteady, hold a stability bar or stand within arm’s reach of a wall. The instability you feel in the first session gradually reduces over the next two or three sessions as your ankle stabilizers adapt.
Heel-to-Toe Bounce

| ⏱60 Seconds | Rest: 20s | Intensity: Low | Suitability: Beginner |
- Begin with a gentle basic bounce to establish your rhythm and center of gravity.
- On each small jump, intentionally land with weight shifted to your heels.
- On the next bounce, shift forward to land on the balls of your feet and toes.
- Alternate heel landing and toe landing in a steady, deliberate rhythm.
- Keep movements small and controlled; this is a body awareness exercise, not a power one.
Pro Tip: This is excellent for ankle mobility and proprioception. Particularly good if you have mild ankle stiffness or are returning to exercise after a break. Most common mistake: rushing the rhythm before balance is established.
Jumping Jacks

| ⏱45–60 Seconds | Rest: 20s | Intensity: Moderate | Suitability: Beginner |
- Start with feet together in the center of the rebounder.
- Jump outward, landing with feet wider than shoulder-width apart.
- Simultaneously raise arms out and up to shoulder height as your feet land wide.
- Jump back to center, returning arms to your sides.
- Build a steady rhythm, aim for coordination over speed in the first few sets.
Pro Tip: Trampoline jumping jacks require far less height than floor jacks. Most common mistake: jumping too high and losing control of foot placement. Keep bounce height modest and prioritize arm-and-leg synchronization above everything else.
Twist Bounce

| ⏱60 Seconds | Rest: 20s | Intensity: Moderate | Suitability: Beginner |
- Start with a comfortable basic bounce, arms slightly out to the sides for balance.
- Keeping your upper body facing forward, rotate your hips and lower body to the right as you land.
- On the next bounce, rotate back to center and then carry through to the left.
- Build a rhythmic, side-to-side twisting motion from the waist and hips.
- Shoulders stay relatively still throughout; the rotation comes from your core and hips, not your whole body.
Pro Tip: If you feel lower back discomfort, reduce the rotation range immediately. This targets the obliques and should feel like a gentle, controlled swing. Most common mistake: twisting the whole torso instead of isolating the movement from the waist down.
High Bounce

| ⏱45–60 Seconds | Rest: 30s | Intensity: Moderate | Suitability: Intermediate |
- Start with your standard bounce and gradually increase height over 10–15 seconds.
- Drive through the balls of your feet to propel yourself upward on each rep.
- At peak height, bring arms close to the body; extend them outward as you descend for landing stability.
- Land with both feet simultaneously, knees softly bent to absorb the impact cleanly.
- Let the mat spring you back up; work with it rather than forcing additional height on each jump.
Pro Tip: Height should feel powerful and controlled, not reckless. If the rebounder starts wobbling or you lose your center of gravity, bring it down a level. Most common mistake: tensing up at the peak of the bounce, staying loose and relaxed on the way down produces a better, more controlled landing.
Ski Jumps

| ⏱45 Seconds | Rest: 30s | Intensity: High | Suitability: Intermediate |
- Stand in the center of the mat with feet together.
- Jump and land with both feet slightly to the right of center.
- Immediately jump again and land both feet to the left of center.
- Swing your arms opposite to your jump direction to mimic a slalom skier’s body mechanics.
- Keep movements tight and controlled, quick feet and consistent rhythm matter more than wide jumps.
Pro Tip: Start with very small lateral jumps and build the range gradually. Going too wide on a mini trampoline risks landing off the mat. Most common mistake: jumping sideways without engaging the arms.
Single-Leg Bounce

| ⏱30 Seconds | Per leg Rest: 30s | Intensity: Moderate | Suitability: Intermediate |
- Start with a basic two-foot bounce to establish your rhythm and warm up the ankles.
- Shift your weight to your right foot and lift your left foot slightly off the mat.
- Bounce on your right leg for 30 seconds, keeping bounce height low and landings controlled.
- Land with a bent knee each time; never lock it out on landing.
- Switch to the left leg without rushing; take a breath and reset your balance before beginning.
Pro Tip: Single-leg bouncing puts serious demand on your ankle stabilizers and the tendons around the knee. One finger on a wall is perfectly fine. Most common mistake: trying to match the bounce height of two-leg bouncing.
Side-to-Side Shuffle

| ⏱45–60 Seconds | Rest: 30s | Intensity: Moderate | Suitability: Intermediate |
- Stand in the center of the mat, feet hip-width apart.
- Step your right foot toward the right edge of the mat, then quickly bring your left foot to meet it.
- Without pausing, step back with your left foot, then bring your right foot over.
- Drive both arms side to side to build momentum and raise your heart rate.
- Keep your chest up and your shuffle quick; the faster the tempo, the more cardiovascular demand.
Pro Tip: This lateral move targets the inner and outer thighs alongside the standard lower body muscle groups. Most common mistake: looking down at your feet to track placement, it throws off your balance more than you’d expect.
Power Bounce
| ⏱30–40 Seconds | Rest: 30–40s | Intensity: High | Suitability: Advanced HIIT |
- Build from a moderate bounce over 10 seconds to generate momentum.
- Drive explosively through your hips and knees to reach maximum height.
- At peak height, optionally tuck your knees toward your chest for an added core challenge.
- Land with control, absorb through bent knees, and move immediately into the next takeoff.
- Use aggressive upward arm drives on each jump to add height and full-body intensity.
Pro Tip: Power bounces are explosive and deplete energy fast. Keep each interval short and rest fully between rounds. Most common mistake: continuing the set when landings start getting sloppy, poor landing mechanics under fatigue are how overuse injuries happen.
Sprint in Place
| ⏱20–30 Seconds | Rest: 30–40s | Intensity: Very High | Suitability: Advanced HIIT |
- Start with a moderate-intensity bounce to warm up the legs and cardiovascular system.
- Shift into a rapid running motion, alternating feet quickly as if sprinting on the spot.
- Drive both arms in proper running form, elbows bent at roughly 90 degrees, pumping front to back.
- Stay on the balls of your feet throughout; avoid flat-foot landings, which slow your cadence.
- Keep your chest upright, resist the urge to hunch forward as fatigue builds.
Pro Tip: This is the highest heart-rate exercise on this list. Intervals work far better than sustained effort. Go all out for 20–30 seconds, slow to a walk bounce for 30–40 seconds, then repeat. Most common mistake: letting the arms go passive when tired.
Squat Jumps

| ⏱30 Seconds | Rest: 40s | Intensity: High | Suitability: Advanced HIIT |
- Stand with feet slightly wider than hip-width, positioned in the center of the mat.
- Sink into a squat, hips back, chest up, knees tracking over (but not beyond) your toes.
- Drive through your heels to jump explosively upward from the squat position.
- Land back into the squat immediately, absorbing the landing through your legs.
- Move straight into the next squat and repeat in a continuous, controlled rhythm.
Pro Tip: The trampoline makes squat jumps more powerful but also less stable than the floor. Use the wider stance, narrow feet create a far less stable landing platform on the mat. Most common mistake: letting the knees cave inward on landing.
Start with ten minutes, see how it feels, and go from there. Most people are surprised by how quickly it stops feeling like exercise.
Progression Plan for Effective Results
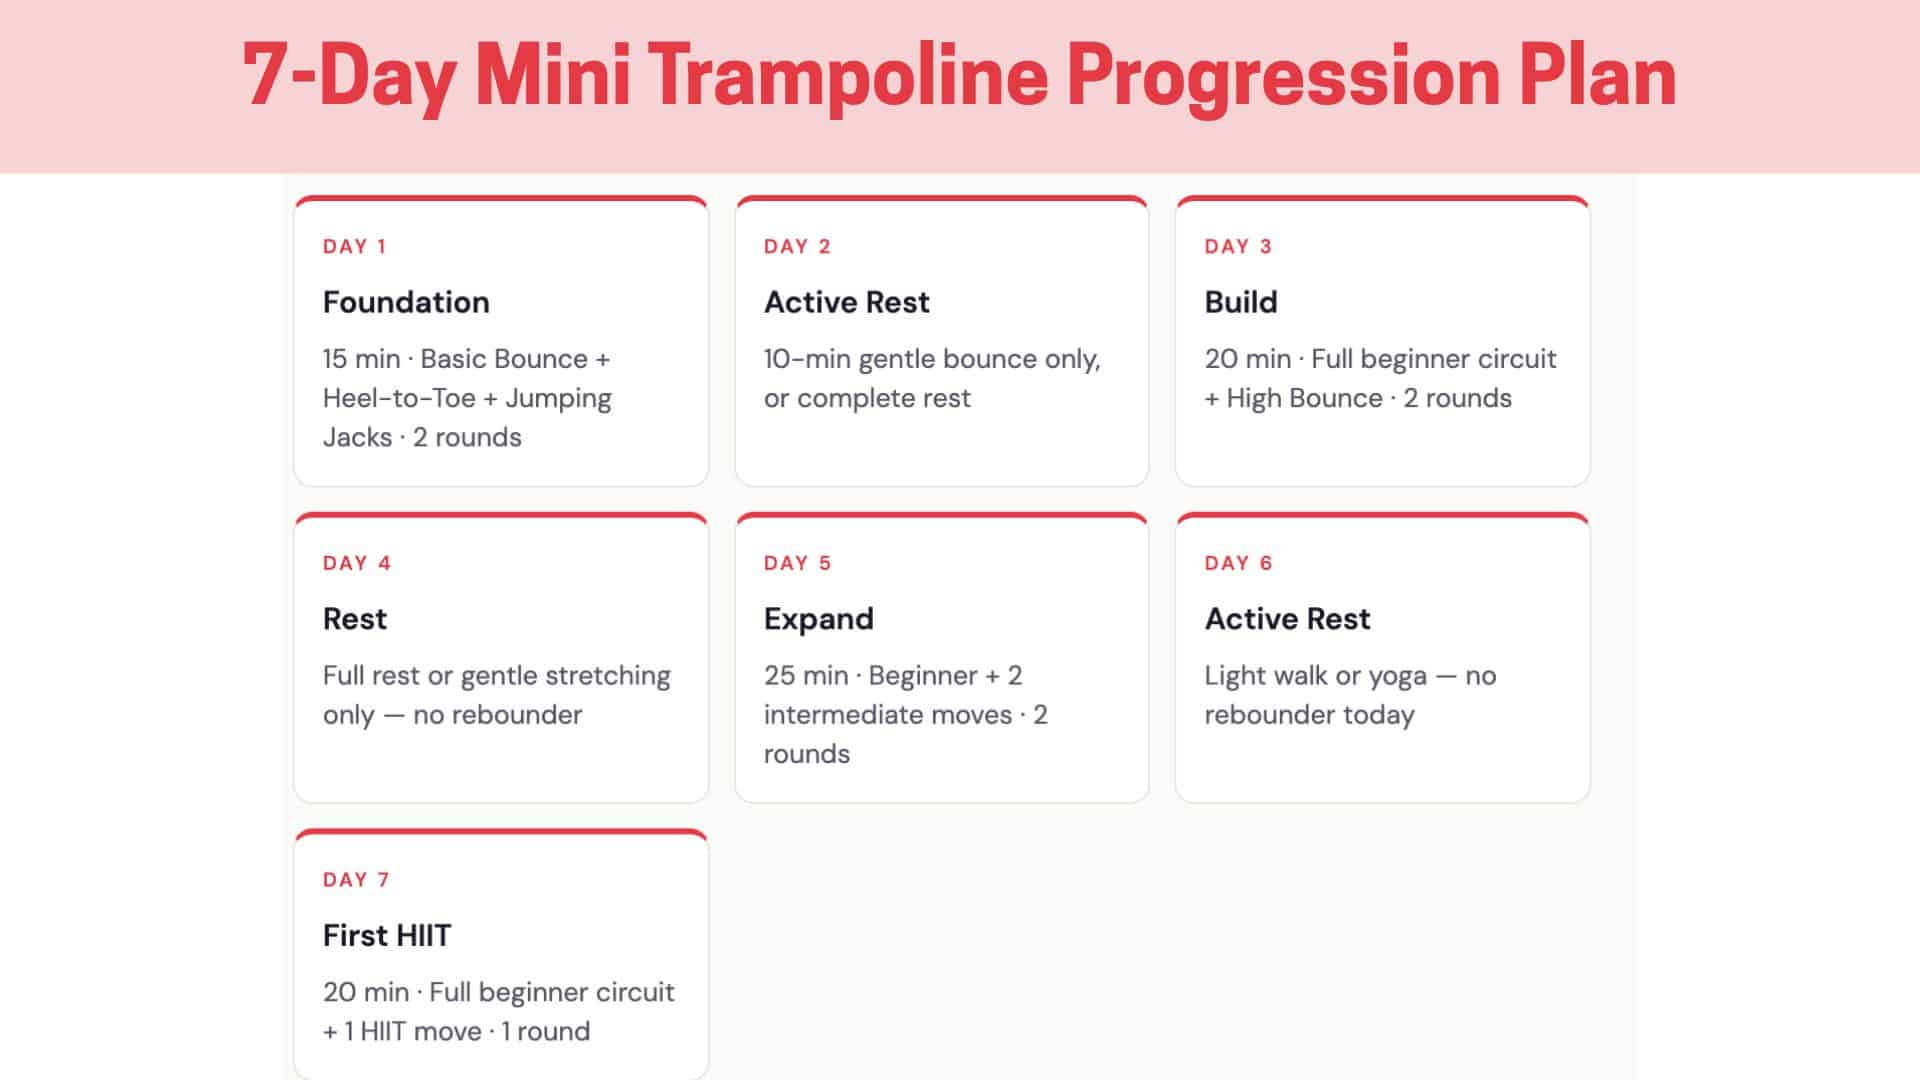
New to rebounding? This plan gives you a structured entry point for your first week without overdoing the volume or intensity too quickly:
|
✅ Do’s |
❌ Don’ts |
|
Warm up before every session |
Skip the warm-up to save time |
|
Keep knees soft and slightly bent |
Lock your knees at the top of a bounce |
|
Always land in the center of the mat |
Bounce near the edge of the mat |
|
Use a stability bar in your first few weeks |
Use the rebounder on wet or uneven surfaces |
|
Stay hydrated before, during, and after |
Push through sharp knee or ankle pain |
|
Listen to discomfort and stop if needed |
Eat a full meal within 60 min of bouncing |
|
Cool down and stretch after every session |
Let children use it without direct supervision |
Progress smartly, and your rebounder becomes a long-term fitness asset. Rush it, and you risk the plateau or injury that sidelines most beginners early.
Final Thoughts: Bounce Into Fitness
Start a mini-trampoline workout based on where your fitness actually is right now. If that means 10 minutes of basic bouncing three times a week, that’s the right starting point for week one.
Add time before intensity, add intensity before complexity, and let your body adapt at its own pace.
Three to four consistent sessions per week will produce measurable results within the first month, in cardio capacity, balance, and how your joints feel day to day.
That last part matters more than most training plans acknowledge, because the best workout is always the one you’ll keep showing up for.
Try the Routine This WeekPick your level from the sample workout table, follow the 7-day progression plan, and track how you feel after three sessions. The structure is already there; all you have to do is step on the mat. |
Frequently Asked Questions
Can I do a mini trampoline workout if I have joint pain?
Rebounding is gentler on joints than most cardio options because the mat absorbs a large portion of each landing’s impact force. If you have a diagnosed knee, hip, or ankle condition, clear it with your doctor or physiotherapist before starting.
How Many Calories Does a Mini Trampoline Workout Burn?
A 30-minute moderate session typically burns between 150 and 210 calories. A HIIT-style session using the advanced exercises can push closer to 250–300 calories in 30 minutes.
How Often Should I Do Mini Trampoline Workouts?
Three to four sessions per week, with at least one rest or active recovery day between sessions, works well for most people.