
Wallpaper can add character to a room, but taking it down can feel tricky. The best way to remove wallpaper starts with understanding your wall type and choosing the right approach for safe removal.
Knowing how to strip your wallpaper helps take the guesswork out of the process, especially when dealing with old adhesive, stubborn layers, or delicate drywall.
Preparation, patience, and the right techniques make all the difference when learning how to remove wallpaper without damaging walls. Small steps early on can prevent tears, gouges, or leftover sticky patches.
Each stage, from checking your walls to handling tough sections, plays a role in achieving a smooth surface ready for paint or new wallpaper.
Signs It’s Time to Remove Wallpaper
Even the nicest wallpaper can lose its charm or start causing problems over time.
Knowing the right moment to remove it can save a lot of stress and protect the walls underneath. Watch for signs that indicate the wallpaper is no longer doing its job and may need to come down.
- Peeling edges or lifting seams: Adhesive is failing, and the wallpaper isn’t sticking properly.
- Bubbling or wrinkles: Moisture may have seeped behind the wallpaper.
- Discoloration or a water stain could indicate damage to drywall or plaster.
- Outdated or clashing patterns: The wallpaper no longer fits your room’s style.
- Stubborn patches that resist cleaning make the space feel unfinished or worn out.
Removing wallpaper at the first signs of these issues keeps walls in good shape, prevents bigger repairs, and provides a smooth, fresh canvas for your next design project.
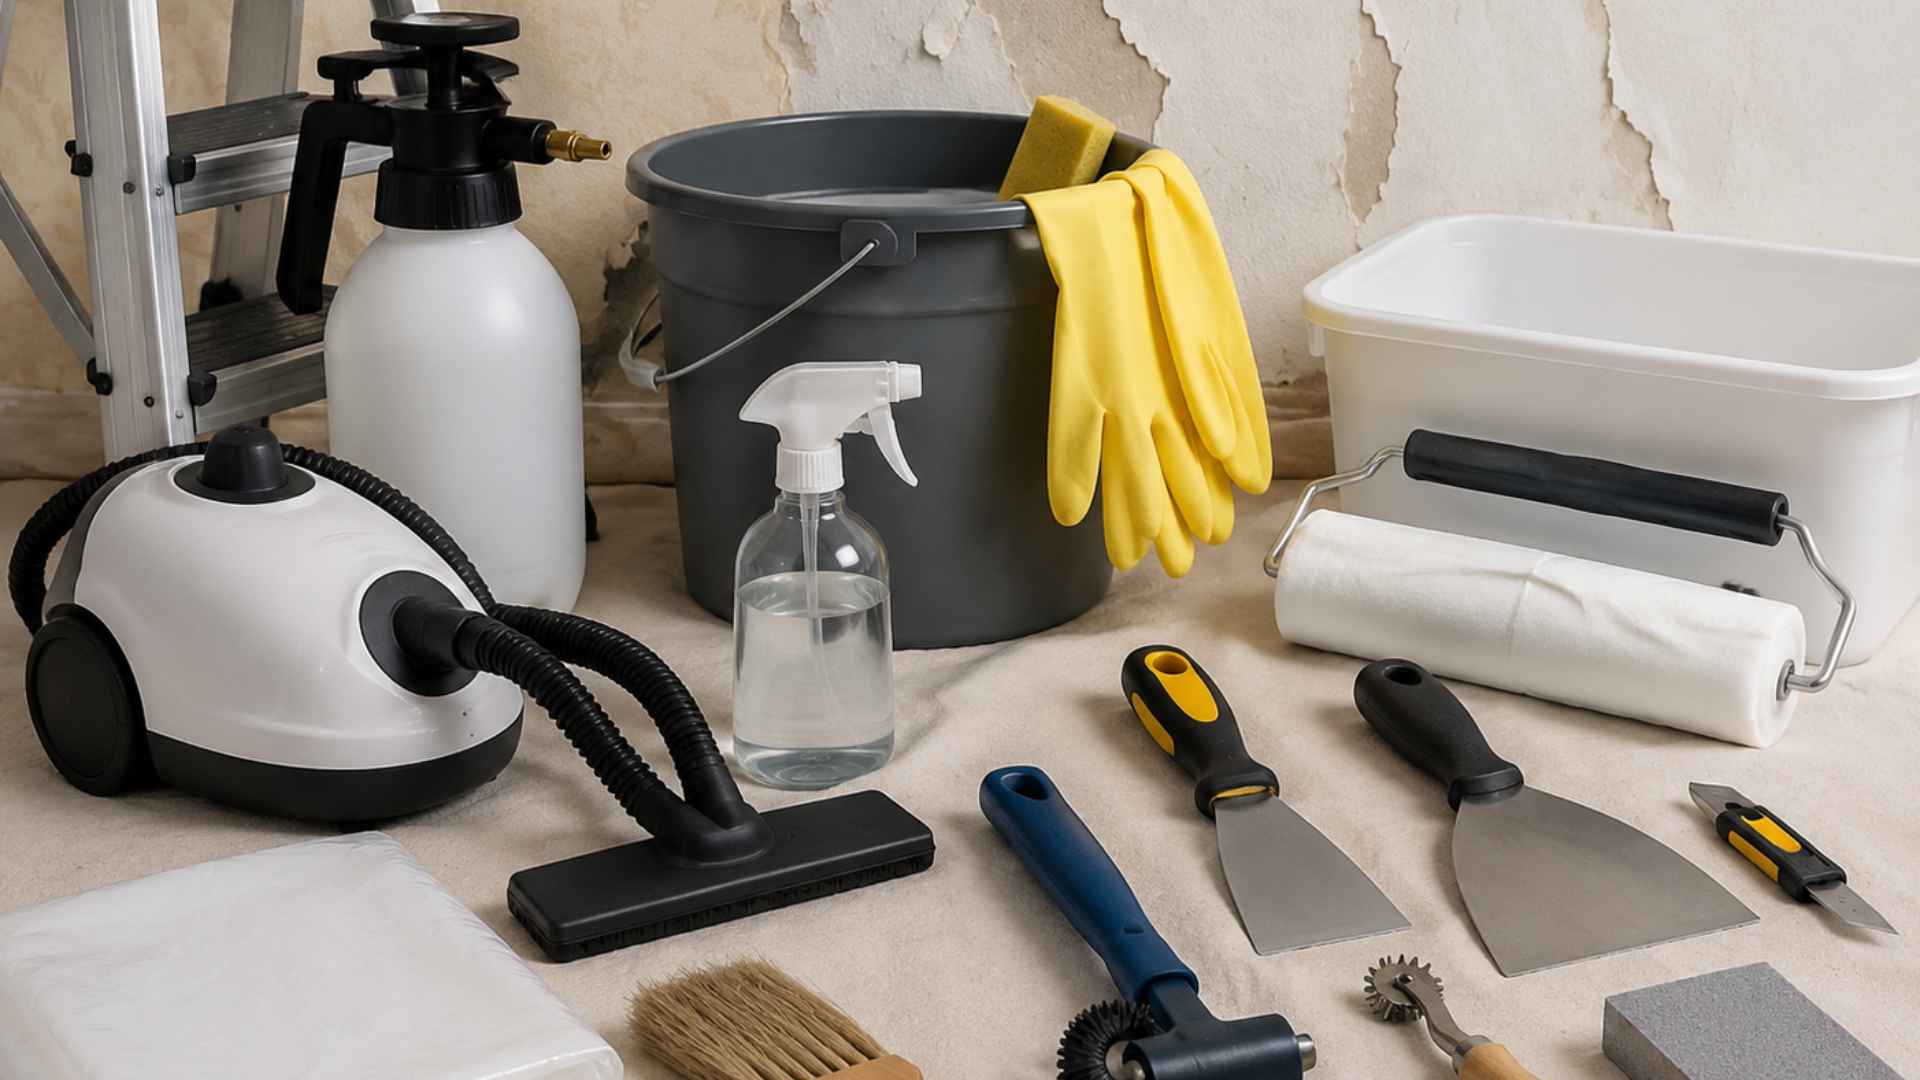
What You’ll Need Before You Start
Before applying any water or solution, turn off the power to the room at the electrical panel and remove the outlet and switch plate covers to prevent moisture damage. |
Know Your Wall Type First
Drywall is particularly fragile when wet. Too much moisture or aggressive scraping can pull off the paper facing, leaving you with a repair job before you even start painting. Plaster walls are far more forgiving and can handle more water and pressure.
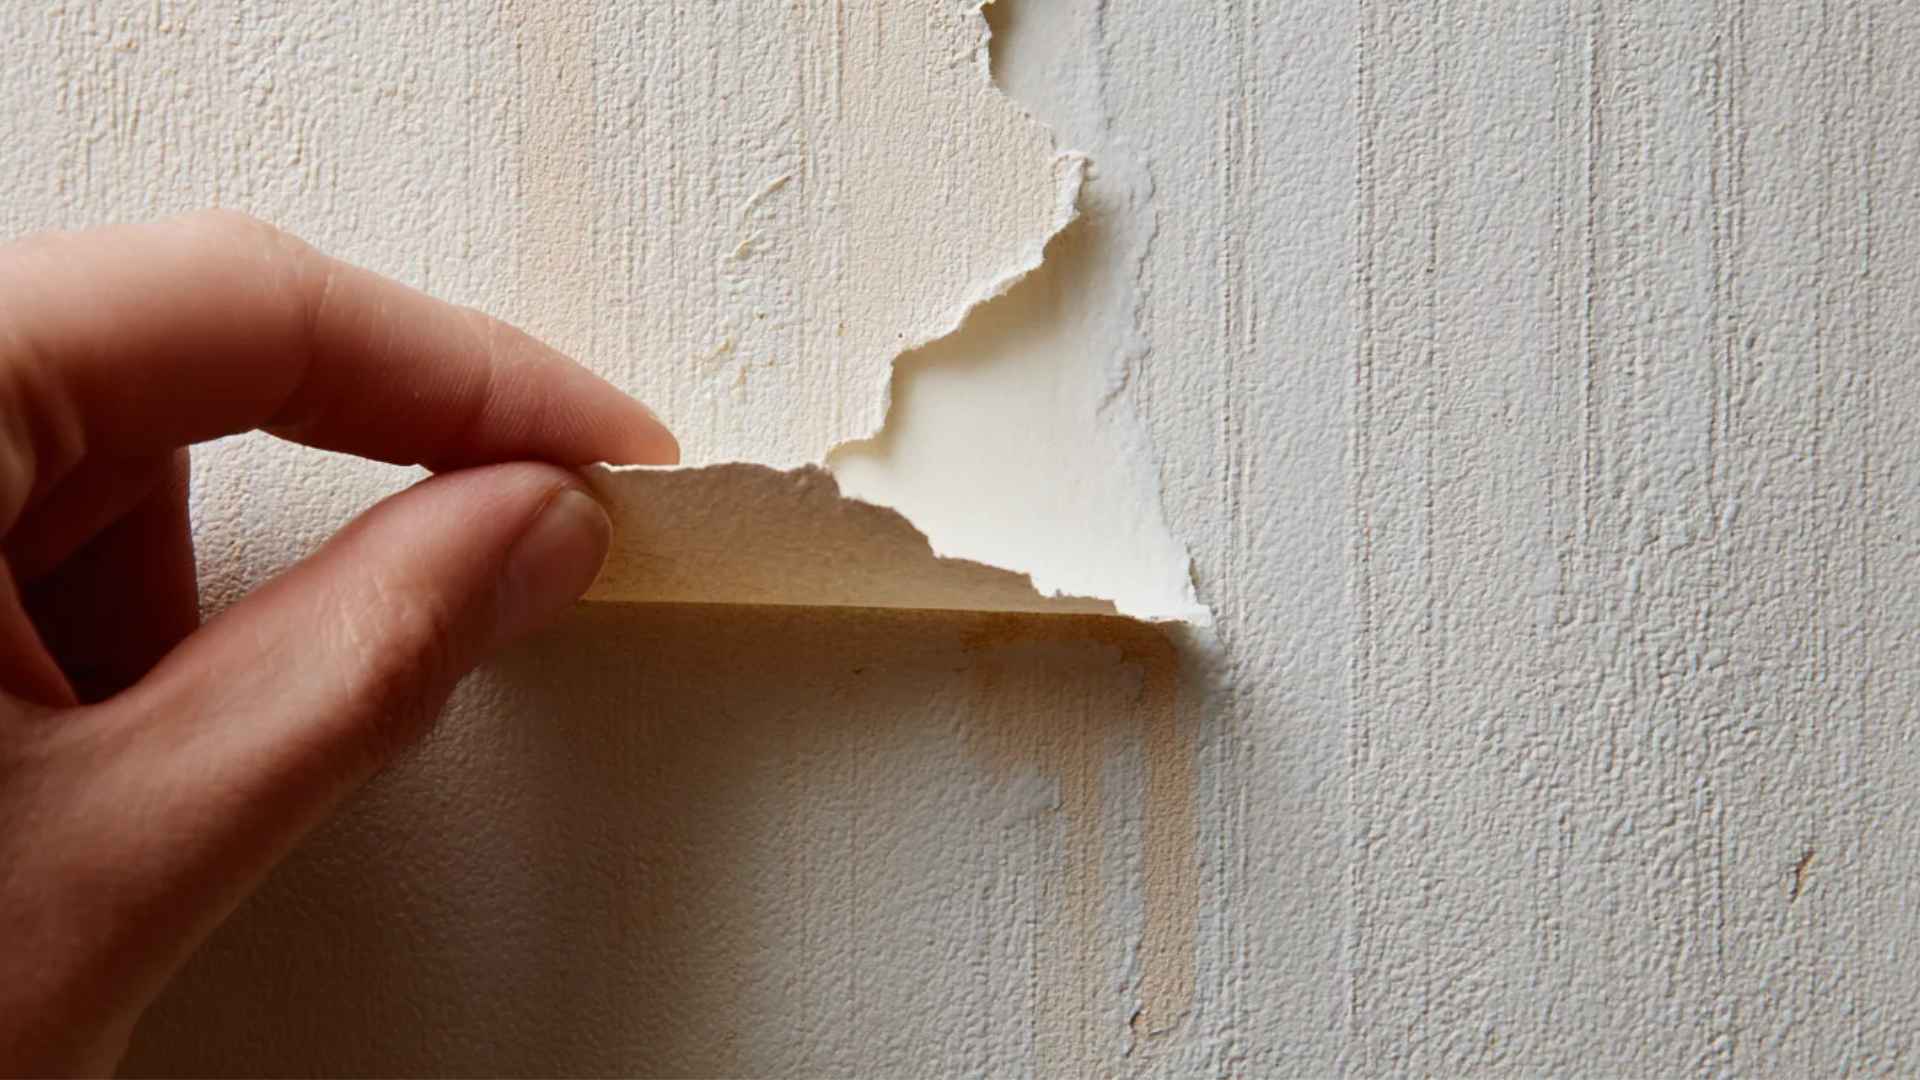
To test your wall, peel back a small corner of wallpaper in an inconspicuous spot and see how the surface responds.
If the wall feels soft or tears easily, treat the entire removal process as a drywall job and go slower. If the surface holds firm and feels solid, it is plaster or previously painted drywall, which can tolerate more moisture.
How to Strip Your Wallpaper
There’s no single method that works for every room, but this sequence covers the vast majority of situations.
Step 1: Test a small section
Start at a corner or seam and gently lift a small edge of the wallpaper using your fingernail or a plastic putty knife. Pull slowly to see how it behaves. If it comes away in a long, clean sheet, it’s strippable.
If it tears into fragments, the wallpaper is strongly bonded and will need a removal solution to prevent wall damage.
Step 2:Peel Off Loose Wallpaper by Hand.
Begin at seams and corners, pulling the wallpaper at a low angle to reduce the risk of tearing the wall surface. Remove as much loose paper as possible before applying any moisture.
This step ensures that you’re not working against stubborn sections later and helps make the adhesive removal process quicker and less damaging to the wall.
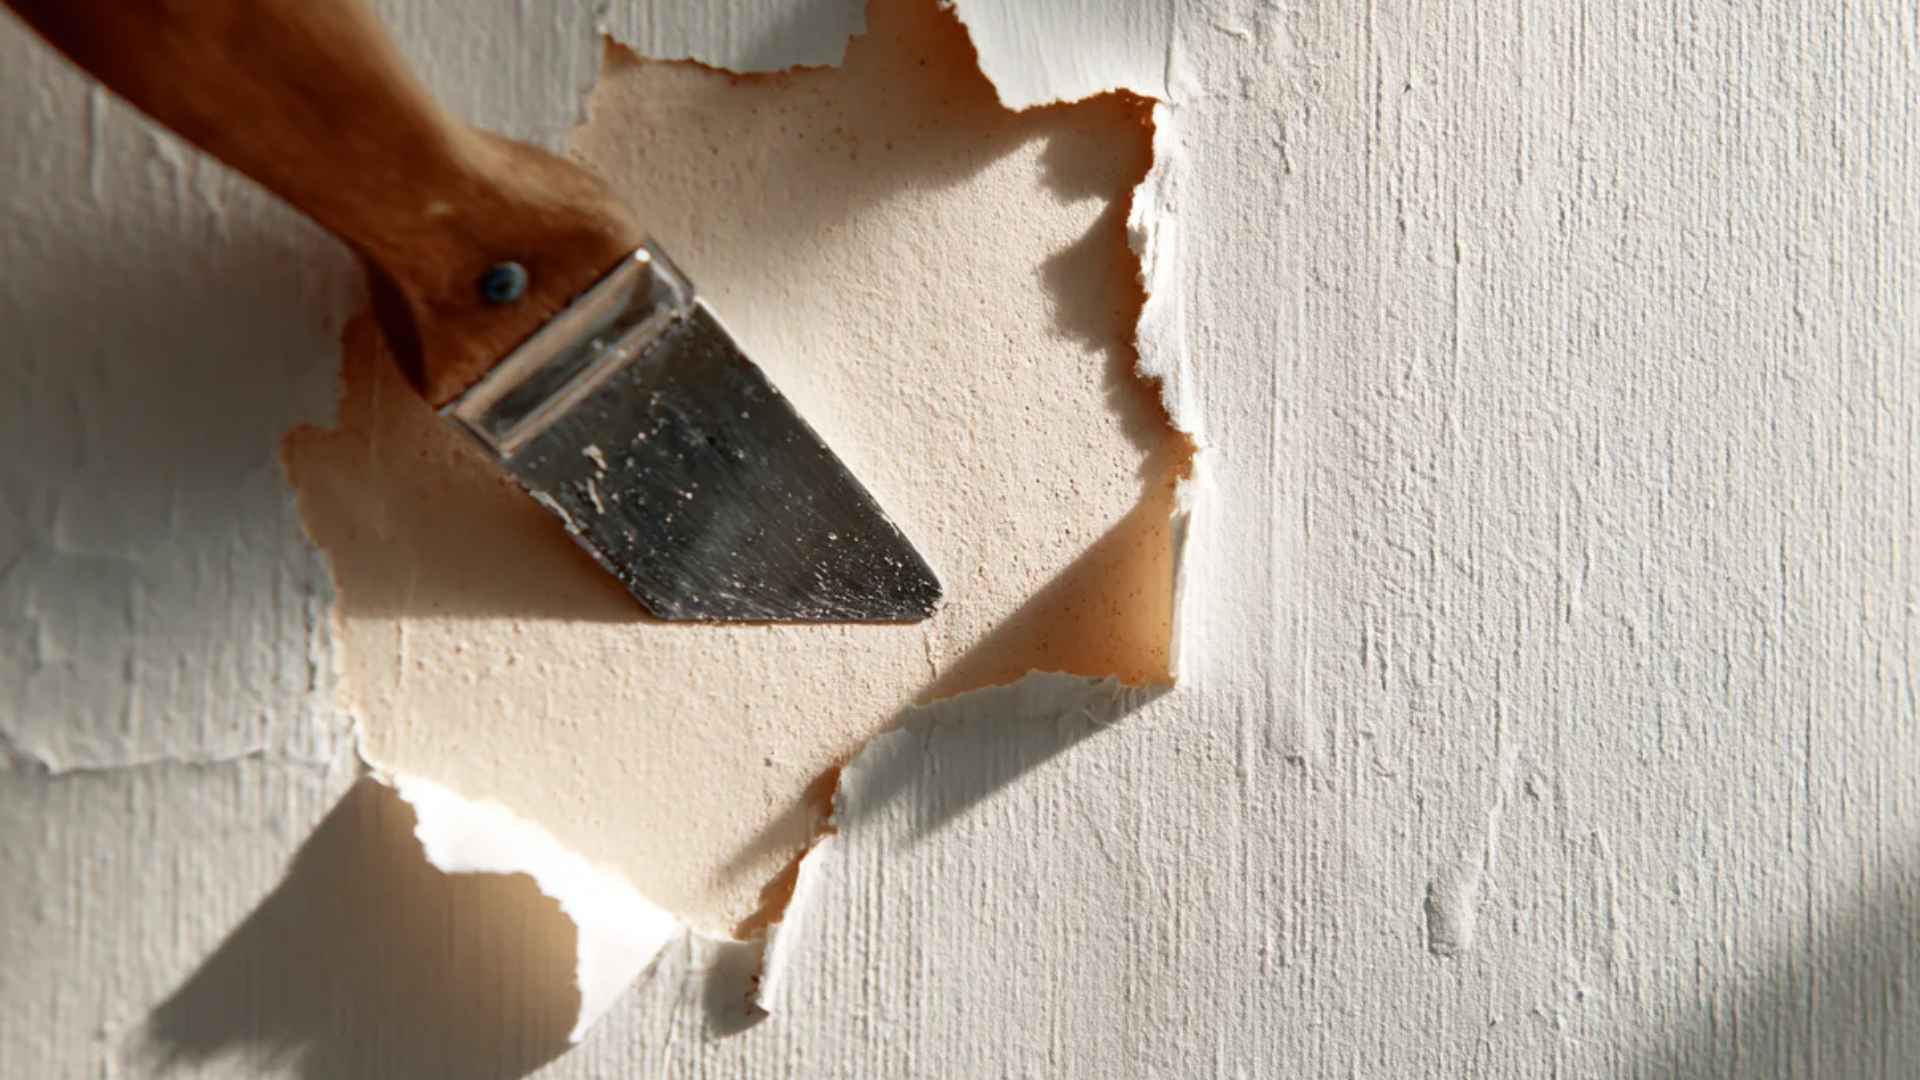
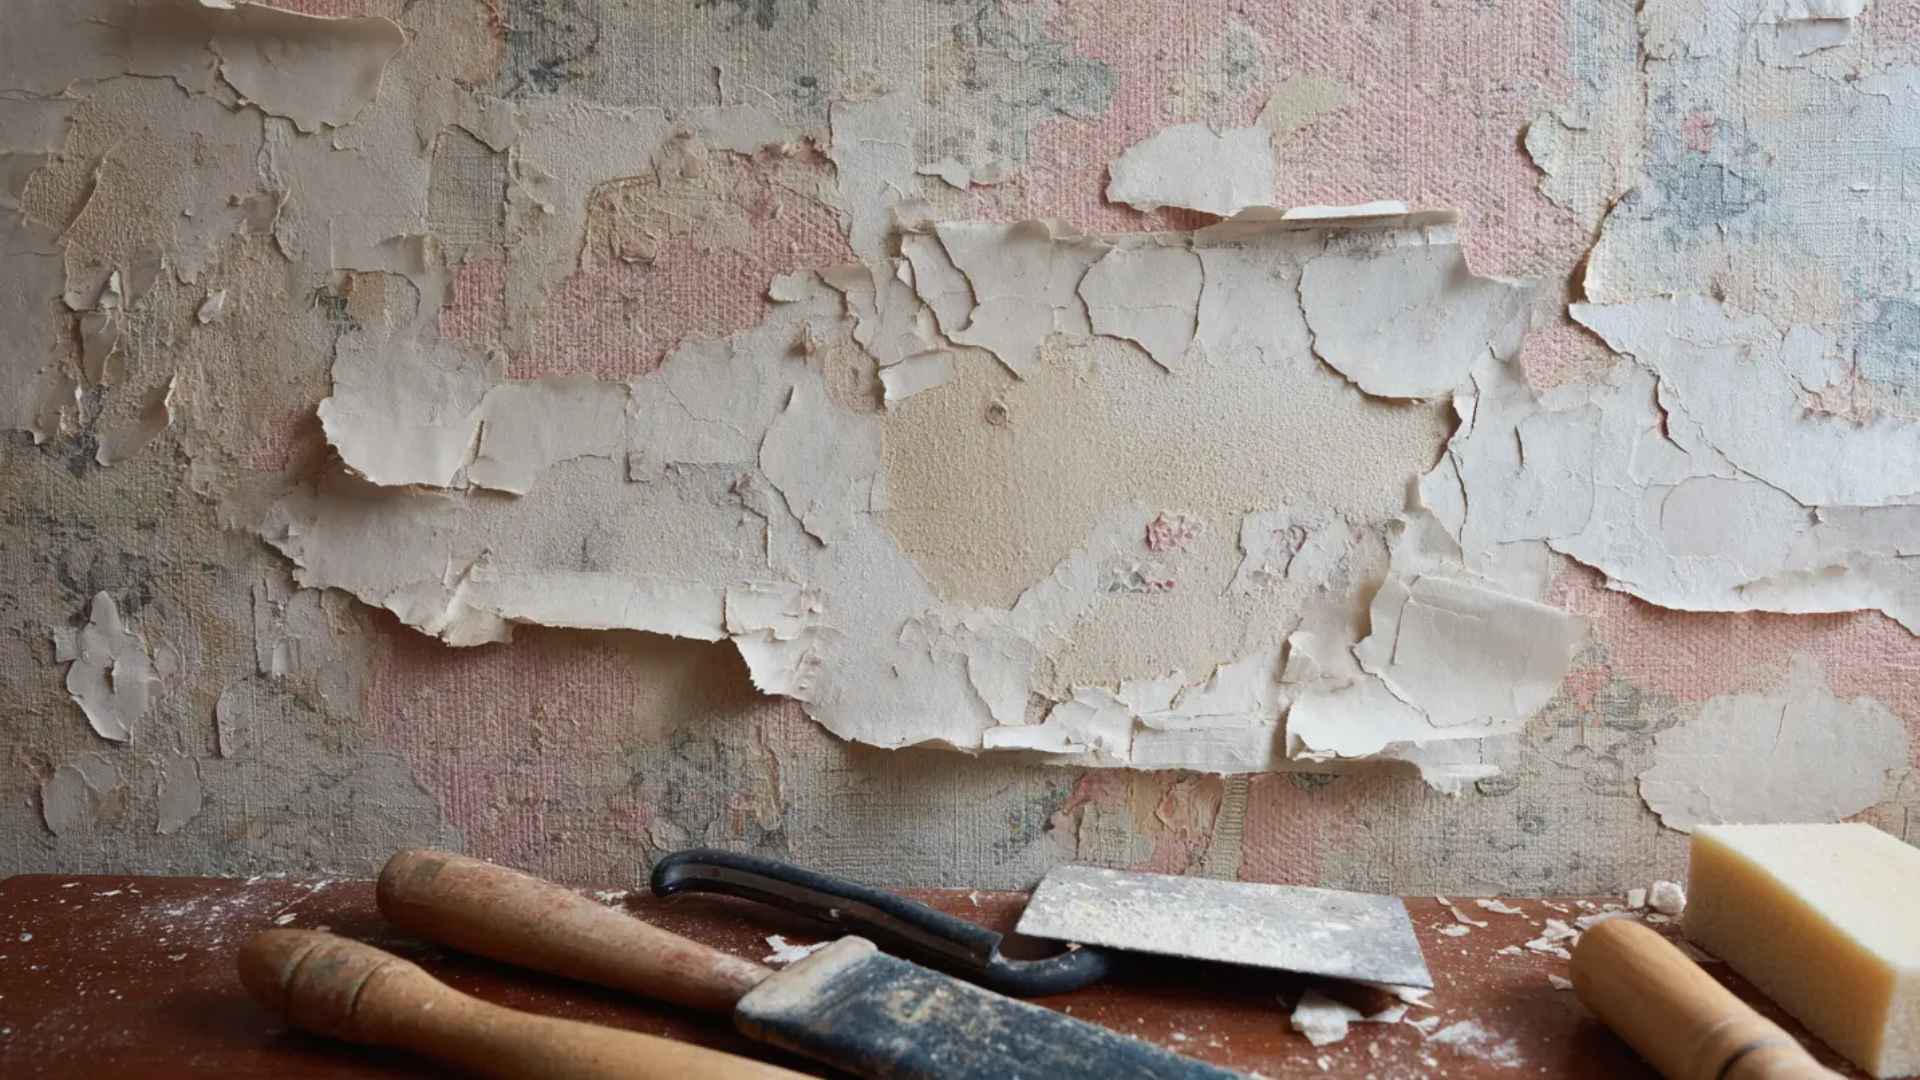
Step 3: Score the surface if needed
For vinyl-coated or painted wallpaper, use a scoring tool to lightly and evenly perforate the surface. Avoid pressing too hard, especially on drywall, as over-scoring can create divots that require filling later.
Scoring allows the removal solution to penetrate and loosen the adhesive, making the scraping process easier and protecting the wall underneath from accidental gouges or tears.
Step 4: Apply a removal solution
Use a commercial wallpaper remover or a homemade mixture. Warm water with one part fabric softener to three parts warm water works well. Alternatively, a 1:1 mix of white vinegar and warm water is effective.
Apply the solution in small sections with a sponge or spray bottle, ensuring the wallpaper is evenly saturated to loosen the adhesive without over-wetting the wall.
Step 5: Let the solution soak in
Allow the solution to sit for 10 to 15 minutes before touching the wallpaper. On drywall, stick closer to ten minutes to avoid oversaturating and softening the wall. Plaster walls can handle longer soaking.
You’ll know the adhesive is loosening when the paper wrinkles slightly or feels soft. Vinyl-coated wallpaper won’t wrinkle, so rely on timing instead.
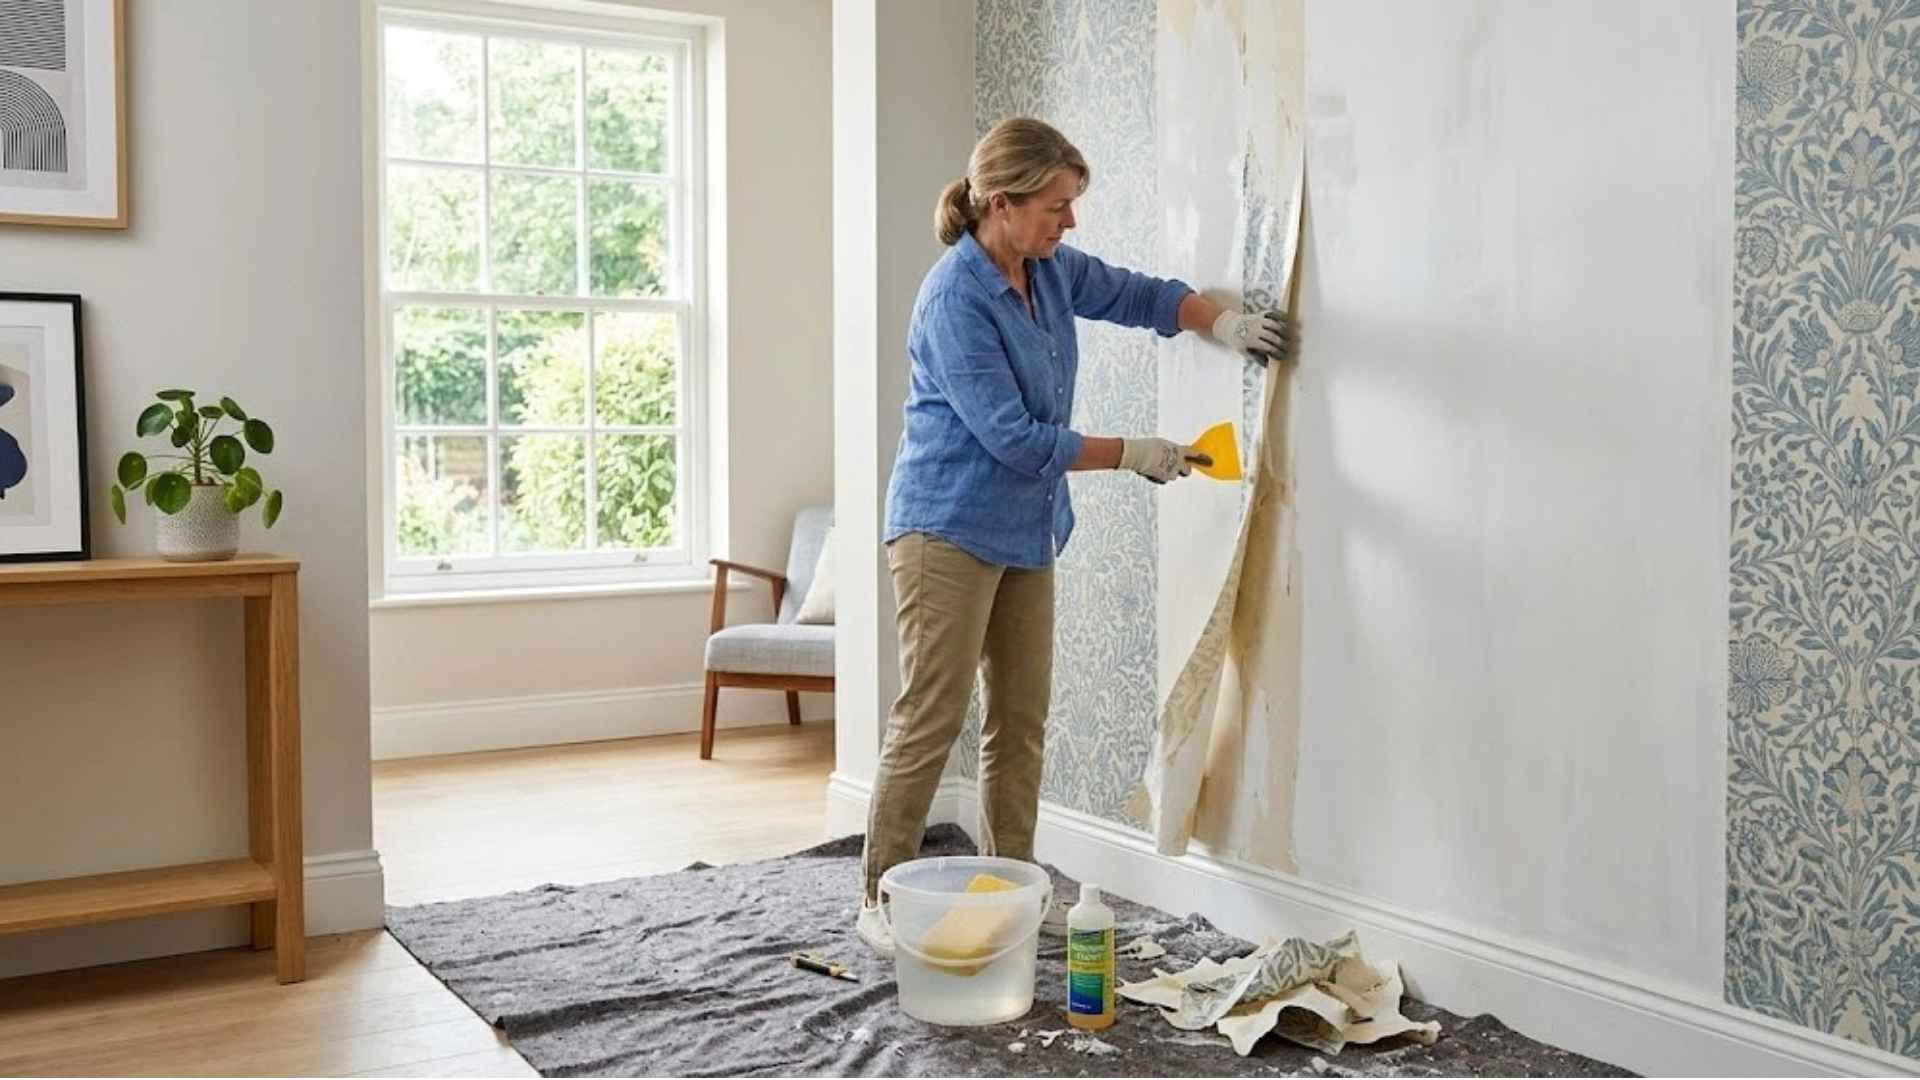
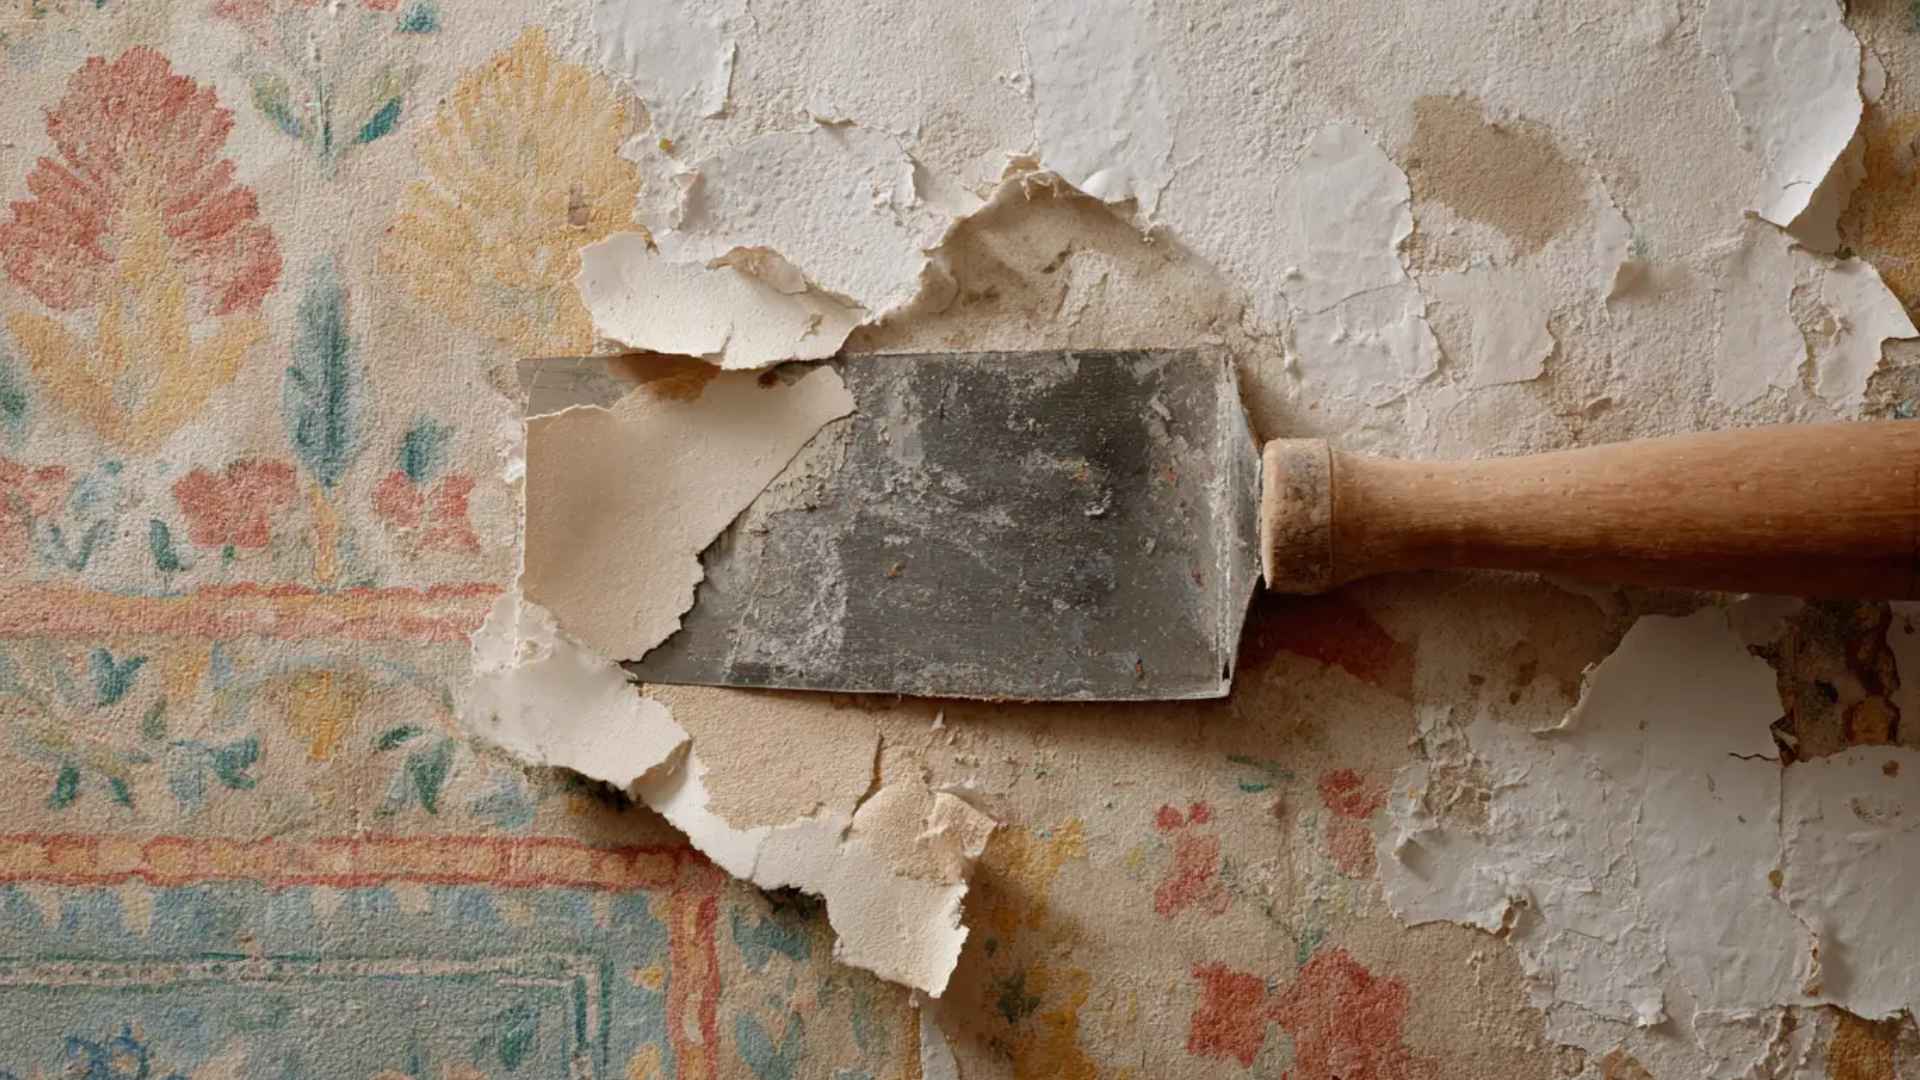
Step 6: Scrape at a low angle
Hold your scraper nearly flat, around 30 degrees, and work in small sections no wider than a couple of feet. This reduces the chance of gouging the drywall and ensures the removal solution doesn’t dry before you reach it.
Scraping at too steep an angle can damage the wall surface and necessitate repairs.
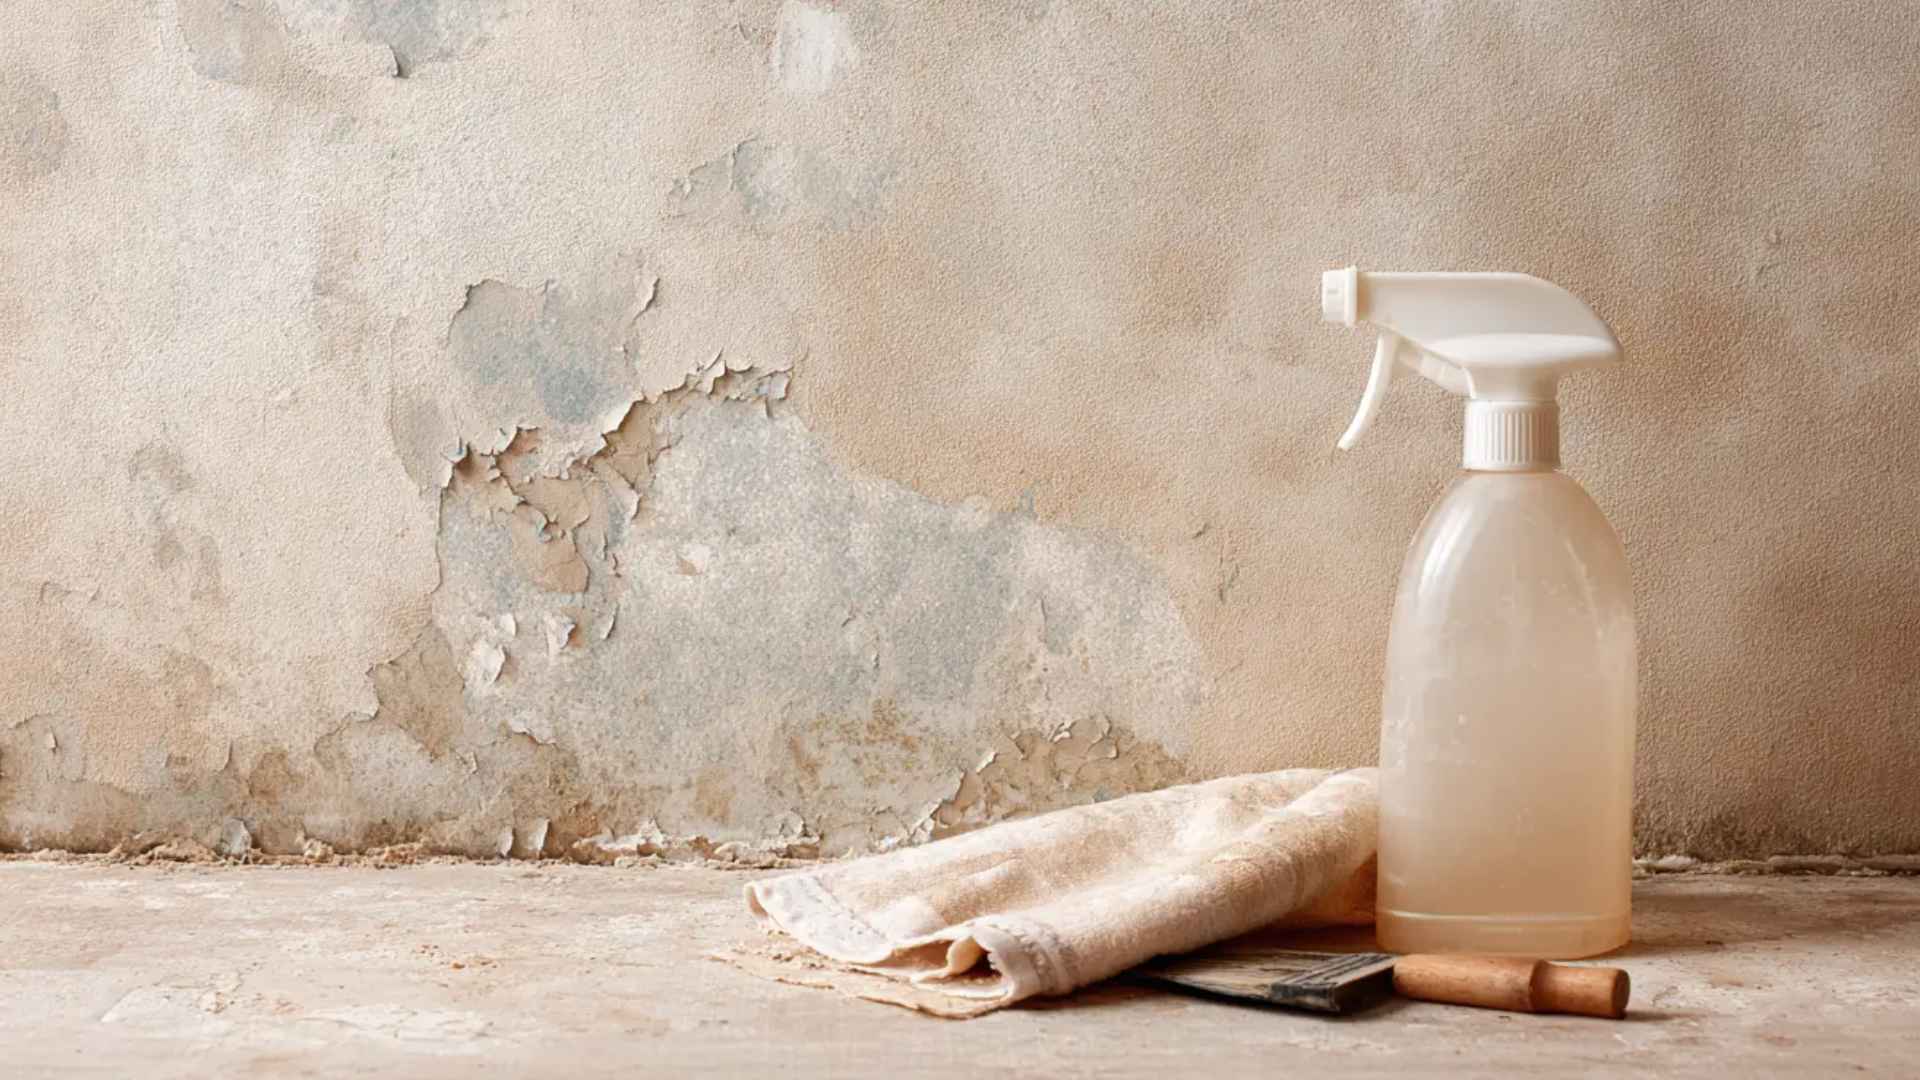
Step 7: Remove leftover adhesive
Once the wallpaper is removed, feel the wall for stiff or rough patches left by adhesive. Spray with a removal solution or warm water, then wipe with a clean sponge in circular motions.
For stubborn glue, a second pass with a vinegar-and-water mixture works well. The acetic acid in vinegar helps dissolve paste and leaves a smooth, paint-ready surface.
Step 8: Clean and Dry the Walls
Wipe the entire wall with a clean damp sponge to remove any remaining residue. Allow the wall to dry completely. On drywall, drying takes at least 24 to 48 hours before priming or painting.
Skipping this step risks paint adhesion issues and trapped moisture, which can cause bubbles, peeling, or other damage to freshly painted walls.
When to Use a Wallpaper SteamerSteamers work well on multiple wallpaper layers or old adhesive, softening glue quickly. On drywall, use short, moving passes to avoid swelling. Most hardware stores rent steamers by the day, enough for a standard room. |
Wallpaper Removal Cost
Removing wallpaper varies in cost depending on whether you do it yourself or hire a professional. Supplies for DIY projects are generally affordable, while professional services vary by method and room size.
DIY Removal Cost
Doing the job yourself costs primarily in supplies. A standard room typically runs $45 to $90 in materials. Here is a rough breakdown:
| Item | Estimated Cost |
|---|---|
| Wallpaper scoring tool | $15–$25 |
| DIF Wallpaper Stripper (concentrate) | $8–$15 |
| Plastic scraper/putty knife | $5–$12 |
| Drop cloths, sponge, bucket | $10–$20 |
| Steamer rental (if needed) | $30–$40 per day |
| Total (without steamer) | $38–$72 |
Professional Removal cost
Dry stripping is the most affordable wallpaper removal method, costing $0.75–$1.75 per square foot.. Steaming is slightly pricier at $1.00–$3.00 per square foot and works well for stubborn wallpaper.
Soaking and scraping are the most labor-intensive, ranging from $3.00–$10.00 per square foot. Still, it’s effective for older or heavily glued wallpaper, making it a reliable choice despite the higher cost.
Note: Costs can vary based on room size, wallpaper type, regional pricing, and whether extra tools or professional services are needed.
Mistakes that Make the Job Harder
Avoid common missteps that make wallpaper removal harder and increase the risk of wall damage. Knowing what not to do can save time, effort, and frustration.
- Skipping the wall type test and flooding the drywall with water
- Using too much force with the scraper before the adhesive has soaked
- Over-scoring the surface and cutting into the drywall paper
- Painting directly over dried adhesive residue
- Not allowing enough drying time before priming
- Working in sections too large for the solution to stay wet
Steer clear of these mistakes to keep your walls intact and the removal process smooth, leaving you ready for a clean, paint-ready surface.
Best Way to Remove Wallpaper Based on Wallpaper Type
Different wallpaper types require different removal methods. Knowing the right approach for peel-and-stick, strippable, traditional, vinyl, or multiple layers makes the job easier and protects your walls.
1. Peel-and-Stick Wallpaper
Peel-and-stick wallpaper is the easiest to remove. Start at a top corner and pull the panel slowly downward at a low angle. Heat from a hair dryer on a low setting can help if any section is stubborn.
No solution is needed for most peel-and-stick products. After removal, wipe down the wall with a slightly damp cloth to pick up any adhesive residue.
Pro tip: Use low heat to loosen stubborn spots and peel slowly at a gentle angle.
2. Strippable Wallpaper
Strippable wallpaper is designed to come off dry in full sheets. Loosen one corner with a putty knife, grip the paper close to the wall, and pull slowly at a 10 to 15 degree angle.
Once you remove the face layer, a thin backing may remain. Wet the backing with the removal solution, let it soak for a few minutes, then scrape it off.
Pro tip: Start at corners, pull gradually, and wet the thin backing before scraping for smooth removal.
3. Traditional Wallpaper
Traditional paper-backed wallpaper absorbs water readily and requires the full process: score, soak, wait, scrape. Work in two-foot sections. Do not let the solution sit on the drywall for too long.
This type is common in homes built between the 1950s and 1990s and often requires the most patience.
Pro Tip: Score lightly, soak in small sections, and scrape carefully to avoid tearing or wall damage.
4. Vinyl Wallpaper
Vinyl wallpaper has a waterproof facing that prevents removal solution from reaching the adhesive underneath. You have two options.
First, score the surface aggressively enough to break through the vinyl layer, then apply the solution and scrape it in.
Second, try peeling off the vinyl face dry before wetting the paper backing beneath. The backing then responds to soaking normally.
Pro Tip: Score the vinyl or peel dry, then apply solution to loosen adhesive for easier removal.
5. Multiple Layers of Wallpaper
Multiple layers are common in older homes. Remove them one layer at a time, starting with the top layer. Each layer may use a different adhesive and require a different removal approach.
Steam is often the most effective option here because it penetrates multiple layers simultaneously. Plan for the job to take two to three times as long as a single-layer removal.
Pro Tip: Remove each layer individually, use steam for old adhesives, and allow extra time for completion.
Wallpaper Removal Methods
earning how to remove wallpaper properly depends on the type of wallpaper and how it was originally installed. The right method helps you avoid wall damage and makes cleanup much easier later.
| Method | Best For | How It Works | Key Note |
|---|---|---|---|
| Dry peeling | Strippable or peel-and-stick wallpaper | Pulls off in sheets without moisture | Fastest method, minimal residue |
| Soaking method | Traditional paper wallpaper | Warm water or solution softens adhesive | Works best in small sections |
| Scoring and solution | Vinyl or painted wallpaper | The surface is perforated so that liquid can reach the glue | Prevents surface barrier issues |
| Steaming | Multiple layers or stubborn adhesive | Heat loosens glue for easier scraping | Effective but requires caution on drywall |
Removing wallpaper takes patience and the right method, but careful steps ensure clean walls ready for painting or redecorating ahead.
How to Repair Walls After Wallpaper Removal
It is normal to find some surface damage once the wallpaper comes off. Torn drywall paper, small gouges, nail holes, and seam marks are all common. Repairing them before you paint is what separates a professional-looking result from an amateur one.
- Inspect the Surface for Damage: After the wall is completely dry, examine it with a raking light held nearly parallel to it. This angle highlights imperfections, dents, or scratches that standard overhead lighting can miss.
- Fill Holes, Dents, and Gouges: Use lightweight drywall joint compound for anything larger than a nail hole. Apply with a 4-inch knife, feather the edges, let dry, and add a second thin coat if needed.
- Repair Torn Drywall Paper: For torn paper, spread a thin skim coat of joint compound over the area, sand smooth once dry, and seal before priming to create an even, paint-ready surface.
- Sand the Wall Smooth: Once all fills are dry, sand the wall with 120-grit sandpaper on a block. Wipe gently with a barely damp cloth to remove dust before priming.
- Apply a Quality Primer: Priming is essential. Use oil-based or shellac-based primer on damaged areas to seal properly, prevent uneven paint absorption, and stop bleed-through from old adhesive.
- Prepare Walls for Paint or New Wallpaper: After primer dries, inspect under raking light again, fill low spots, sand, and re-prime as needed. For wallpaper, seal with a sizing product to make future removal easier.
With the walls repaired, sanded, and properly primed, your surface is now ready for painting or new wallpaper. Taking these careful steps ensures a smooth, even finish and helps your project look polished and long-lasting.
The Bottom Line
Removing wallpaper without damaging the walls is all about preparation, patience, and the right techniques.
Small actions, like testing a corner or scraping at a low angle, prevent damage and make the process more manageable. Knowing how to handle different wallpaper types, adhesives, and layers saves time and keeps walls intact.
Taking the extra moments to repair and prime after removal guarantees a polished, long-lasting finish. Keeping these tips in mind transforms a challenging task into a straightforward project.
Ready to give your walls a fresh start? Save this page and follow the steps for damage-free results.
Frequently Asked Questions
What is the Easiest Way to Remove Wallpaper?
Strippable wallpaper peels off easily if primed. Otherwise, use warm water and fabric softener for a simple, DIY removal without chemicals or steam.
Does vinegar actually help remove wallpaper?
Yes. A 1:1 mix of white vinegar and warm water works well as a soaking solution, particularly on older adhesives.
How Long Does It Take to Remove Wallpaper from a Room?
A standard bedroom with one layer of strippable wallpaper takes roughly 3 to 5 hours. Rooms with multiple layers can take a full day or more, with each additional layer adding significant time.
Can wallpaper removal damage drywall?
It can. The two main risks are over-wetting, which weakens the paper face of the drywall, and aggressive scraping at too steep an angle.