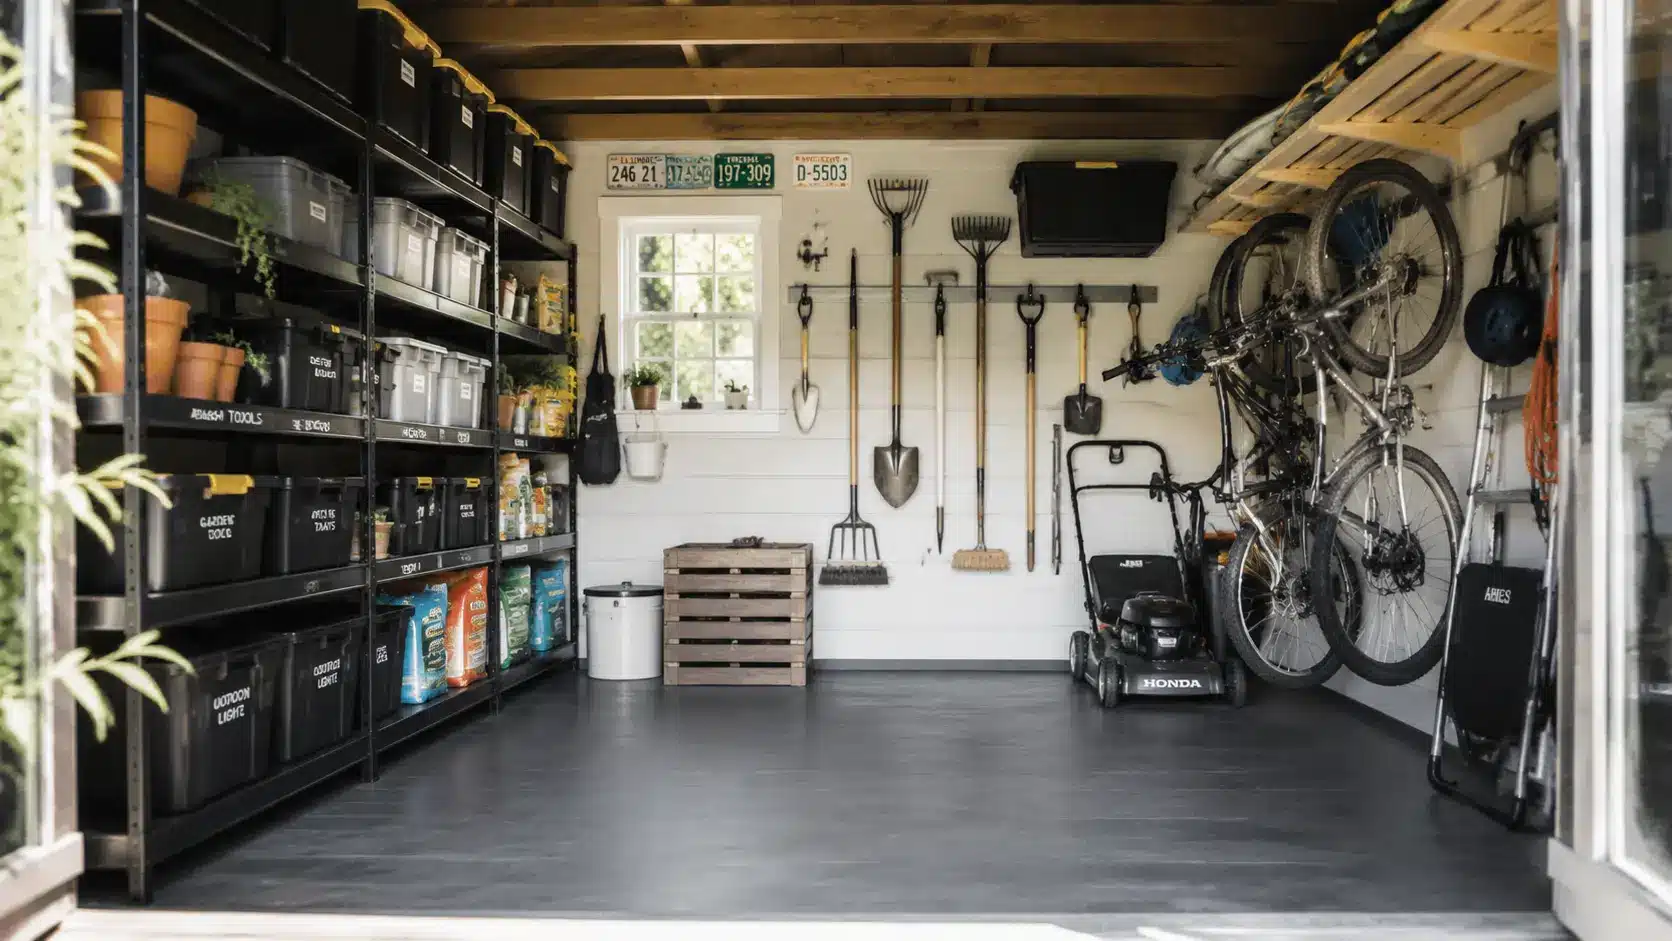

A shed can go from useful to useless fast. Tools pile up, bags get stacked in corners, and finding anything becomes a game of guesswork.
The good thing is, getting your shed organized is not as hard as it looks. With the right storage setup, you can fit more, find things faster, and actually enjoy using your shed again.
From wall-mounted solutions to smart storage hacks, these ideas cover every shed type and budget, including small shed organization ideas that squeeze the most out of tight spaces.
Before You Start: How to Organize a Shed Properly
Taking a few preparation steps first will make the entire organization process faster, easier, and more effective.
- Empty the Shed: Before adding any storage system, take everything out. This gives you a clear view of the space you are working with and makes it easier to clean the floors and walls.
- Declutter and Remove Unused Items: Go through each item and decide what stays and what goes. If you have not used something in over a year, it probably does not need to take up space.
- Sort everything into categories: garden tools, power tools, hardware, and seasonal decorations. This step makes the organizing process much easier.
- Measure Your Available Storage Space: Take measurements of your walls, ceiling height, and floor space. Knowing your exact dimensions helps you buy or build the right storage solutions.
- Create Functional Storage Zones: Assign a specific area for each category. For example, one wall for garden tools, one corner for power tools, and a shelf section for hardware and supplies.
With a clean, organized plan in place, you will be ready to implement storage solutions that keep your shed functional and clutter-free.
Wall Storage Ideas
Wall storage is one of the fastest ways to free up floor space in any shed. Mounting tools and supplies on your walls keeps everything visible, accessible, and off the ground.
1. Install a Large Pegboard for Frequently Used Tools
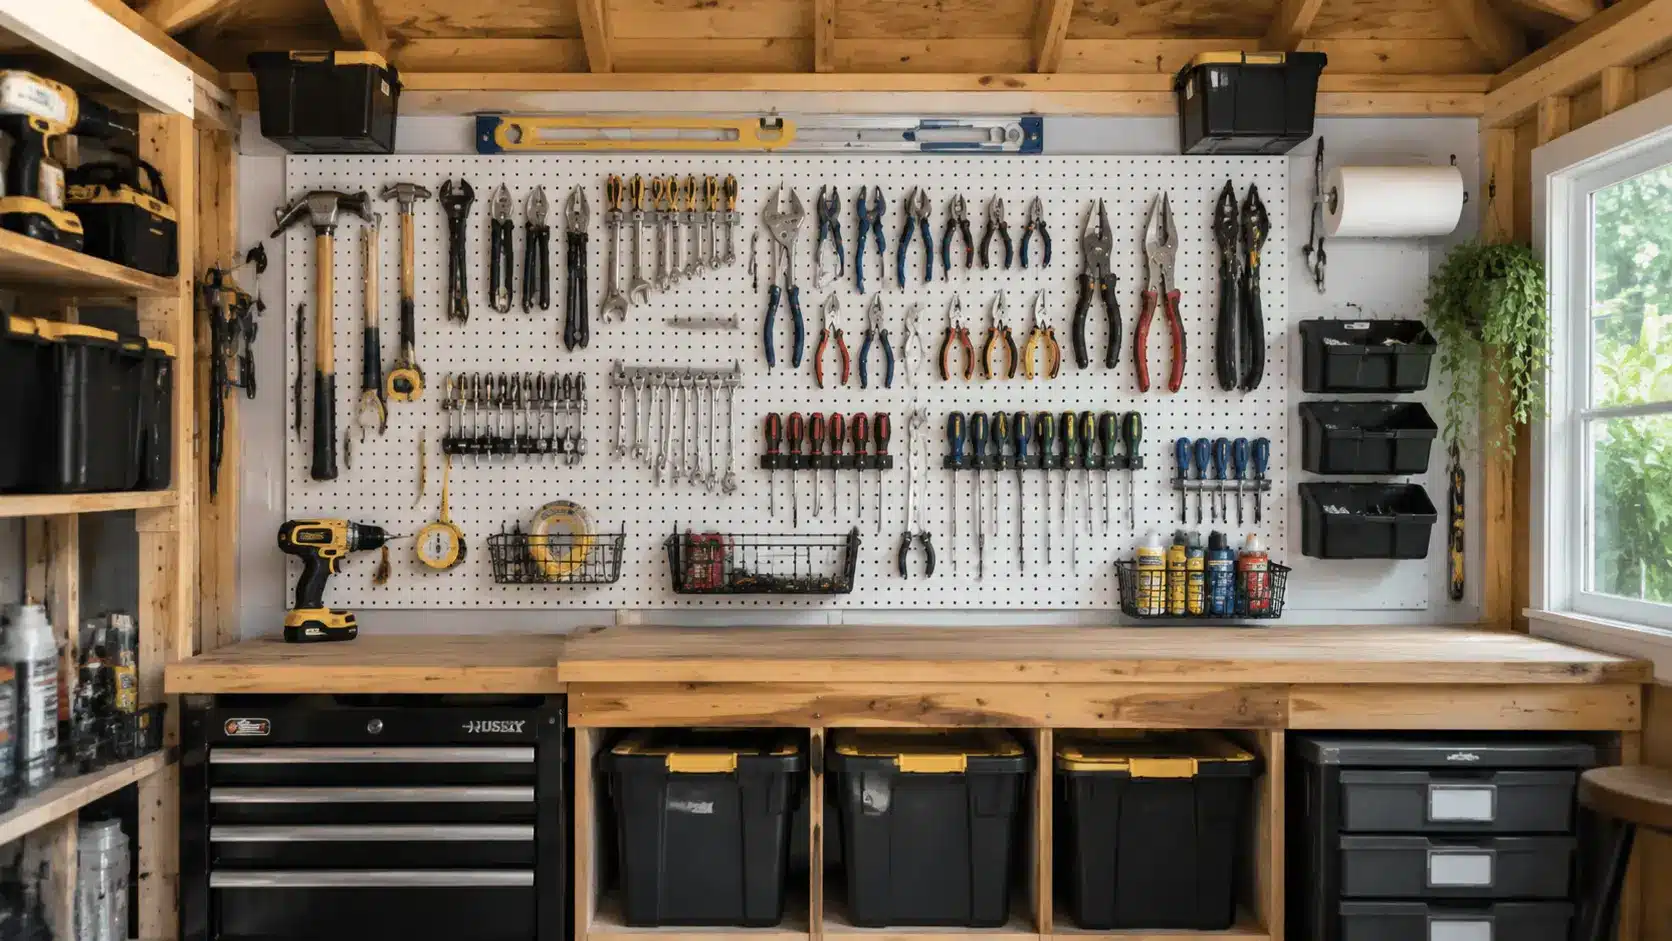
Pegboards are one of the most practical wall storage options you can add to a shed. Mount one on a main wall and use hooks to hang hand tools, small baskets, and accessories so everything stays visible and within reach.
- Go with at least 1/4-inch thick hardboard for sheds and heavy-use areas
- Use color-coded hooks by category
- Leave a gap behind the board for hooks to slide in
2. Use Heavy-Duty Utility Hooks
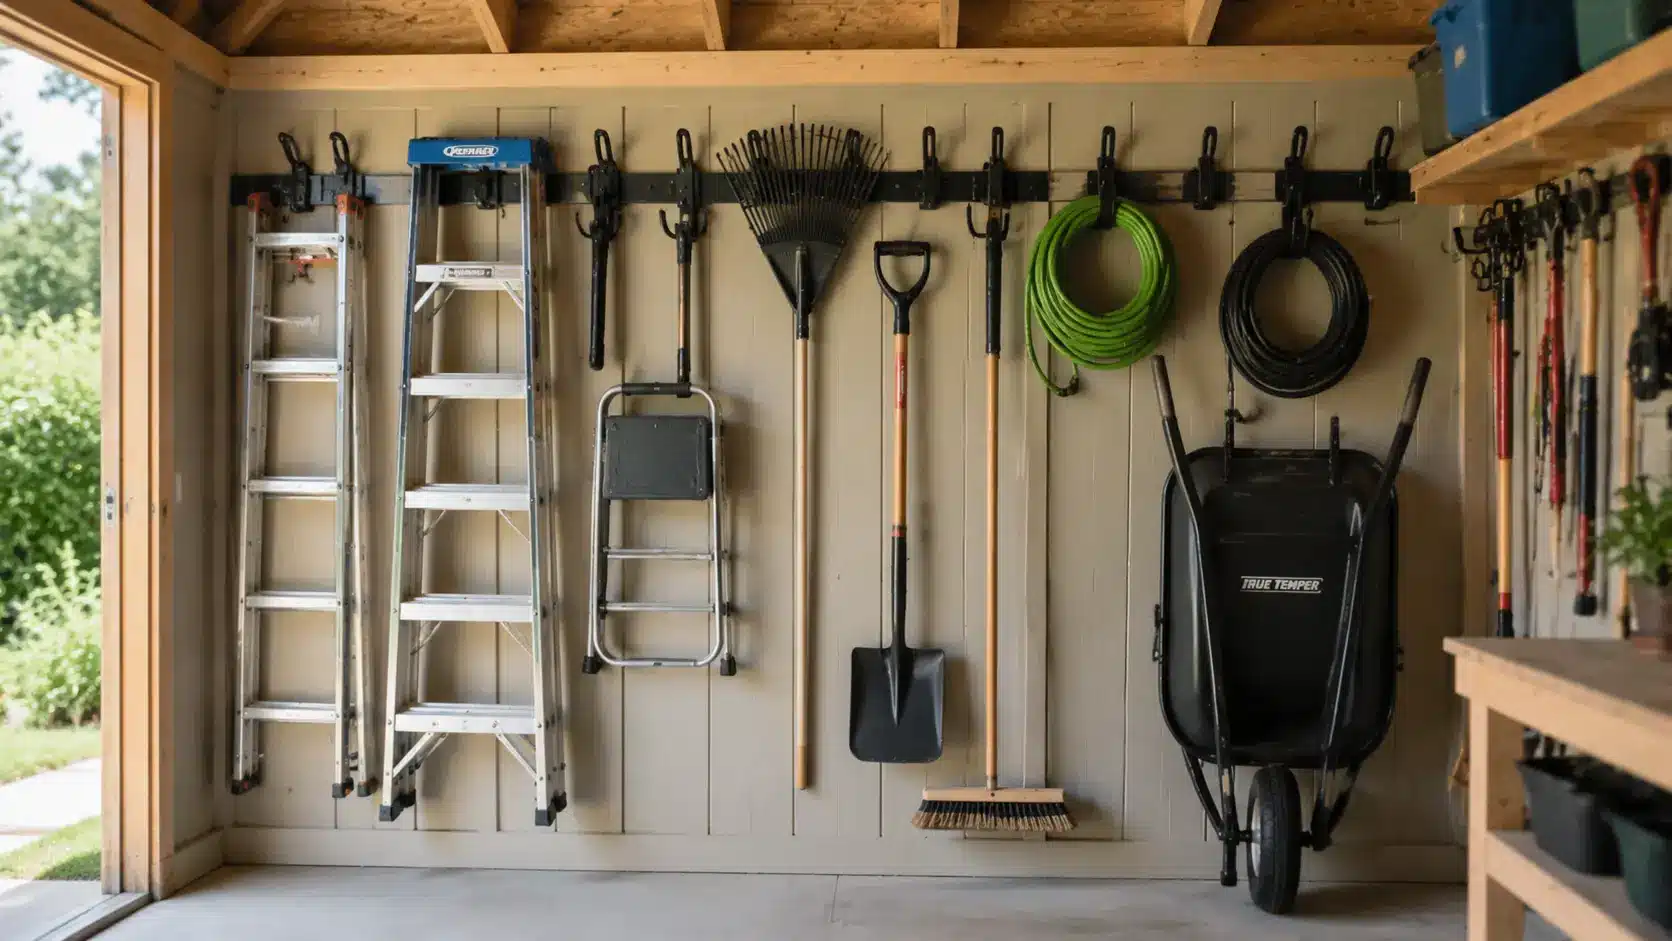
For heavier items like ladders, hoses, and large tools, heavy-duty hooks mounted directly into wall studs provide strong and reliable support.
- Look for hooks rated at 50 pounds or more
- Mount at a comfortable lifting height
- Use rubberized hooks to protect handles
3. Add Magnetic Tool, Holders
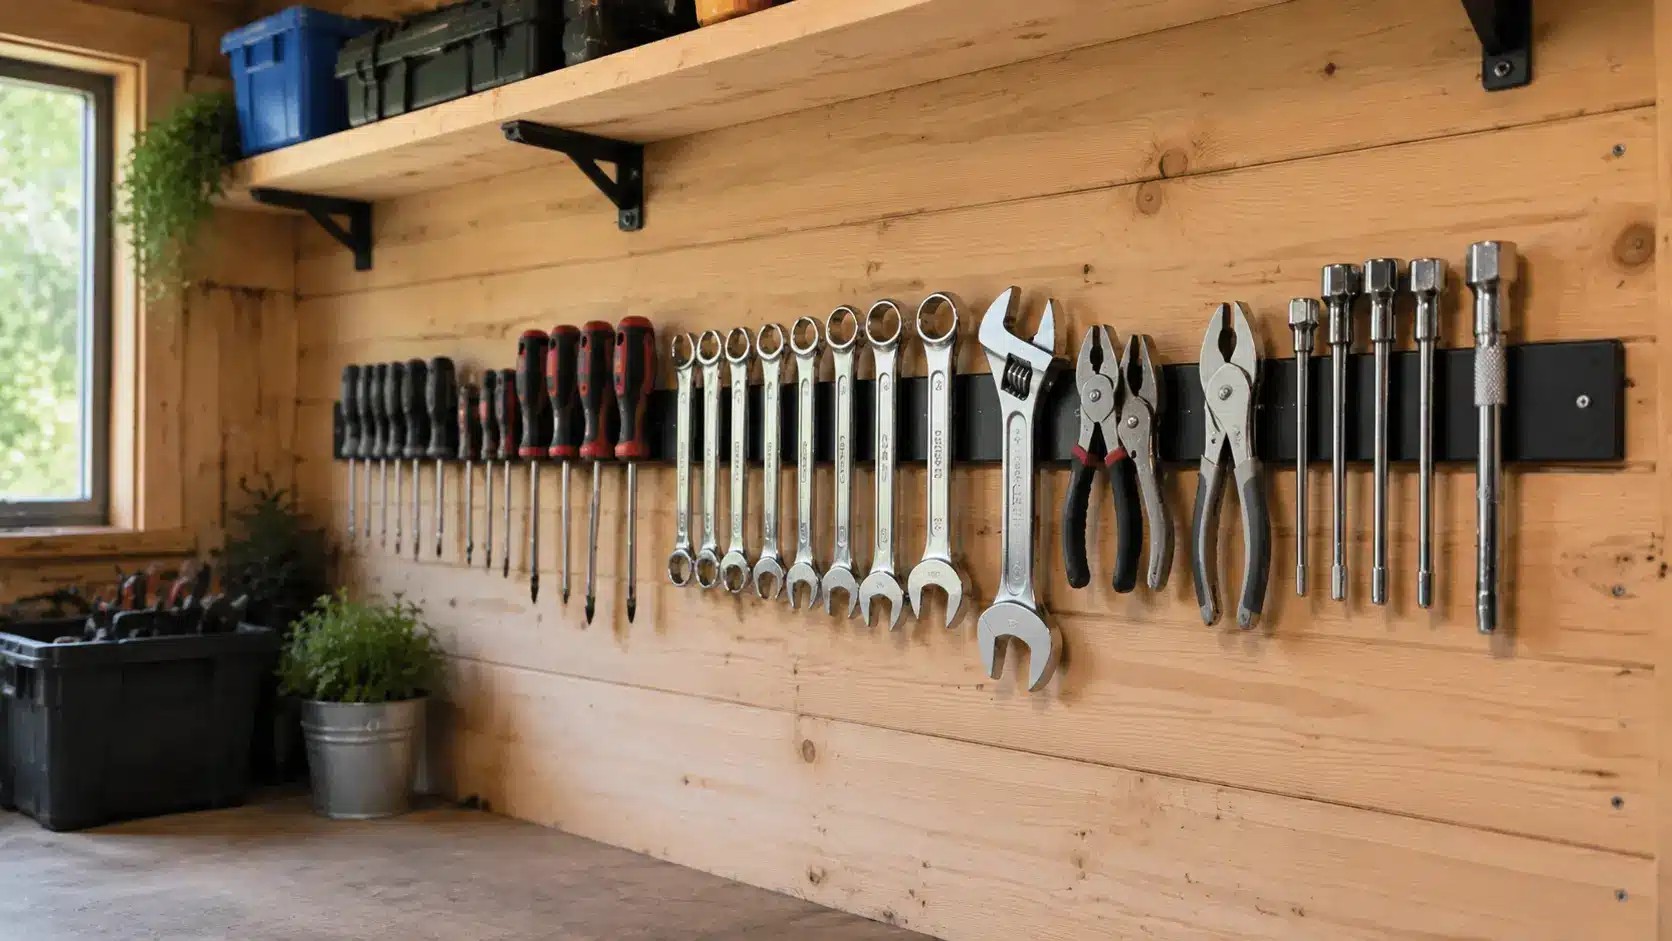
Magnetic strips are great for metal tools like chisels, screwdrivers, and wrenches. They keep tools organized, easy to grab, and completely off the work surface.
- Choose a heavy-duty strip with strong pull strength
- Mount at eye level for fast access
- Wipe clean occasionally to maintain grip
4. Install Slatwall Storage Panels
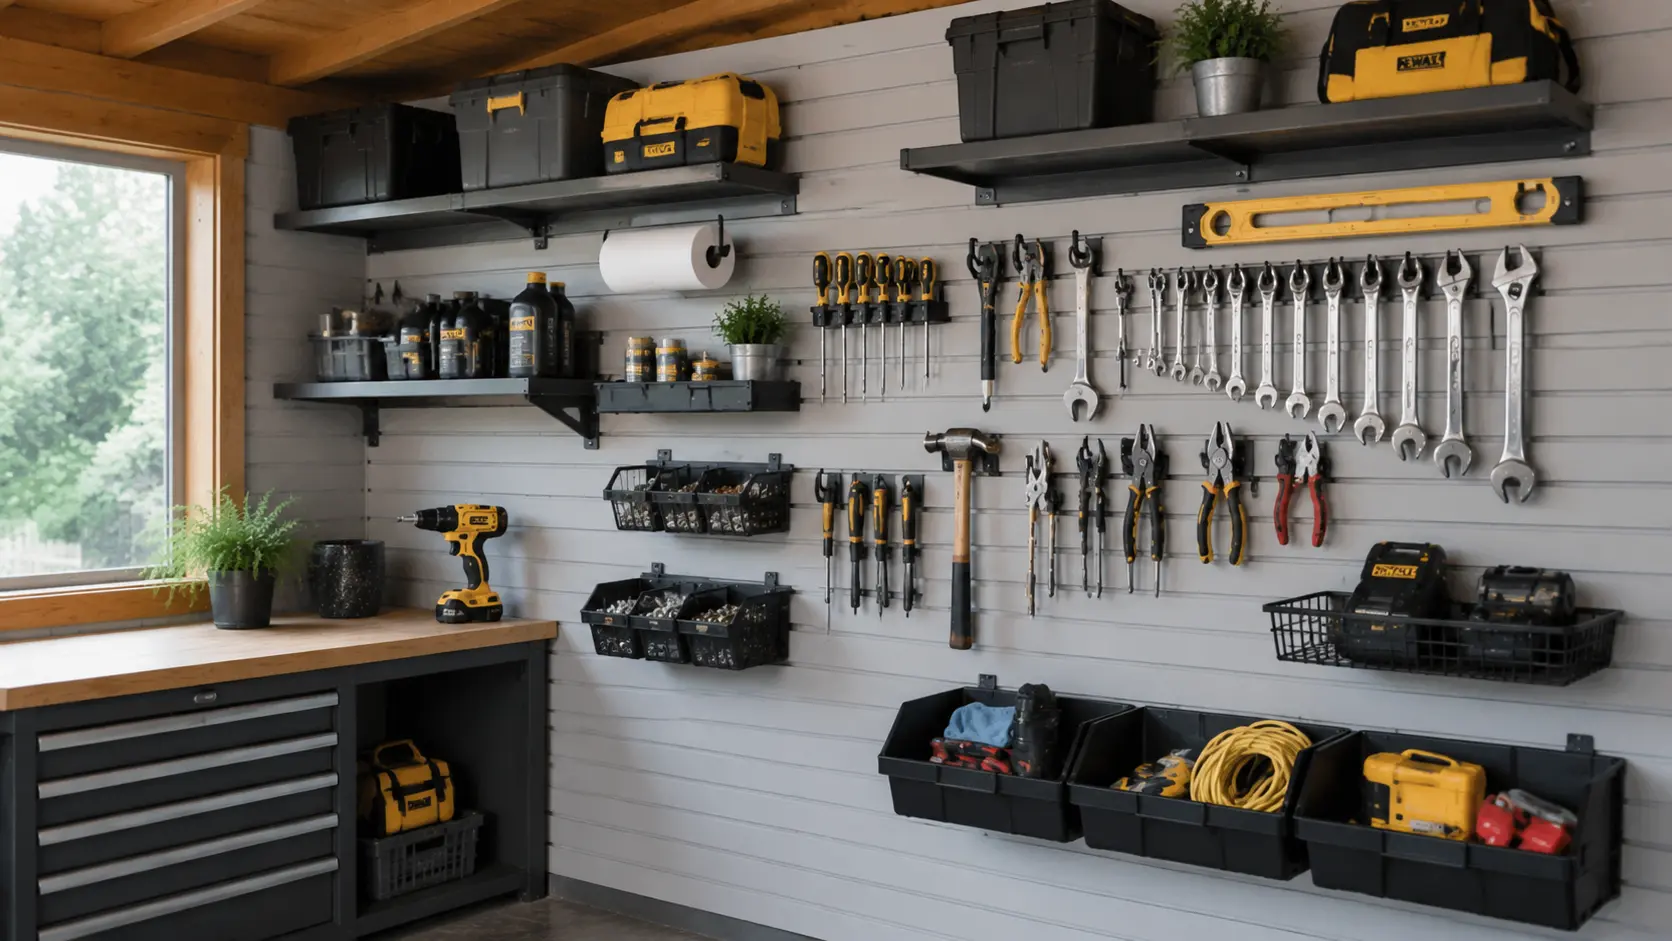
Slatwall panels let you rearrange hooks, bins, and shelves without drilling new holes every time. They are flexible and work well in sheds where your storage needs tend to change.
- Choose high-density fiberboard or PVC panels
- Buy a starter kit with mixed hook sizes
- Cover a full wall for maximum flexibility
5. Hang Garden Tools Vertically
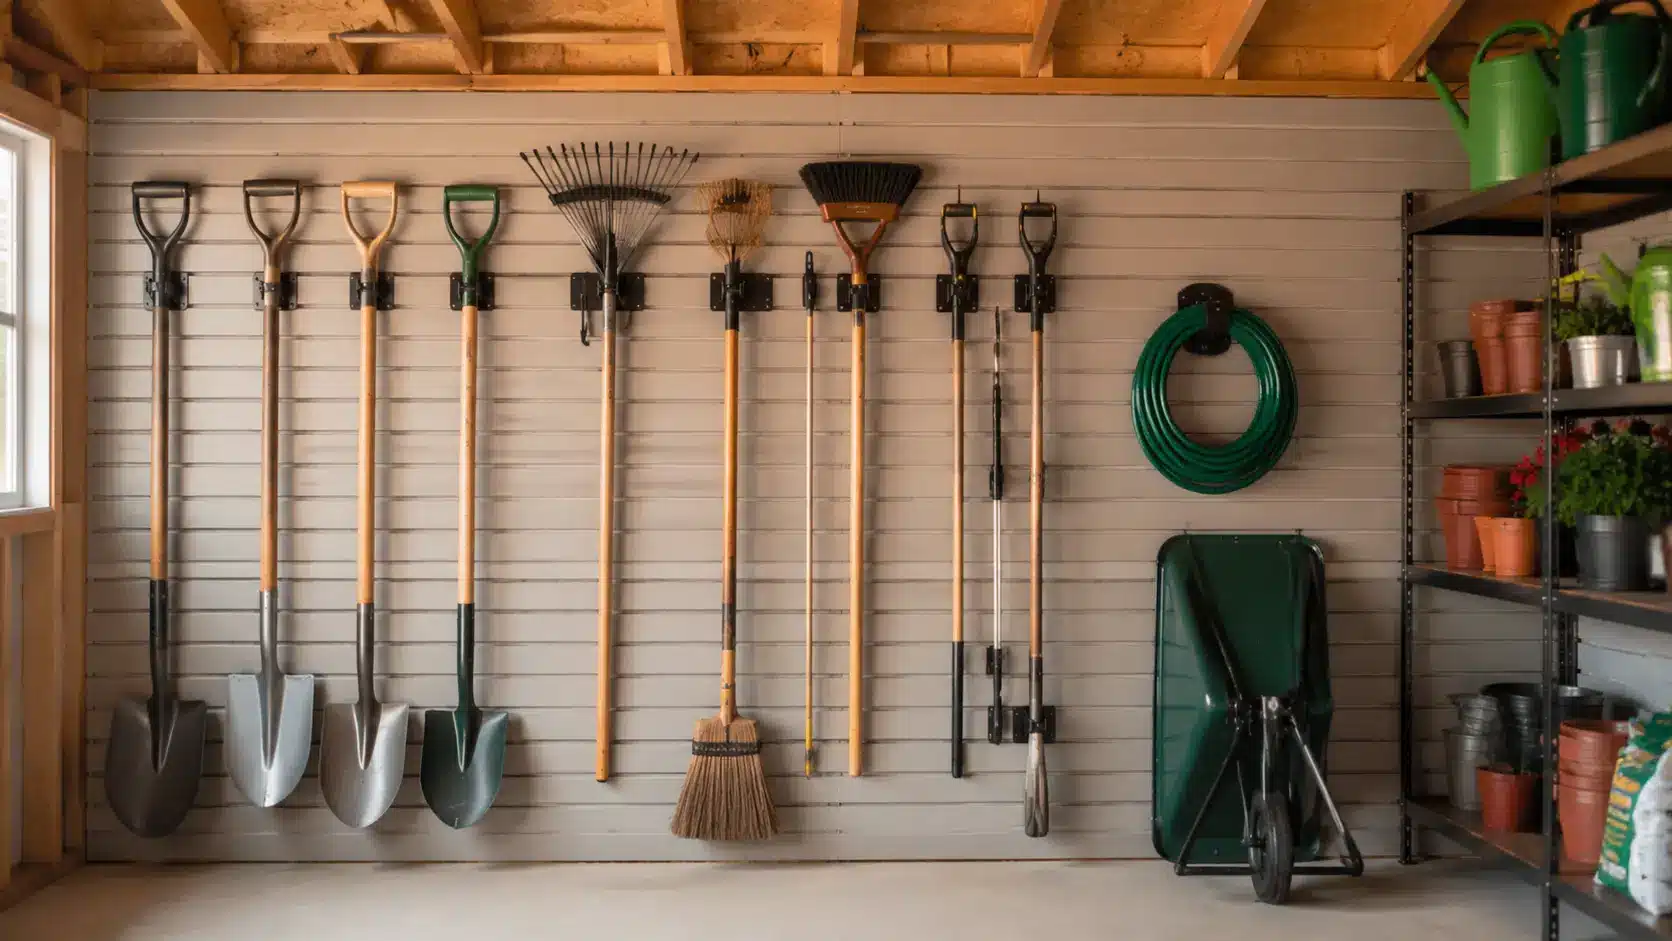
Rakes, shovels, and brooms take up a lot of floor space when leaning against walls. Vertical wall-mounted tool holders keep them upright, secure, and completely out of the way.
- Use spring-loaded mounts that grip handles automatically
- Space holders so tool heads do not clash
- Group similar tools together
6. Use Wall-Mounted Tool Racks
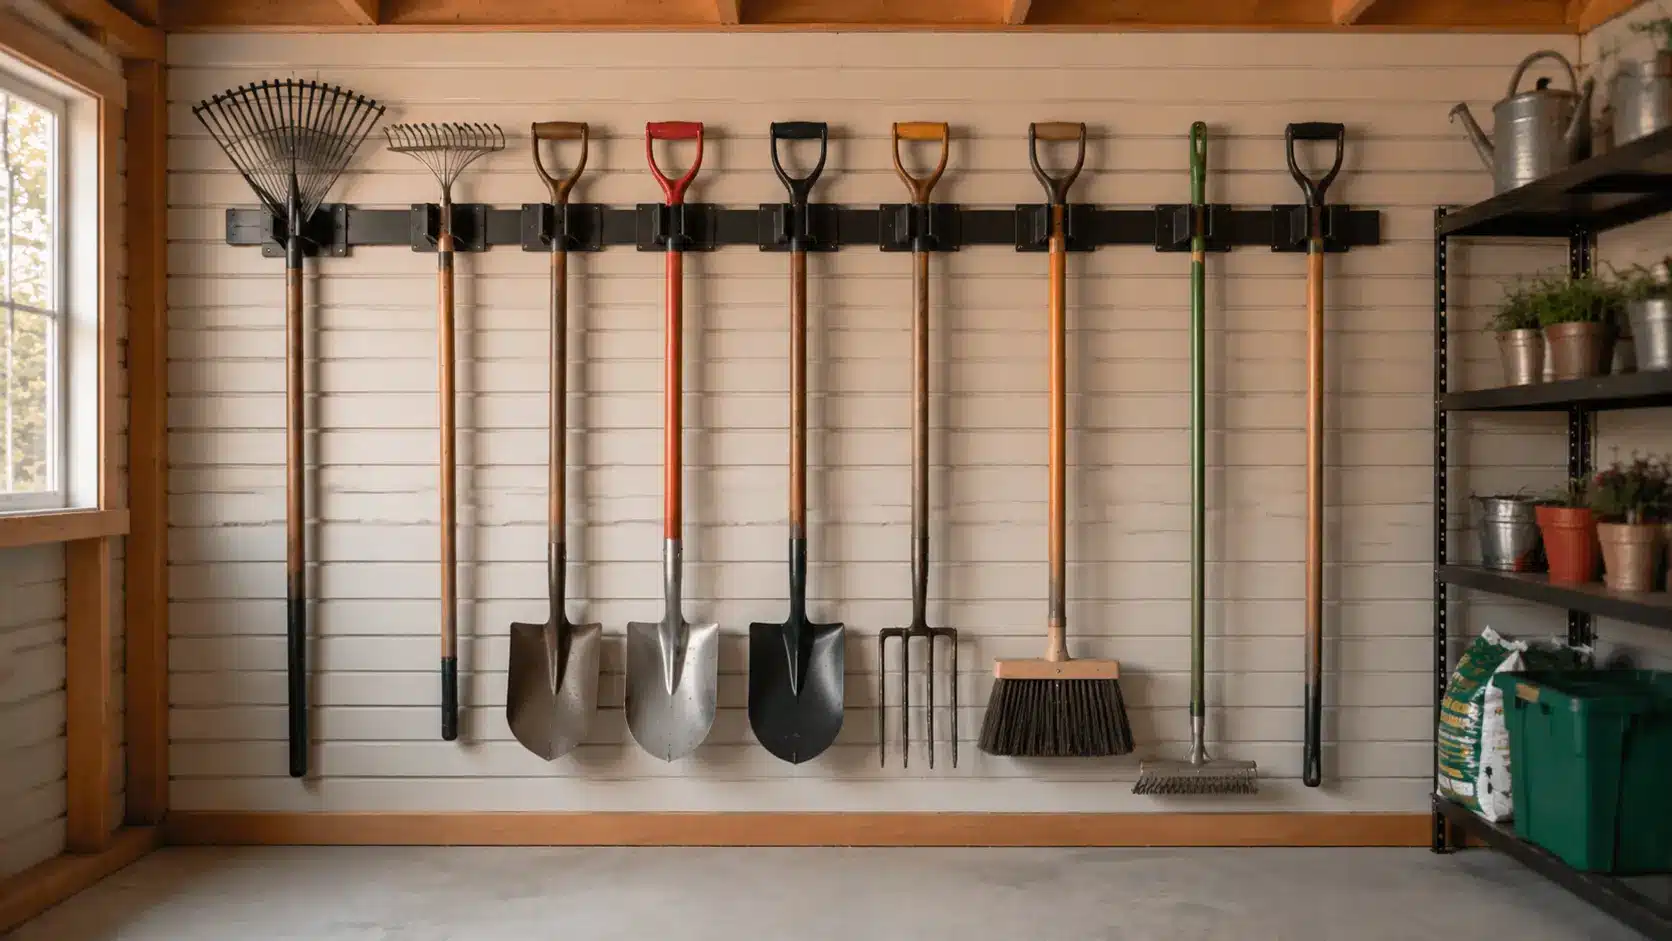
Pre-made wall racks designed for long-handled tools are affordable and easy to install. They hold multiple tools in one spot and free up a noticeable amount of floor space right away.
- Look for racks that hold at least five tools
- Mount near the door for easy grab-and-go
- Choose adjustable arms for different handle sizes
7. Store Extension Cords on Wall Hooks
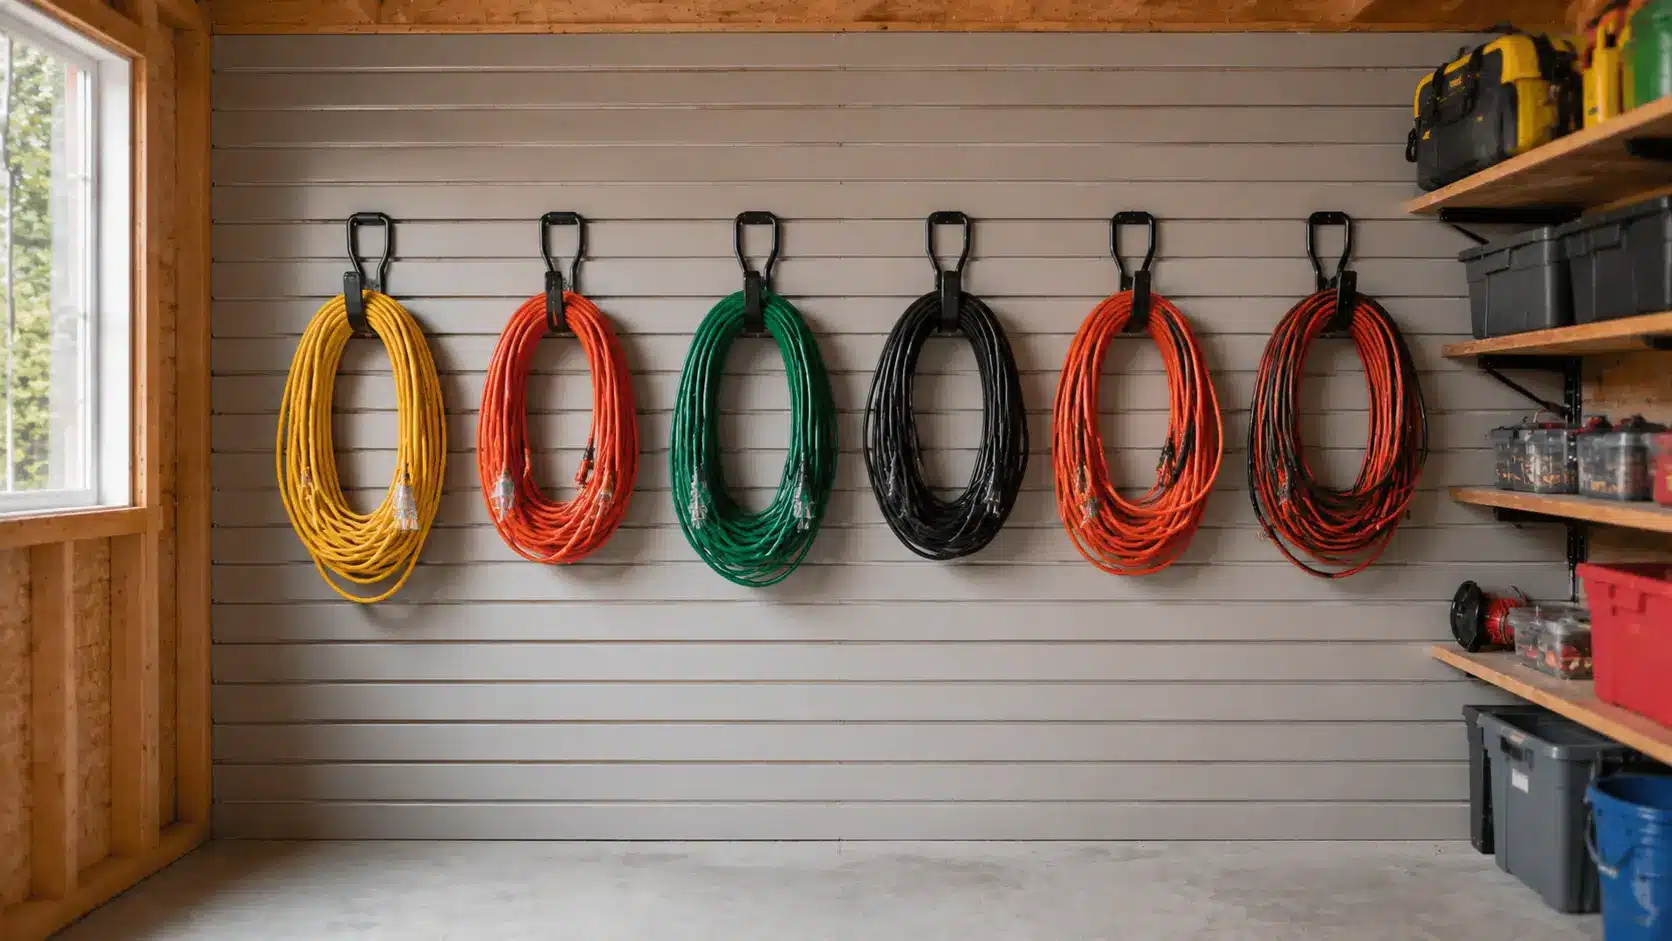
Wrapping cords neatly and hanging them on individual hooks or cord holders prevents tangling and makes them easy to grab when needed. It also protects cords from damage caused by sitting on damp floors.
- Use large J-hooks or dedicated cord winders
- Label each hook with the cord length
- Mount at shoulder height for easy access
8. Mount Baskets for Small Supplies
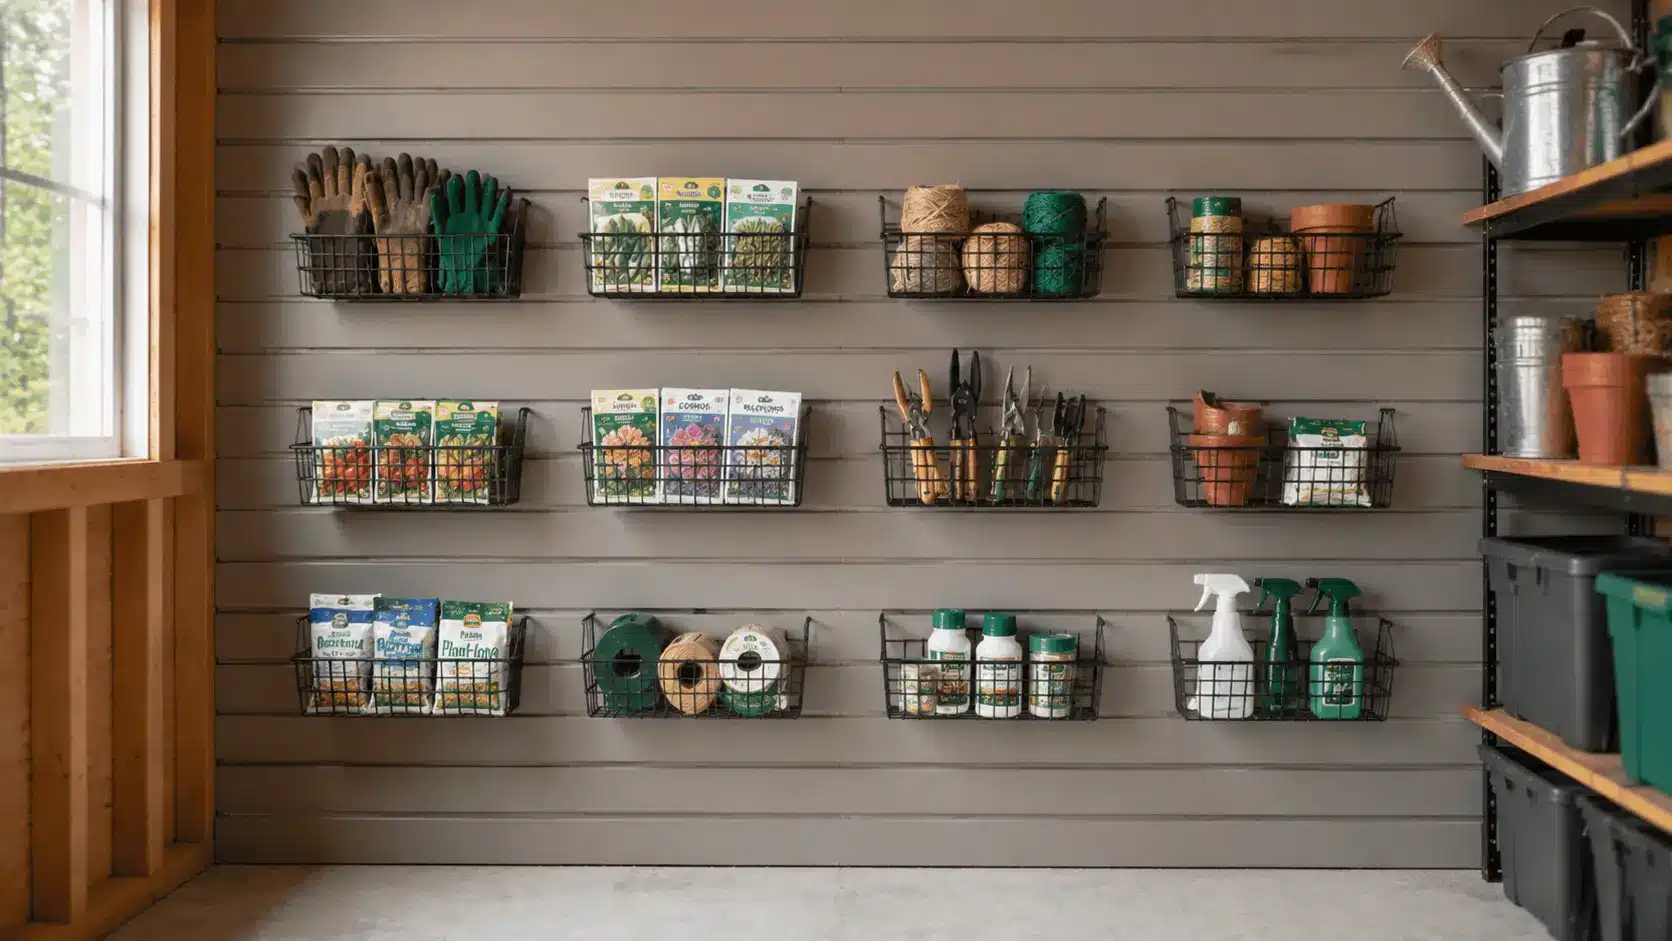
Wire or mesh baskets mounted on the wall are ideal for storing gloves, seed packets, small bottles, and other loose items that would otherwise get lost on a shelf.
- Choose open-front baskets for easy grabbing
- Group by task: gardening, painting, hardware
- Match anchors to the basket’s loaded weight
Shelving Ideas
Good shelving turns empty wall space into organized storage. The right shelves make it easier to sort items by category, see what you have, and keep your shed tidy over time.
9. Install Adjustable Shelving Units
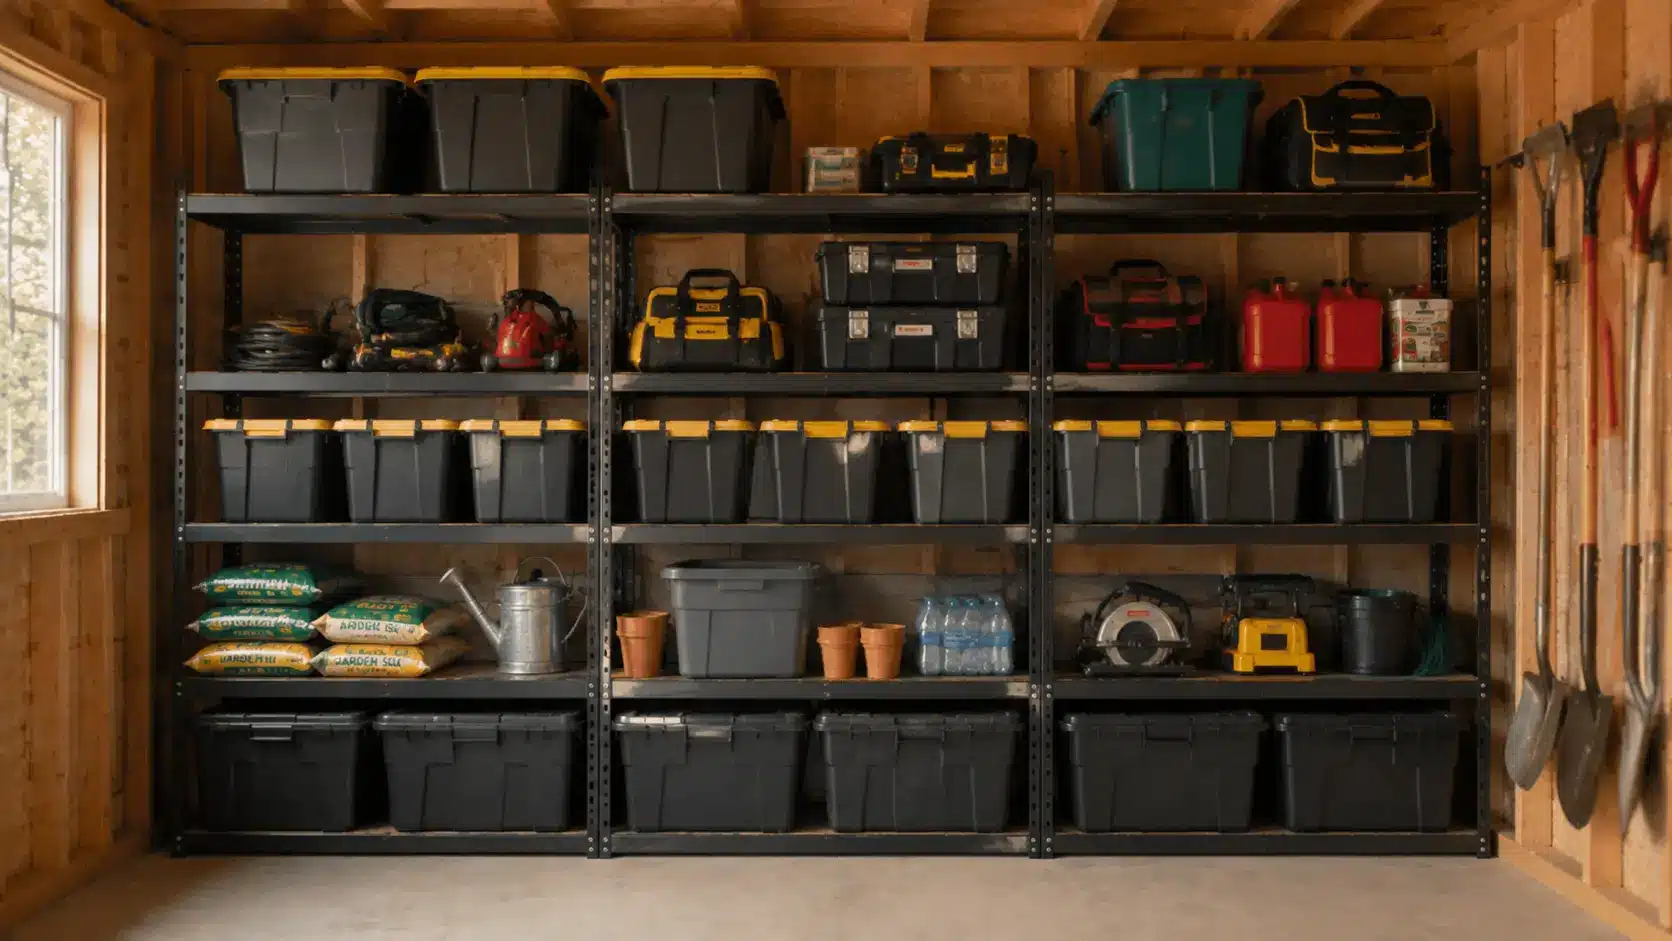
Adjustable shelves let you change the height between rows as your storage needs shift. They are especially useful if you store items of different sizes and do not want to be locked into a fixed layout.
- Choose metal shelving rated at 200 pounds per shelf
- Set lower rows deeper apart for taller items
- Reassess heights once a year
10. Add Floating Shelves Above Work Areas
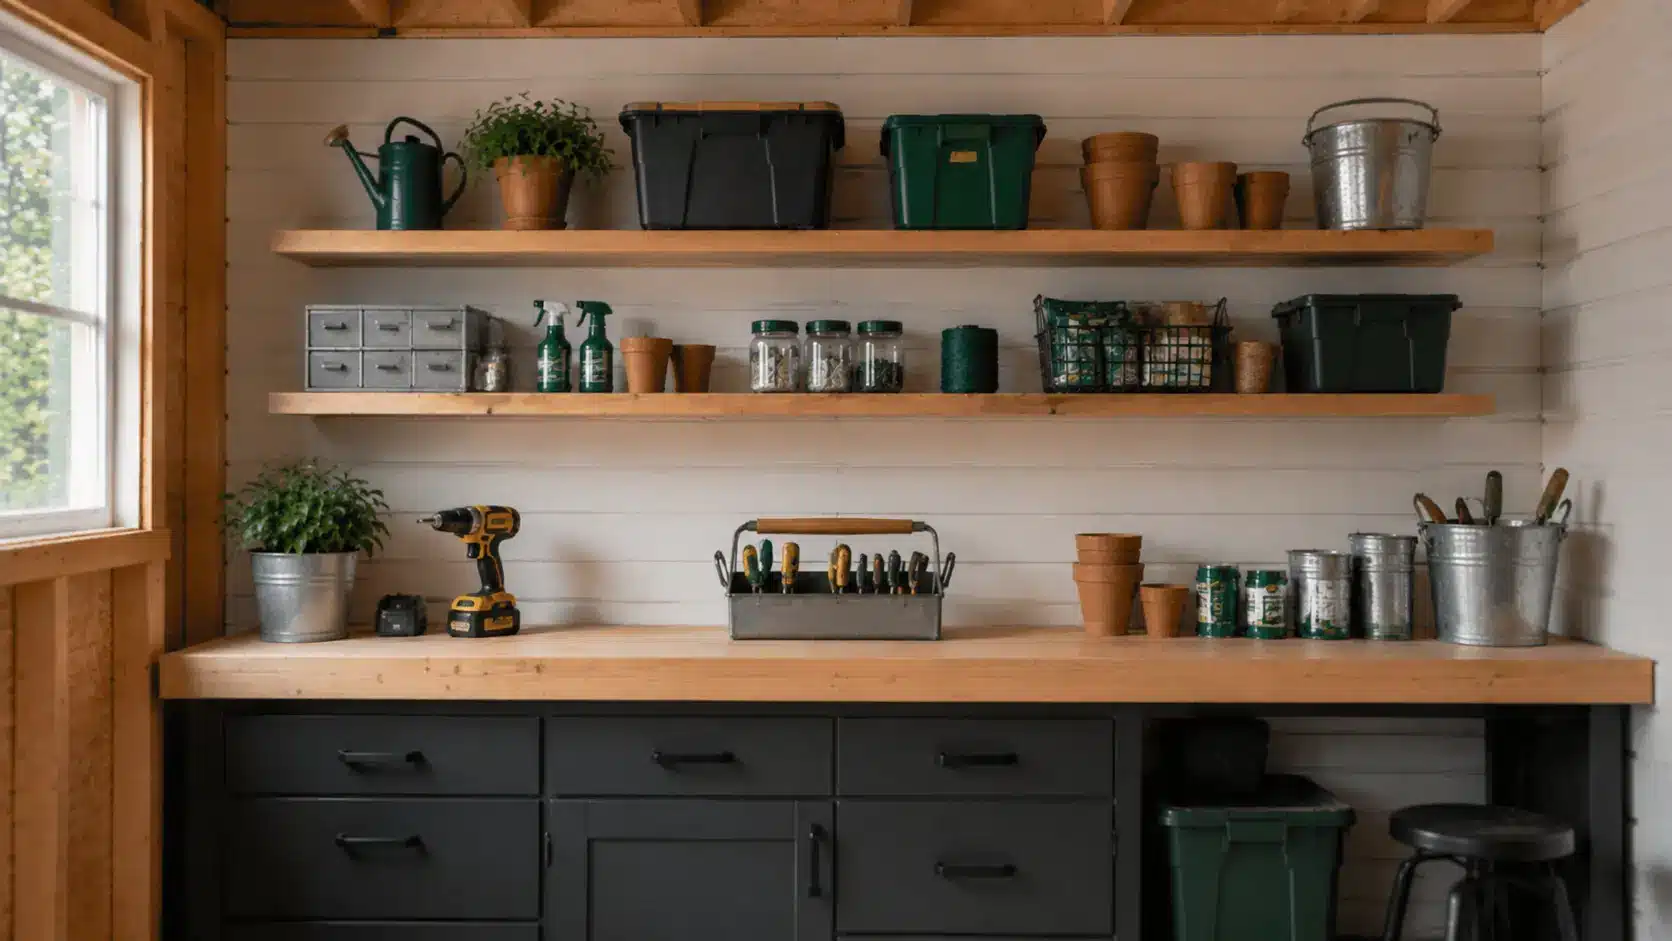
The wall space above a workbench is often unused. Installing floating shelves here keeps frequently needed supplies close without eating into bench space below.
- Use heavy-duty brackets rated for your load
- Keep shelves 10 to 12 inches deep for most shed supplies
- Put the most-used supplies on the lowest shelf
11. Use Corner Shelving to Maximize Space
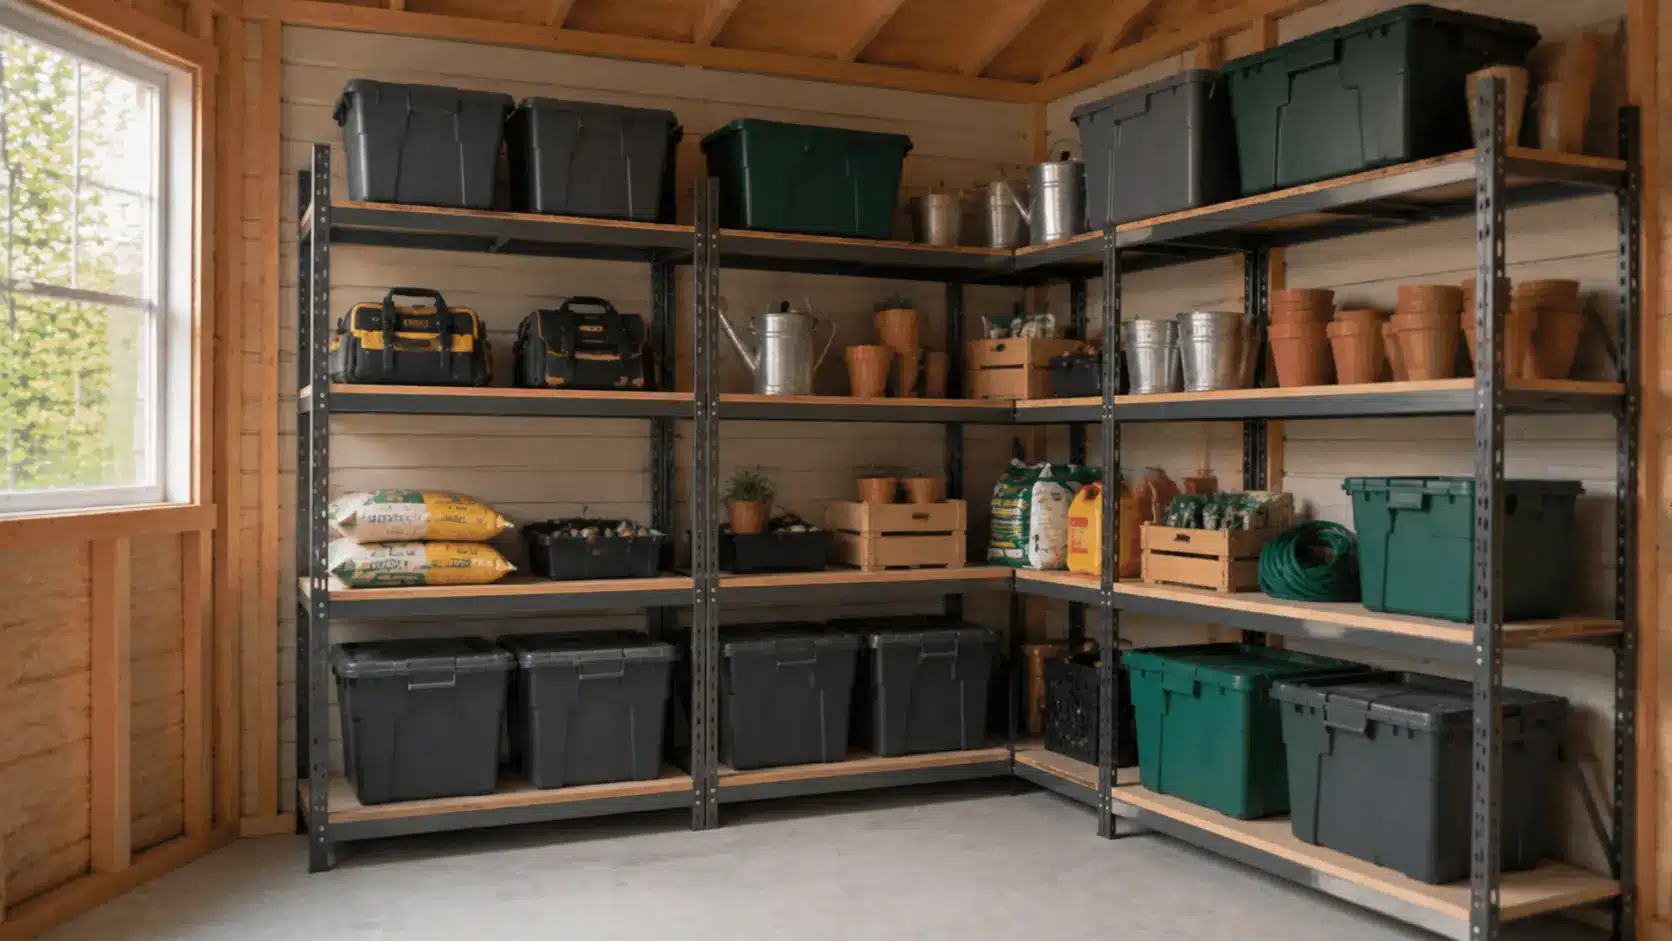
Corner Space is almost always wasted in sheds. Corner shelves fill that gap and add extra storage without touching the main wall space, which is better used for tools and racks.
- Triangular shelves fit corners better than square ones
- Use corners for less-used or seasonal items
- Stack multiple levels for more capacity
12. Build Floor-to-Ceiling Storage Shelves
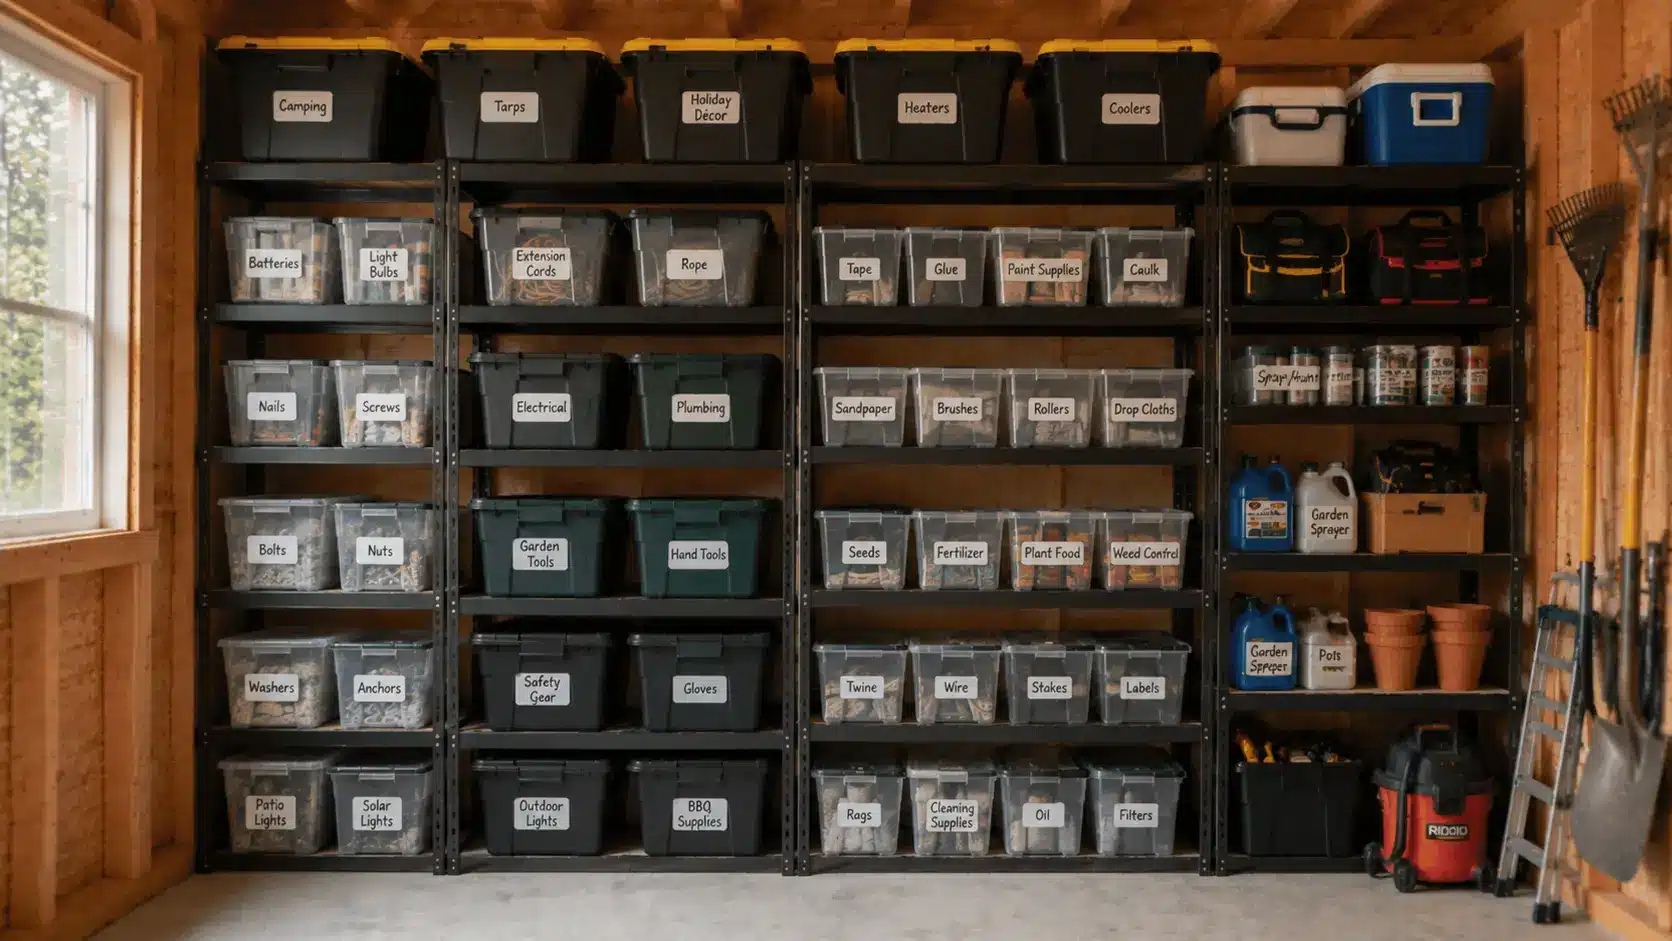
Floor-to-ceiling shelves use the full height of the wall and give you the most storage capacity of any shelving option. They work especially well along the back wall of a shed.
- Use two-by-four lumber for sturdy uprights
- Keep heavier bins on the bottom three shelves
- Store a step stool nearby for upper shelf access
13. Use Wire Shelving for Better Visibility
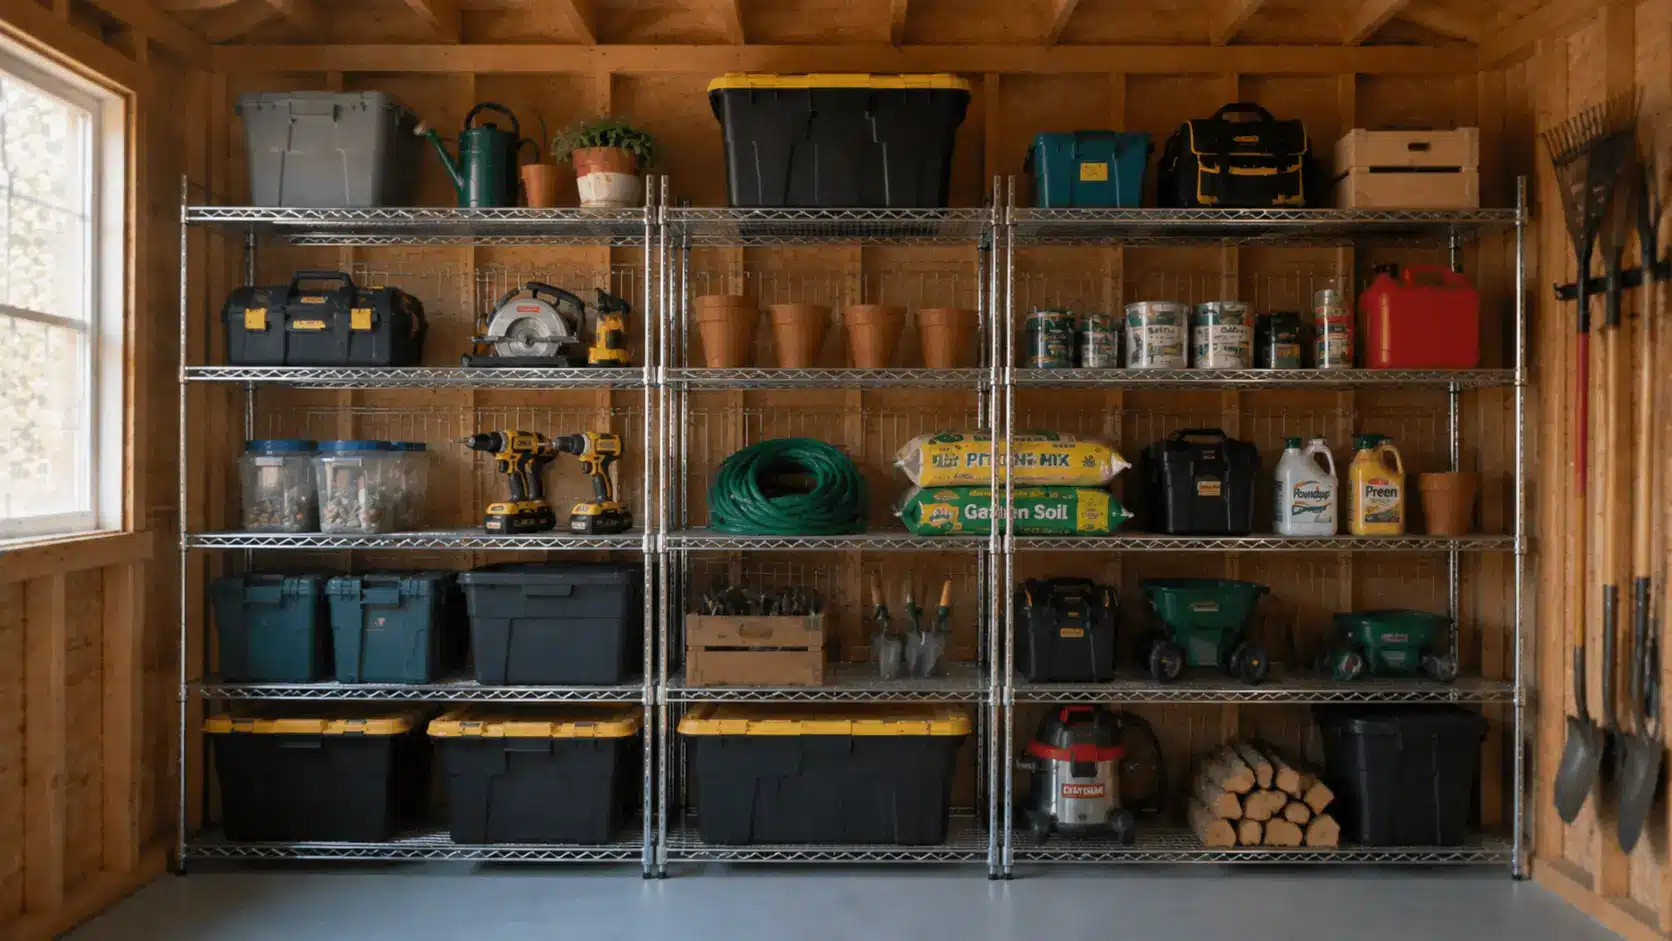
Wire shelves allow air to circulate and let you see items stored on them from multiple angles. They work well for bins, containers, and tools where airflow and visibility both matter.
- Choose coated wire to prevent rust
- Add liners on levels holding small items
- Easy to wipe down after gardening use
14. Create Dedicated Shelves for Seasonal Items
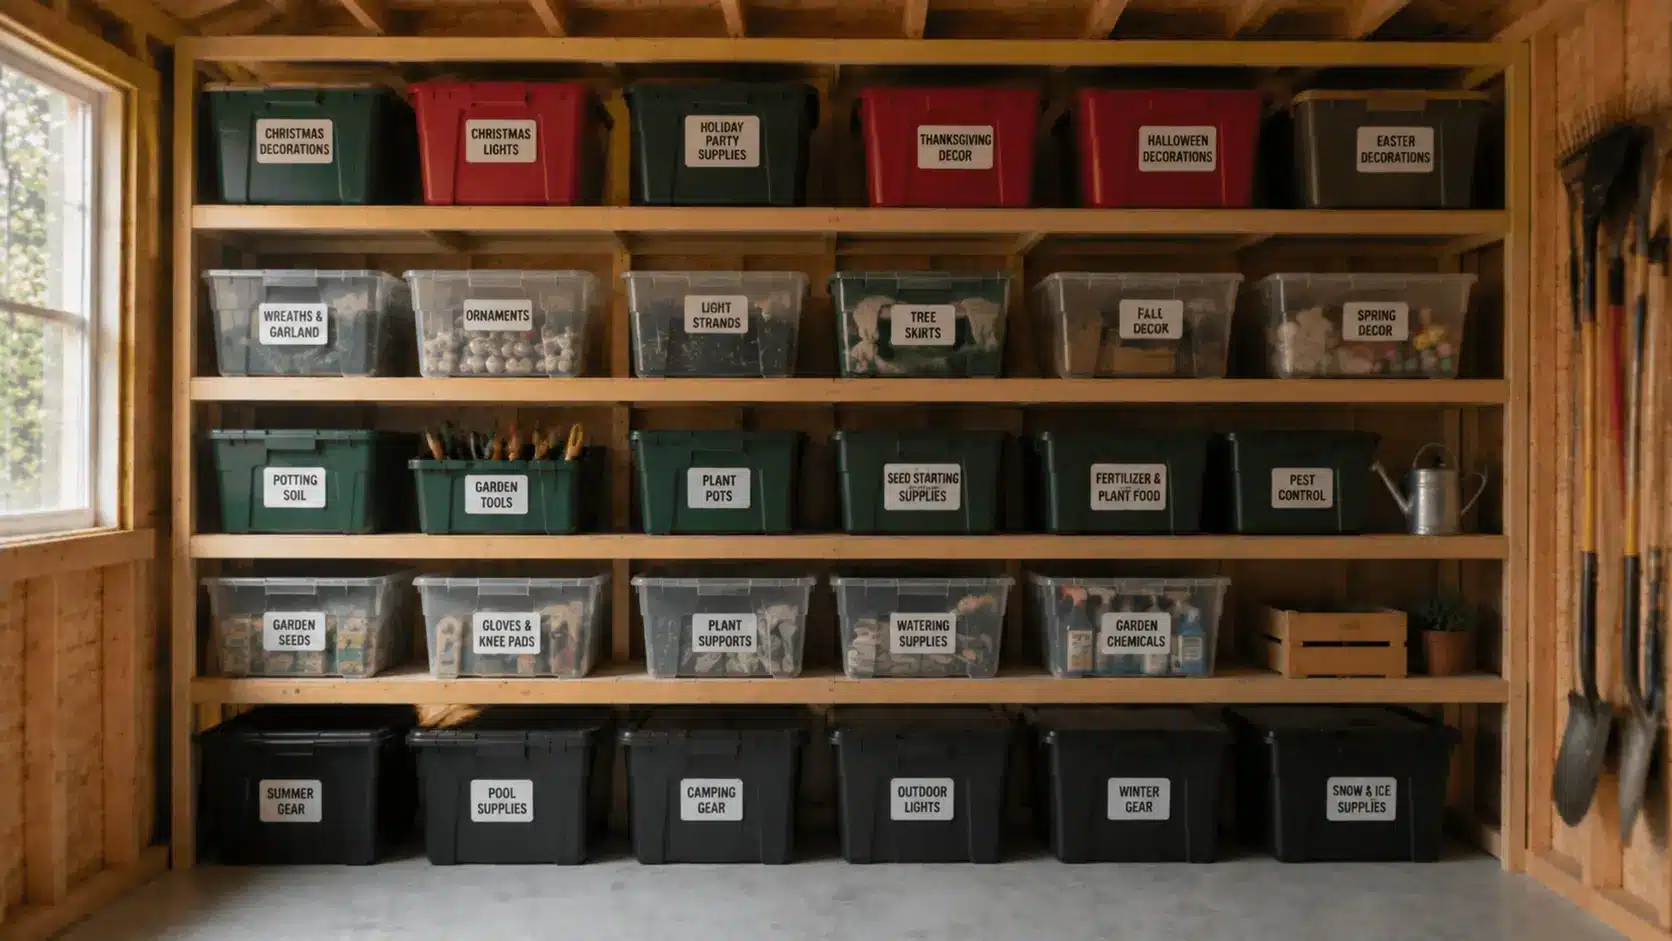
Setting aside one shelf section for seasonal items keeps them contained and easy to find when the time comes. It also prevents seasonal clutter from spreading into the rest of your storage.
- Use labeled bins so items always return to the same spot
- Place seasonal shelves higher up
- Rotate bins at the start of each season
Ceiling and Overhead Storage Ideas
The ceiling is the most overlooked storage area in most sheds. Overhead space is space for items you do not reach for every day, and using it well keeps your walls and floors free.
15. Install Overhead Storage Racks
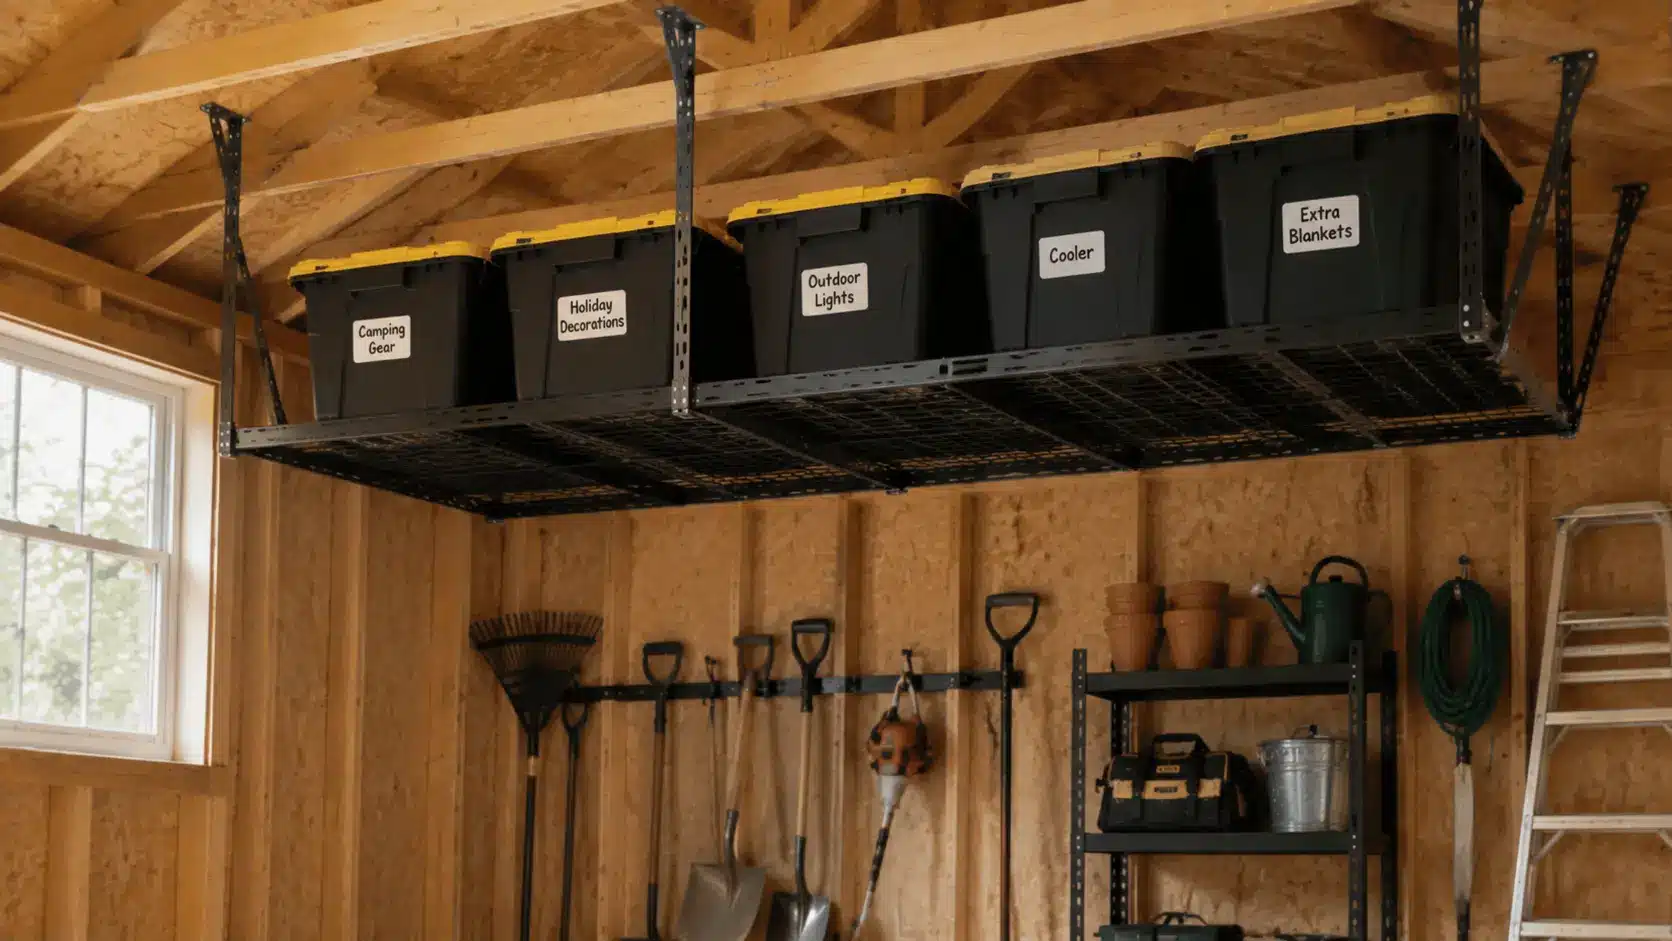
Ceiling-mounted racks are ideal for storing bins and totes you do not need regularly. They keep items off the floor and shelves, freeing up the most-used storage zones below.
- Choose racks rated for at least 400 pounds for reliable shed storage
- Leave two feet of clearance below the rack
- Use matching bins for a tidy overhead setup
16. Build a Storage Loft
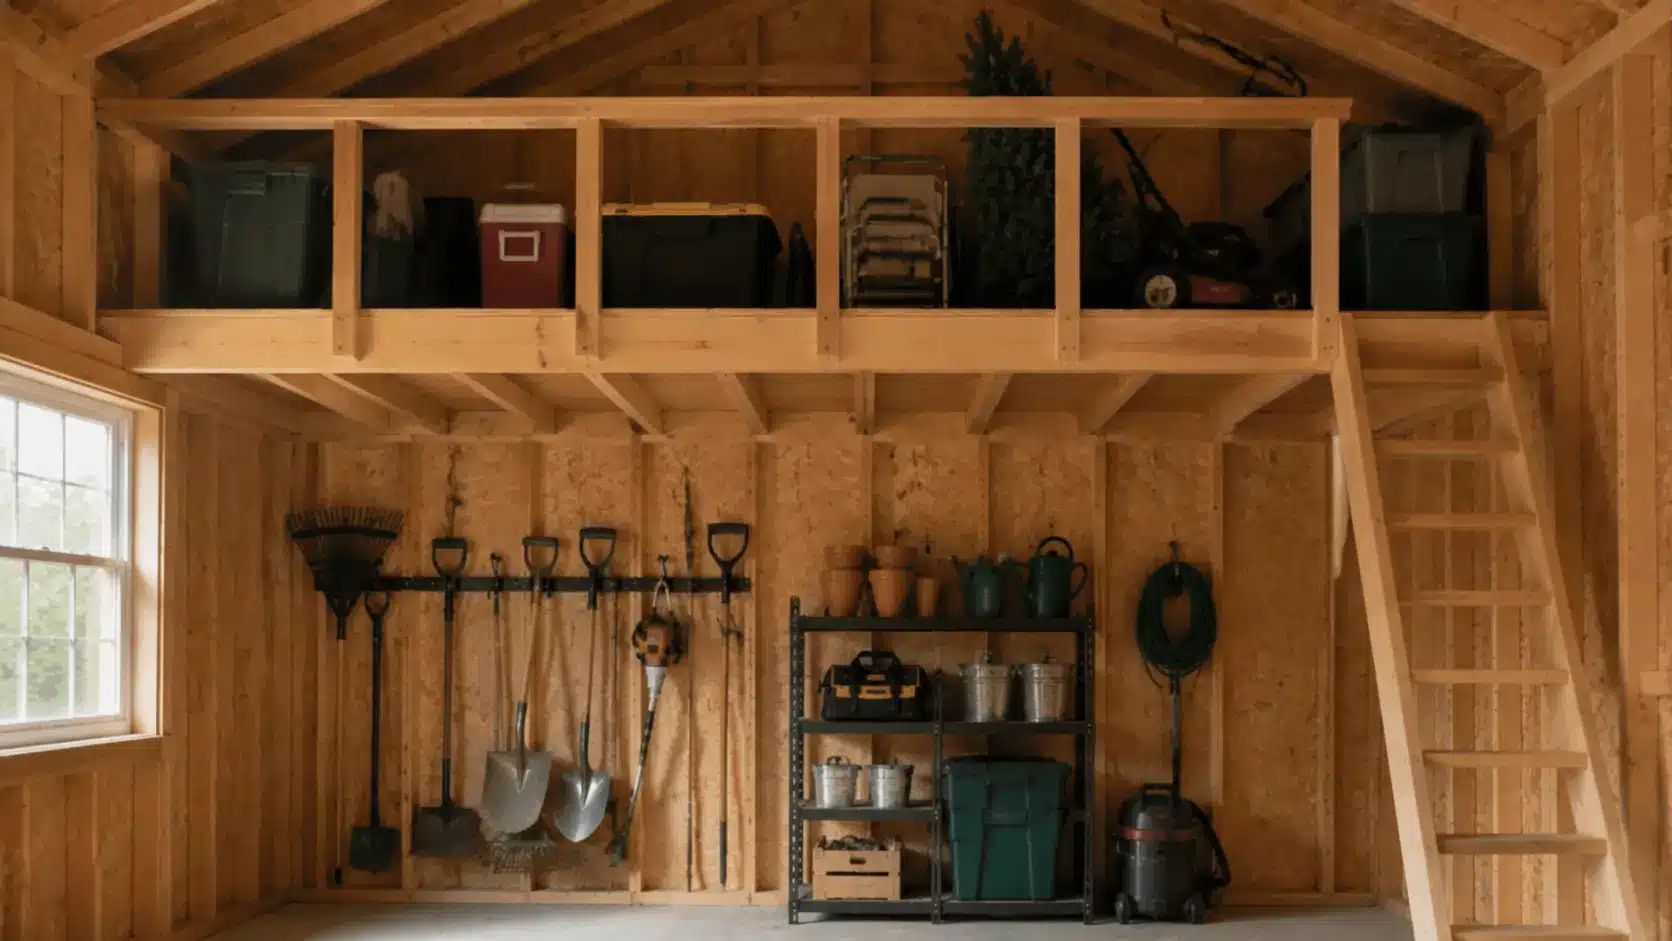
If your shed has enough ceiling height, a simple loft built above head level adds a large amount of storage space for bulky or rarely used items.
- You need enough total ceiling height to allow at least six feet of clearance below the loft floor for safe movement
- Use pressure-treated lumber for the frame
- Add a fixed ladder or pull-down steps for safe access
17. Store Lumber Overhead
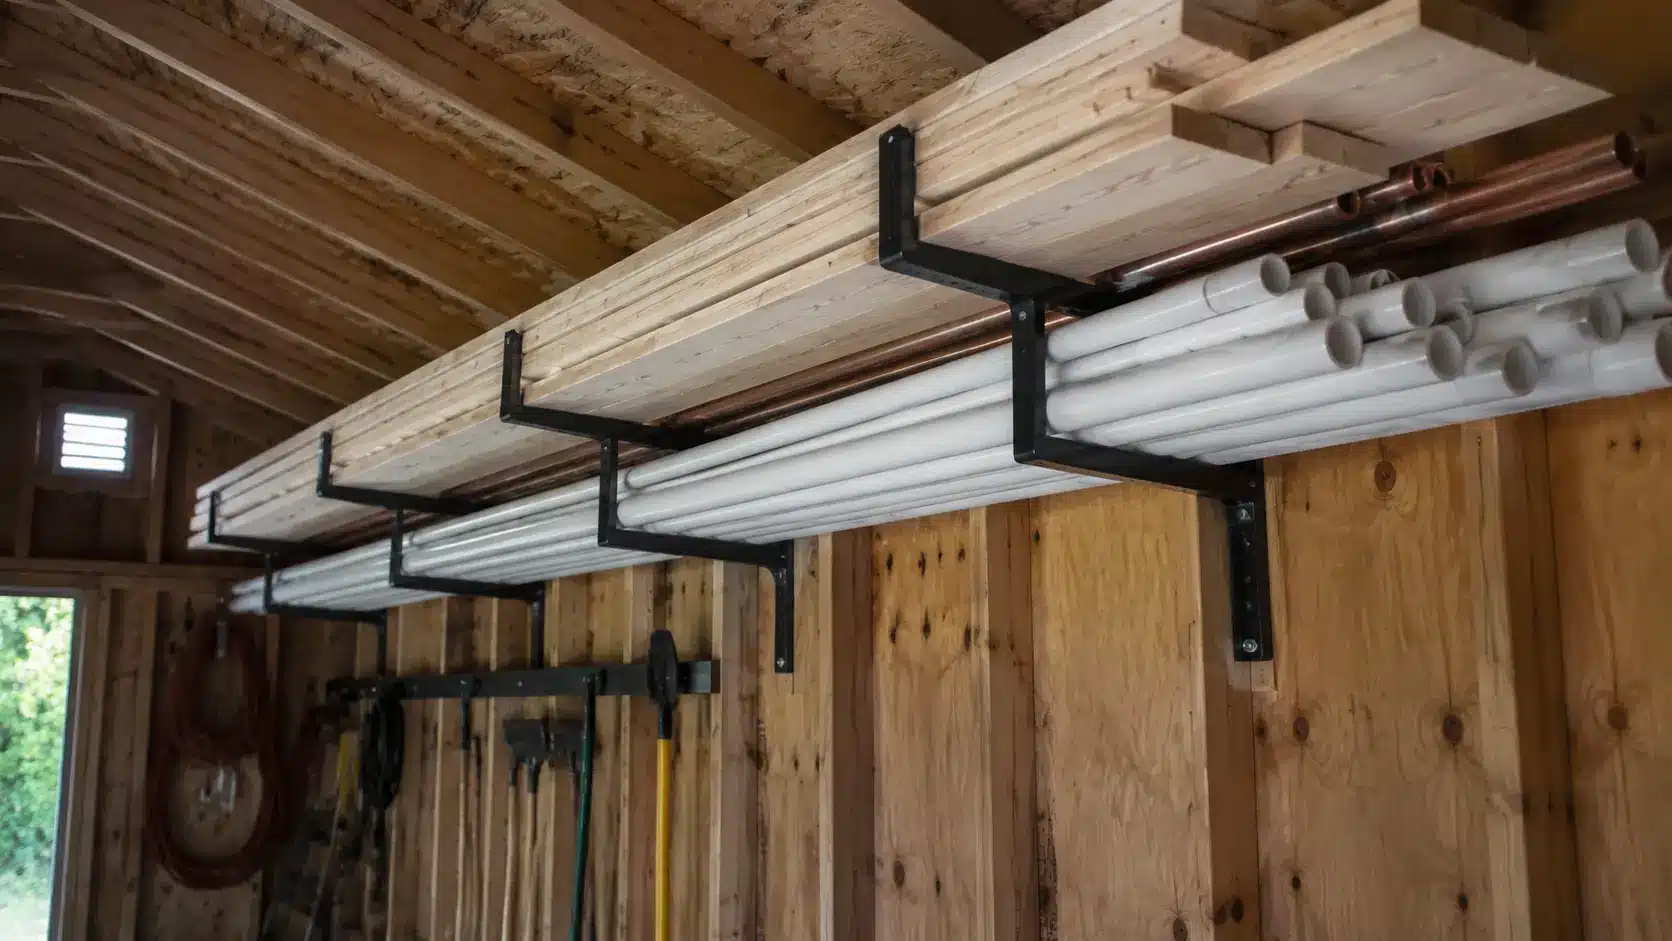
Horizontal ceiling brackets can hold lengths of wood or piping up and out of the way. This keeps long materials organized and prevents them from taking up floor space or leaning awkwardly against walls.
- Space brackets no more than four feet apart
- Only store dry lumber overhead
- Keep the area below clear for safe pull-down
18. Create Hanging Bin Storage
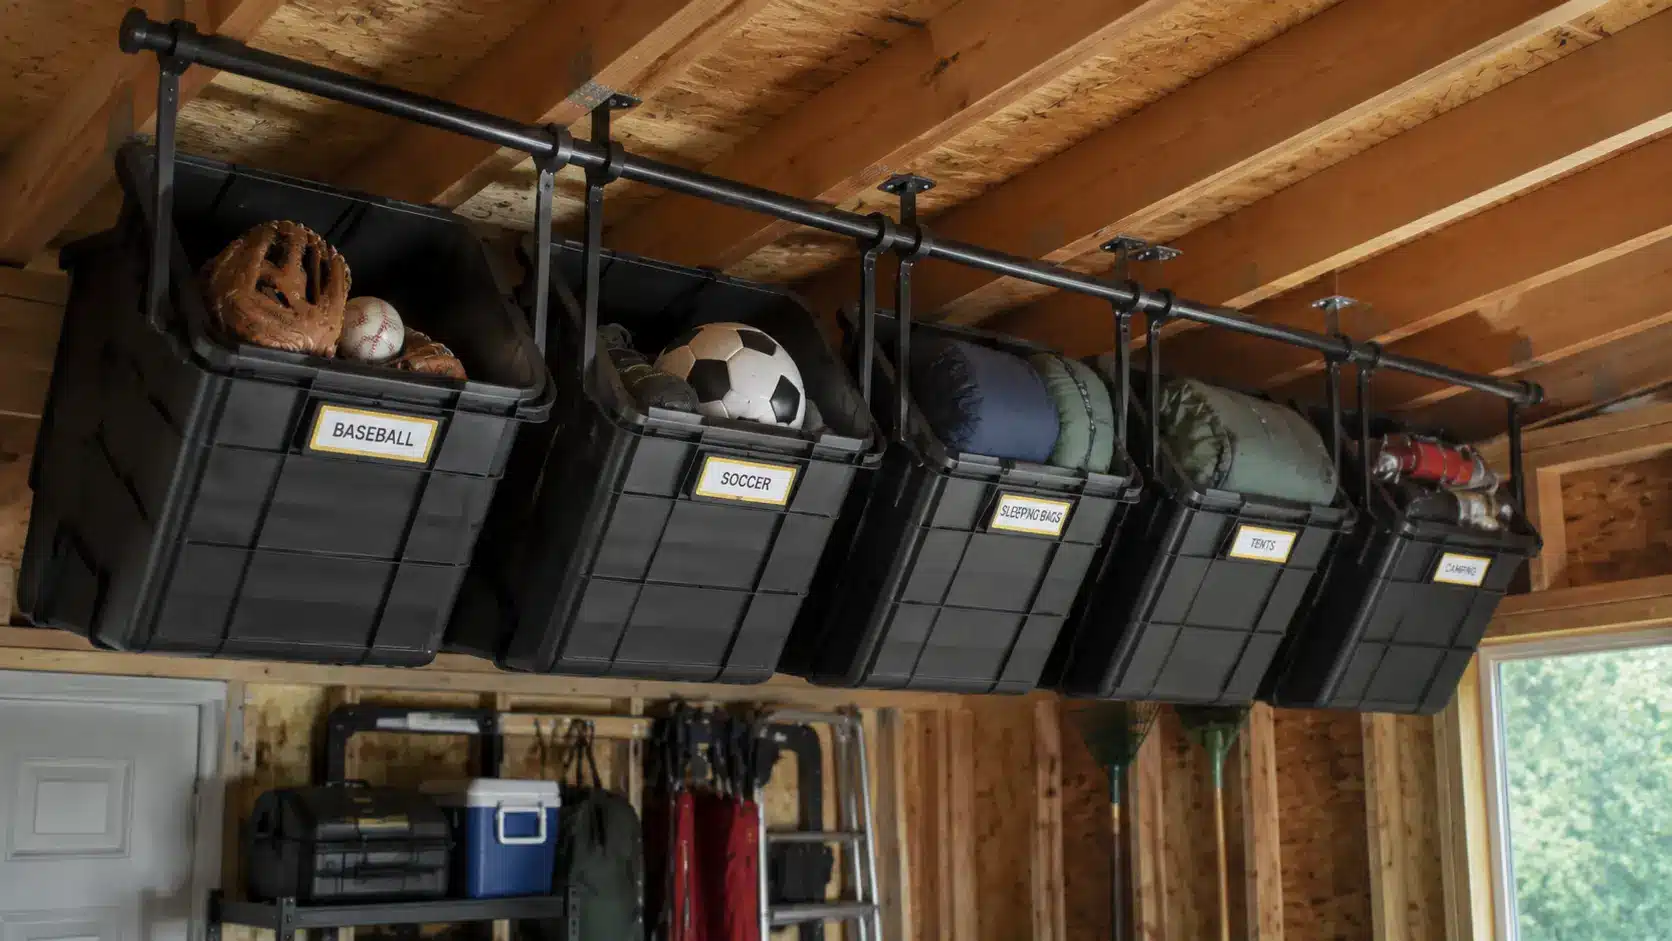
Hanging small bins or buckets from ceiling hooks or a mounted rod works well for storing balls, ropes, and other gear that is awkward to shelve.
- Mount a wooden dowel or rod between two joists
- Choose bins with handles for easy lifting
- Group by activity: sports, camping, yard work
Tool Storage Ideas
Keeping tools organized is one of the biggest challenges in any shed. When tools have a dedicated spot, you spend less time searching and more time getting work done.
19. Build a Dedicated Tool Wall
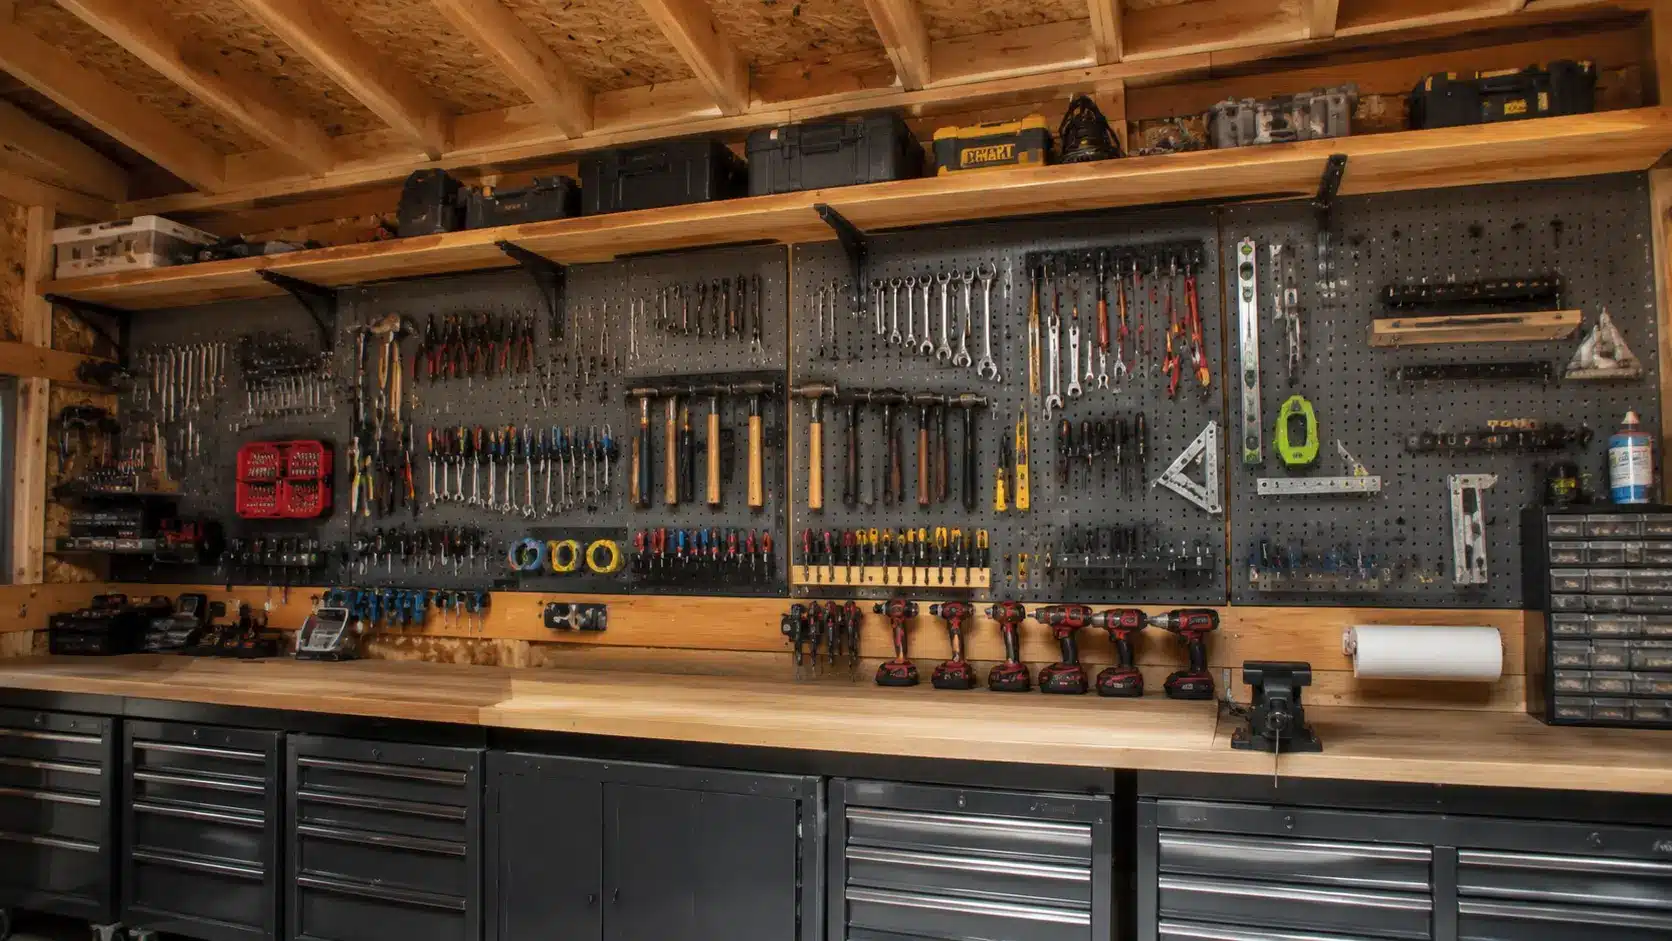
Combining pegboards, hooks, and shelves on one wall creates a complete tool storage system in a single area. When everything has a set place, the whole shed is easier to keep tidy.
- Plan the layout on paper before mounting anything
- Put the most-used tools at the eye-level center
- Paint the wall a bright color so gaps are obvious
20. Organize Hand Tools With Shadow Boards
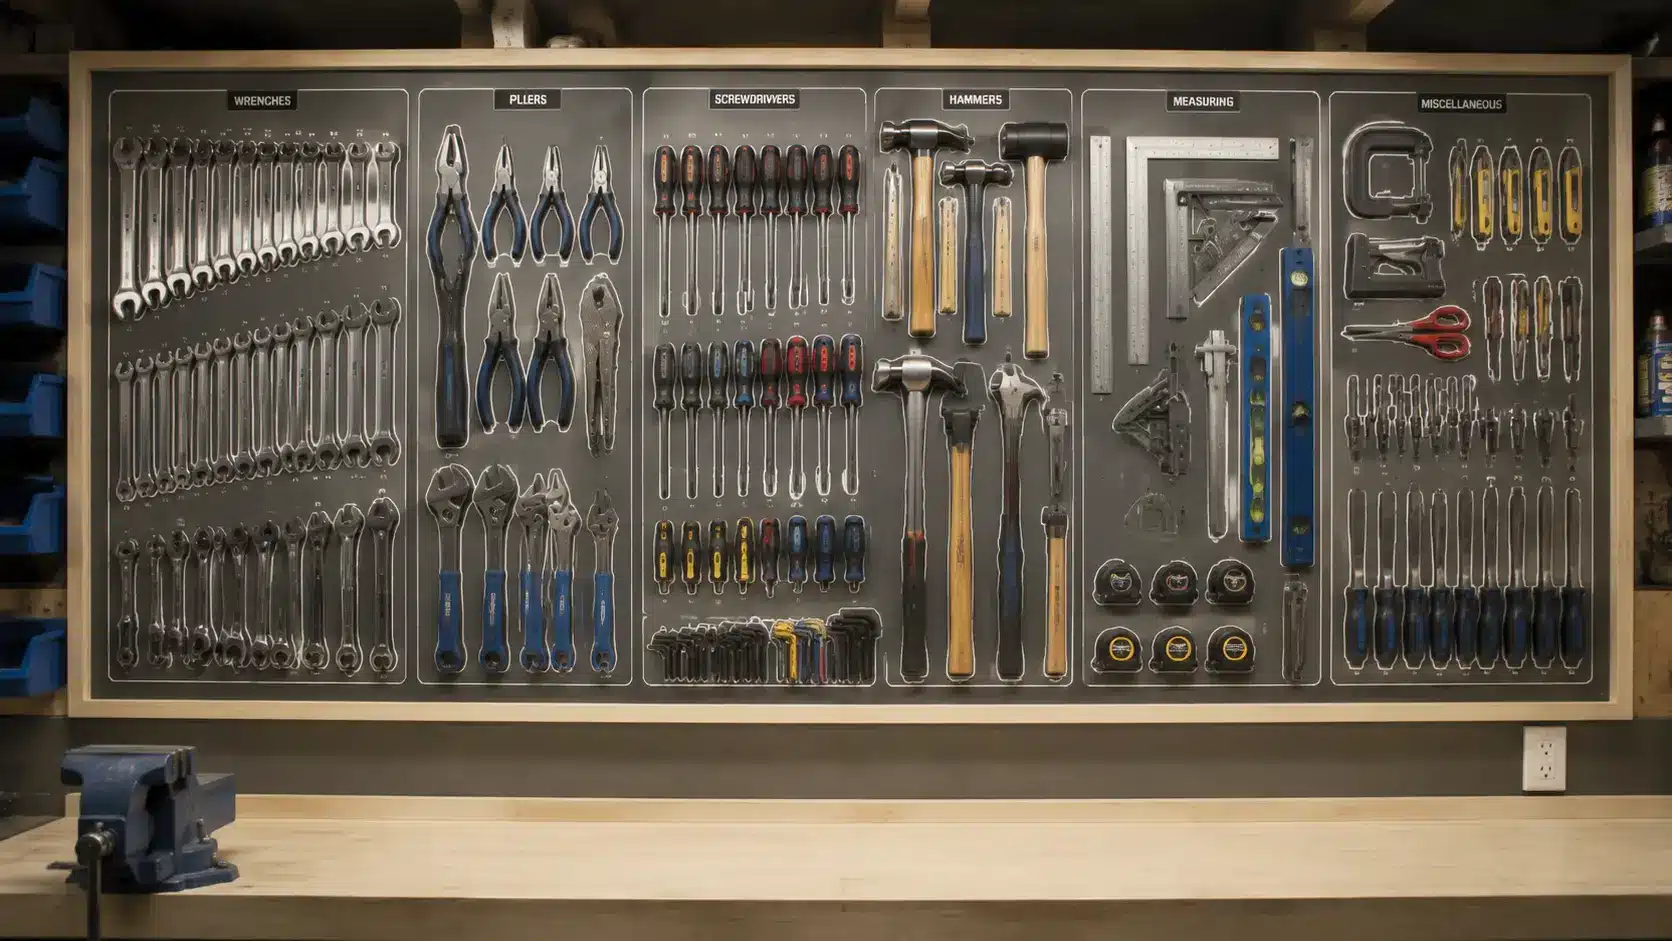
Shadow boards are painted boards with outlines of each tool drawn or cut into them. Each tool hangs in its exact spot, making it instantly clear when something is missing or out of place.
Storing tools properly also follows basic hand tool safety practices that reduce the risk of accidents in any workspace.
- Use bright contrasting paint for outlines
- Trace each tool before painting for accuracy
- Best for frequently used hand tools
21. Create a Power Tool Charging Station
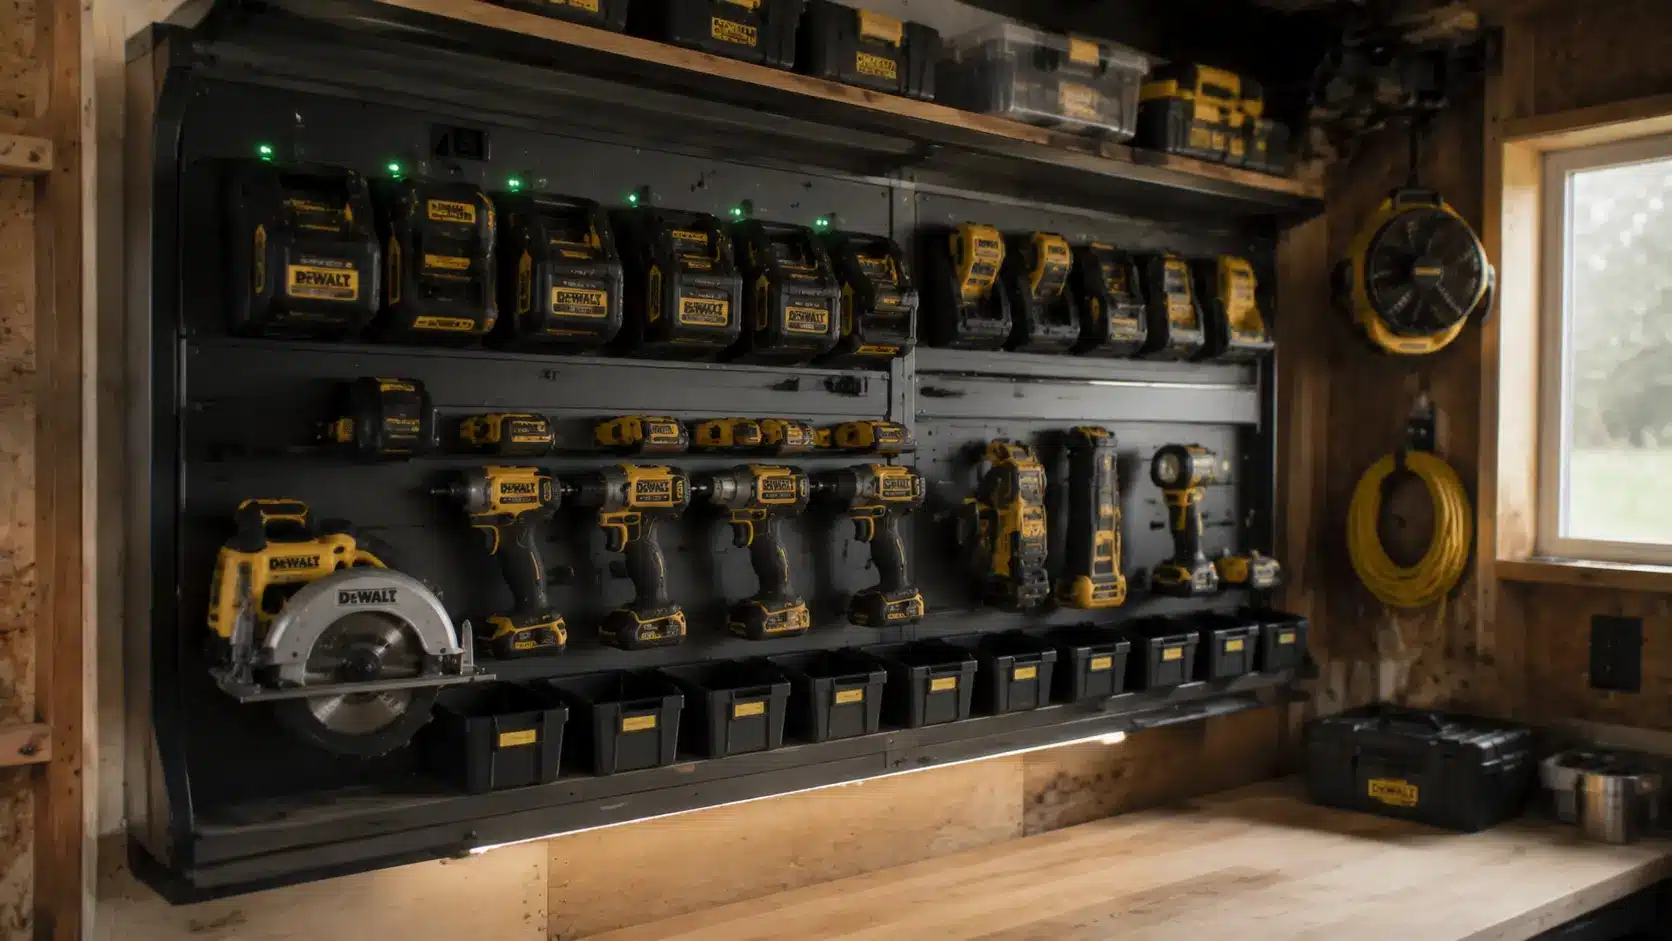
Setting up a shelf with a power strip gives all your battery-powered tools one dedicated place to charge. Labeling each spot means tools always go back to the right location.
- Use a surge-protected power strip
- Keep the shelf away from damp areas
- Store spare batteries on the same shelf
22. Use PVC Pipe Holders for Long-Handled Tools
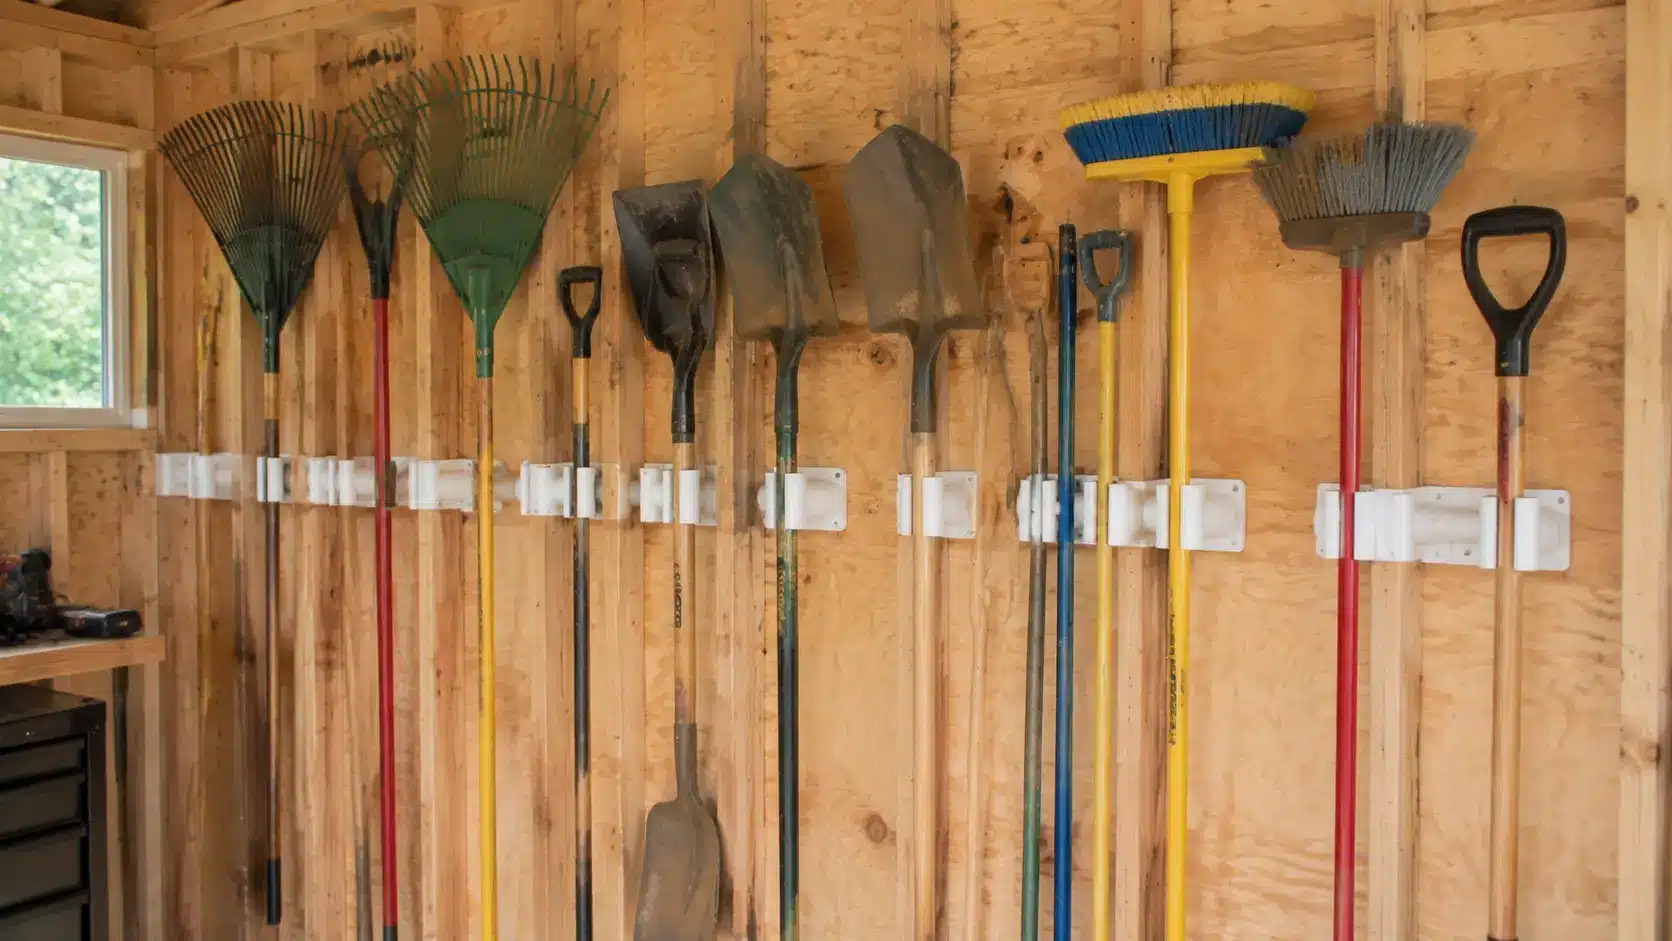
Cutting PVC pipe into short sections and mounting them on the wall or a board creates cheap and effective holders for broom, rake, and shovel handles. The tools stay upright without leaning or falling over.
- Use a three-inch diameter pipe for standard handles
- Mount at a slight downward angle to hold tools in place
- Label each pipe if you want assigned spots
23. Add Rolling Tool Storage Carts
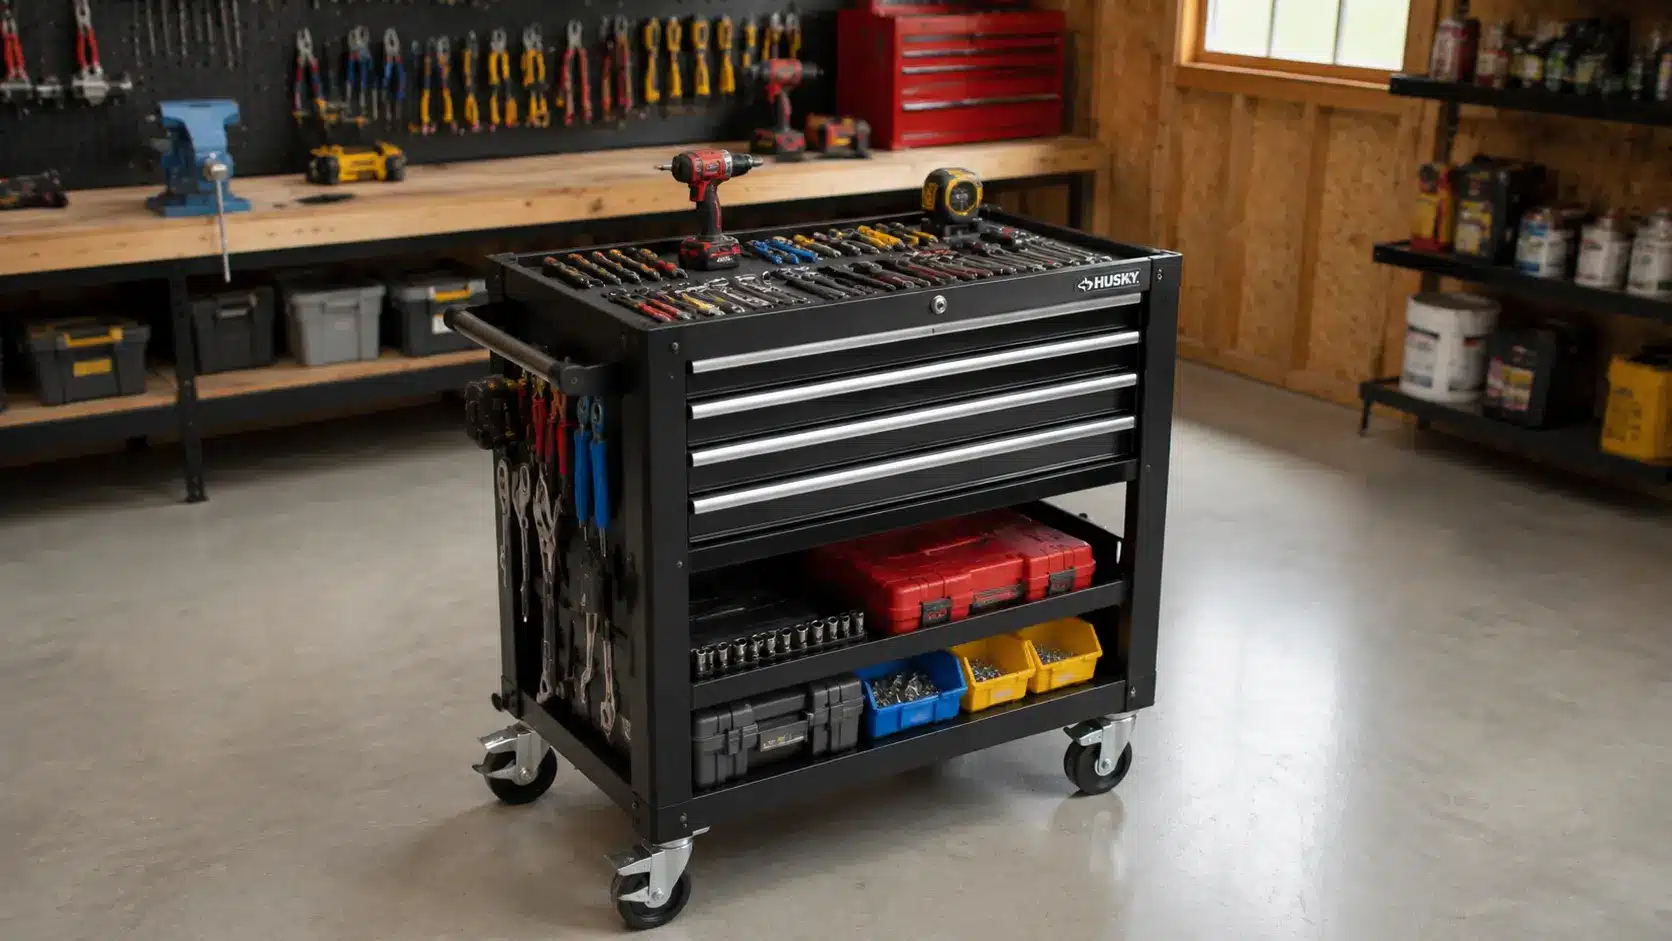
A rolling cart provides portable tool storage that moves with you wherever you work. At the end of the day, it rolls back into its corner, keeping tools contained.
- Choose a cart with locking wheels
- Top drawer for most-used tools, lower for the rest
- Look for a cart with a built-in work surface
24. Store Hardware in Clear Drawer Organizers
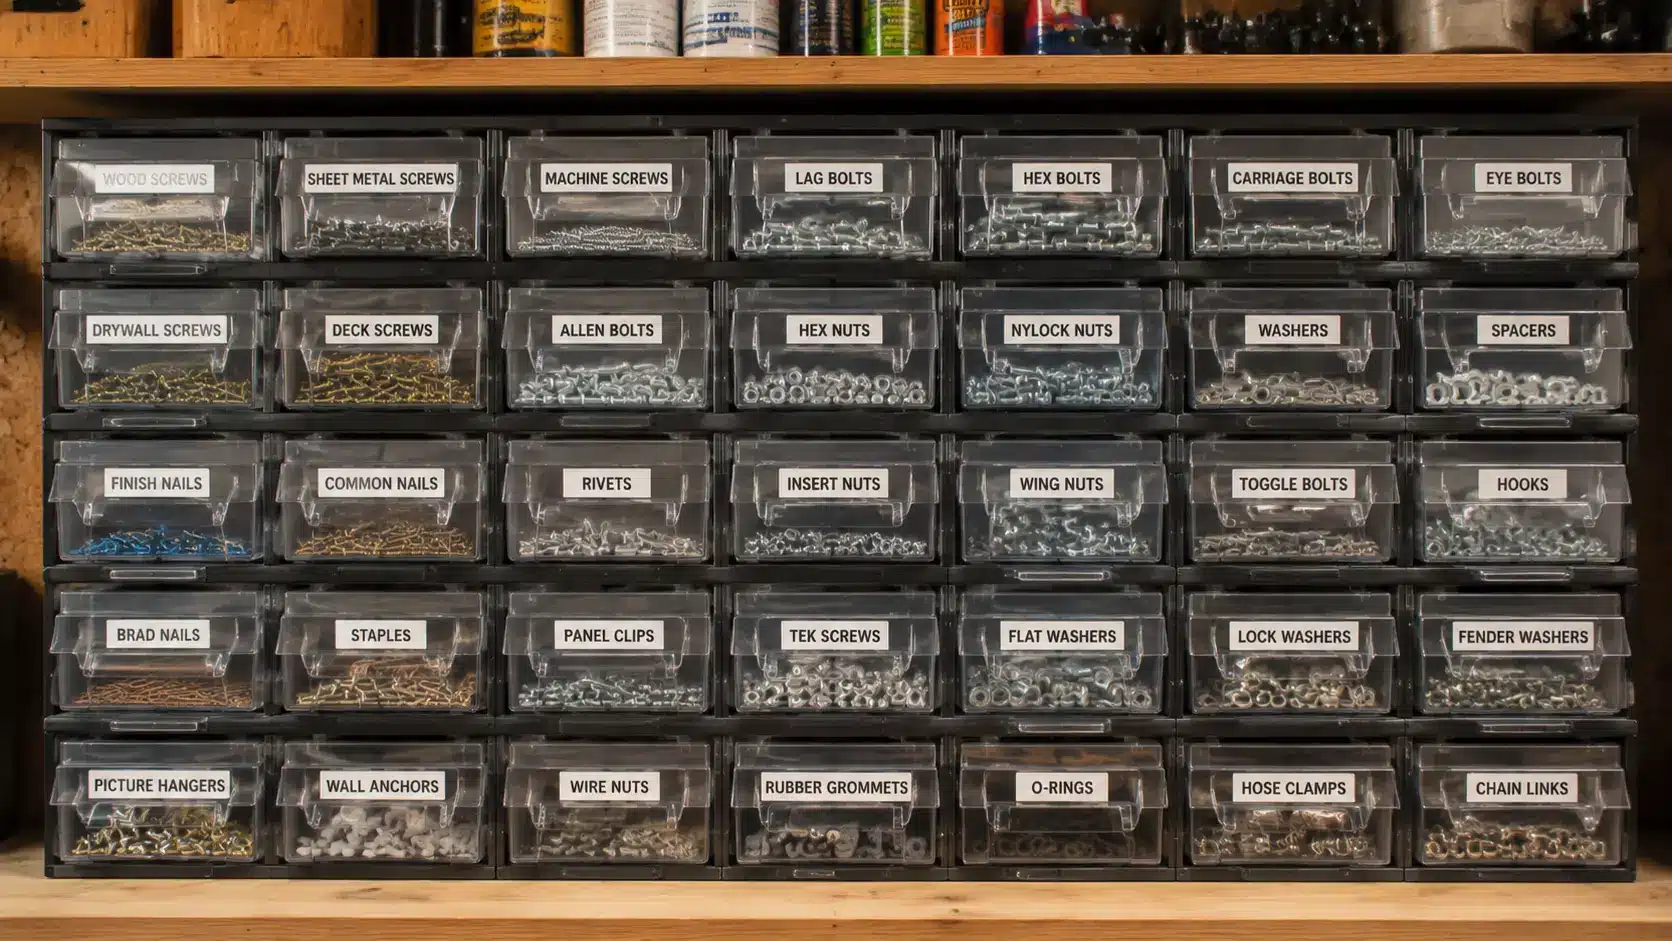
Screws, nails, bolts, and anchors are easy to lose in a messy shed. Small clear drawer organizers or stackable compartment boxes keep hardware sorted so you can find the right piece fast.
- Buy a set with adjustable dividers.
- Label each compartment with size and type
- Stack multiple organizers on one shelf
Smart Storage Solutions
Good organization is not just about adding more storage. It is about making the storage you have work better.
25. Label Every Storage Bin
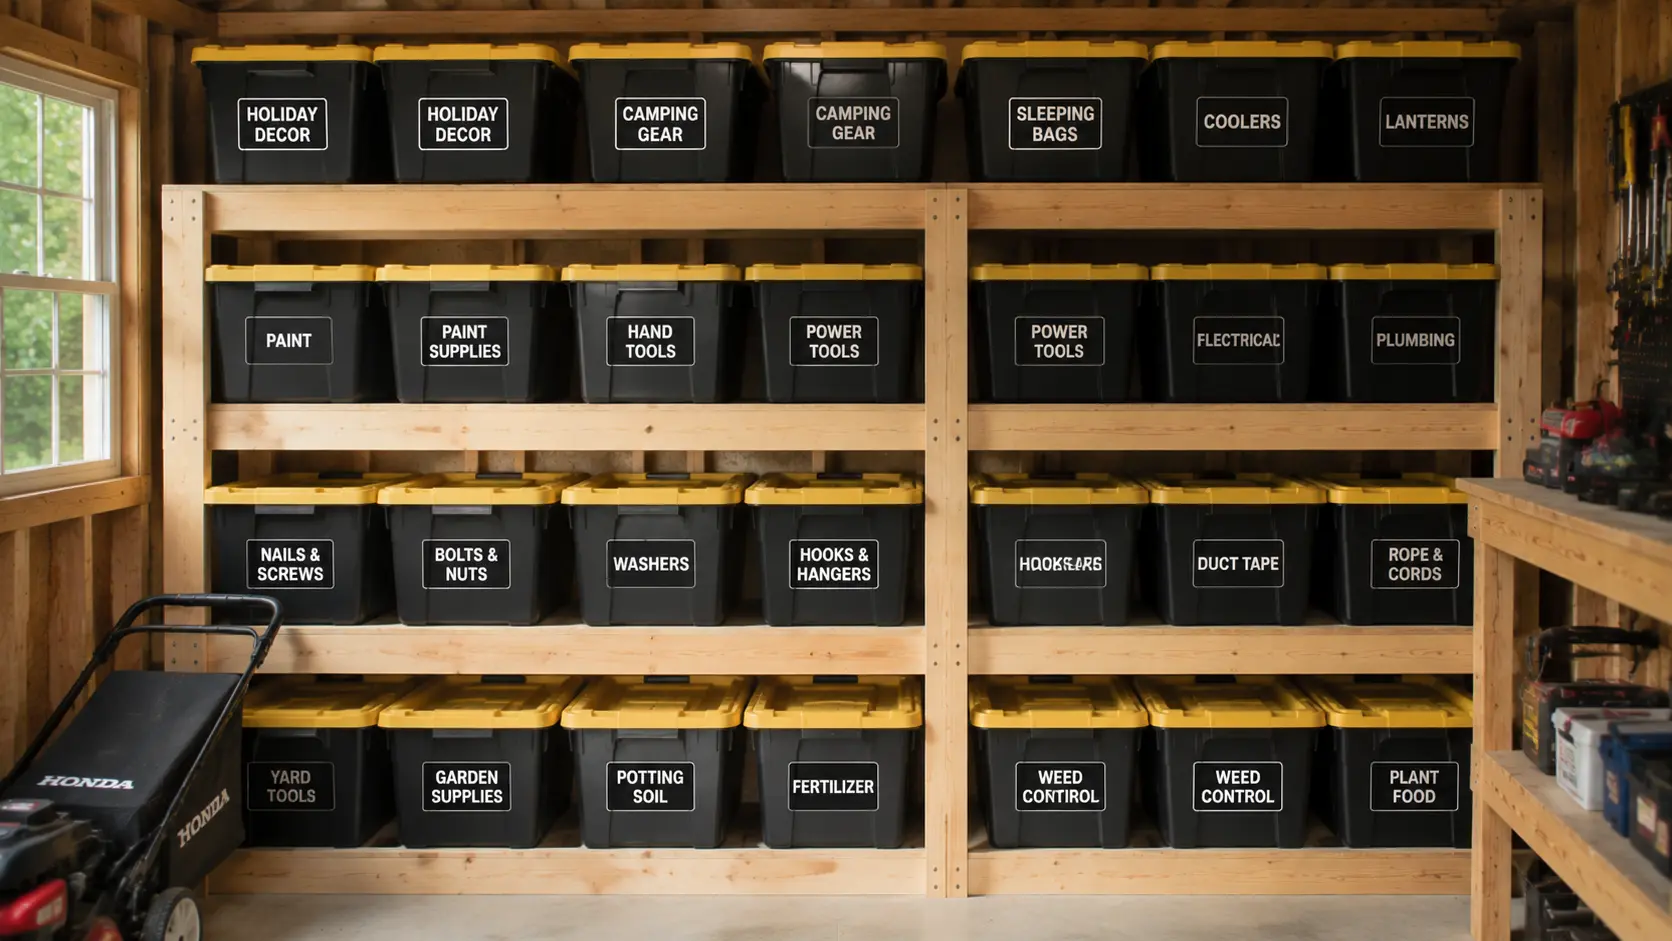
Labels save time every single day. Even if you know what is in every bin right now, labels make it easy for everyone in the household to find things and put them back correctly.
- Use a label maker for long-lasting labels
- Include category name and short contents list
- Re-label any time you reorganize
26. Use Stackable Storage Containers
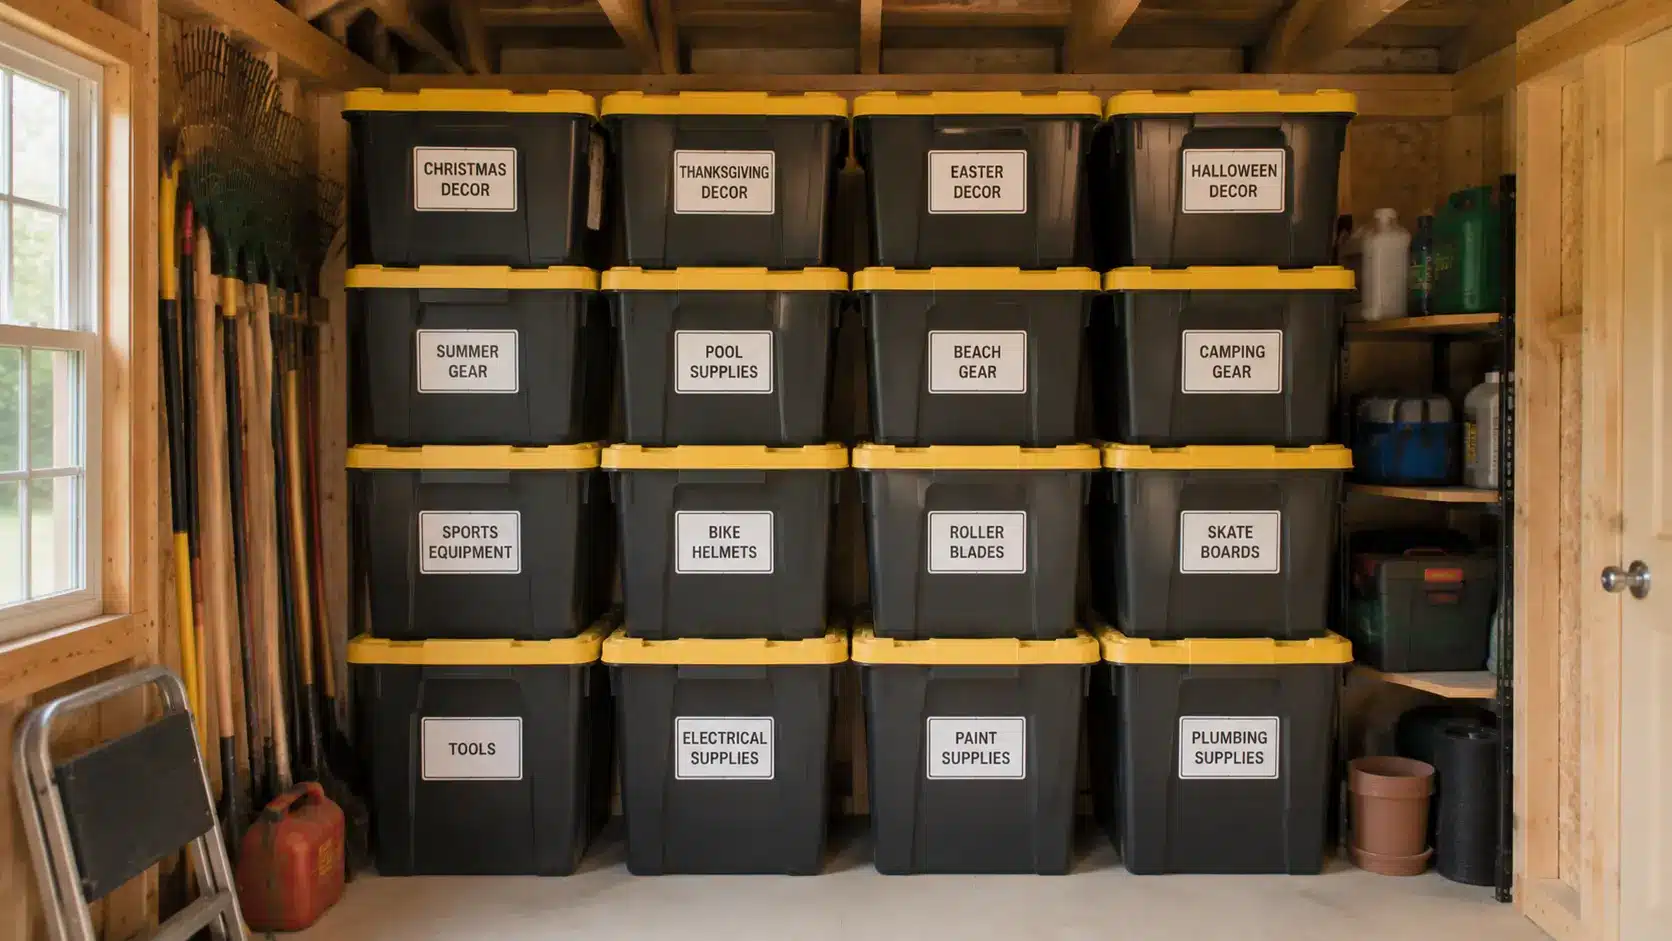
Stackable bins use vertical space efficiently and keep similar items together. Clear ones let you see the contents without opening each lid.
- Choose containers rated to stack three to four high
- Use the same brand so sizes match
- Keep the heaviest bins at the bottom
27. Repurpose Old Cabinets for Extra Storage
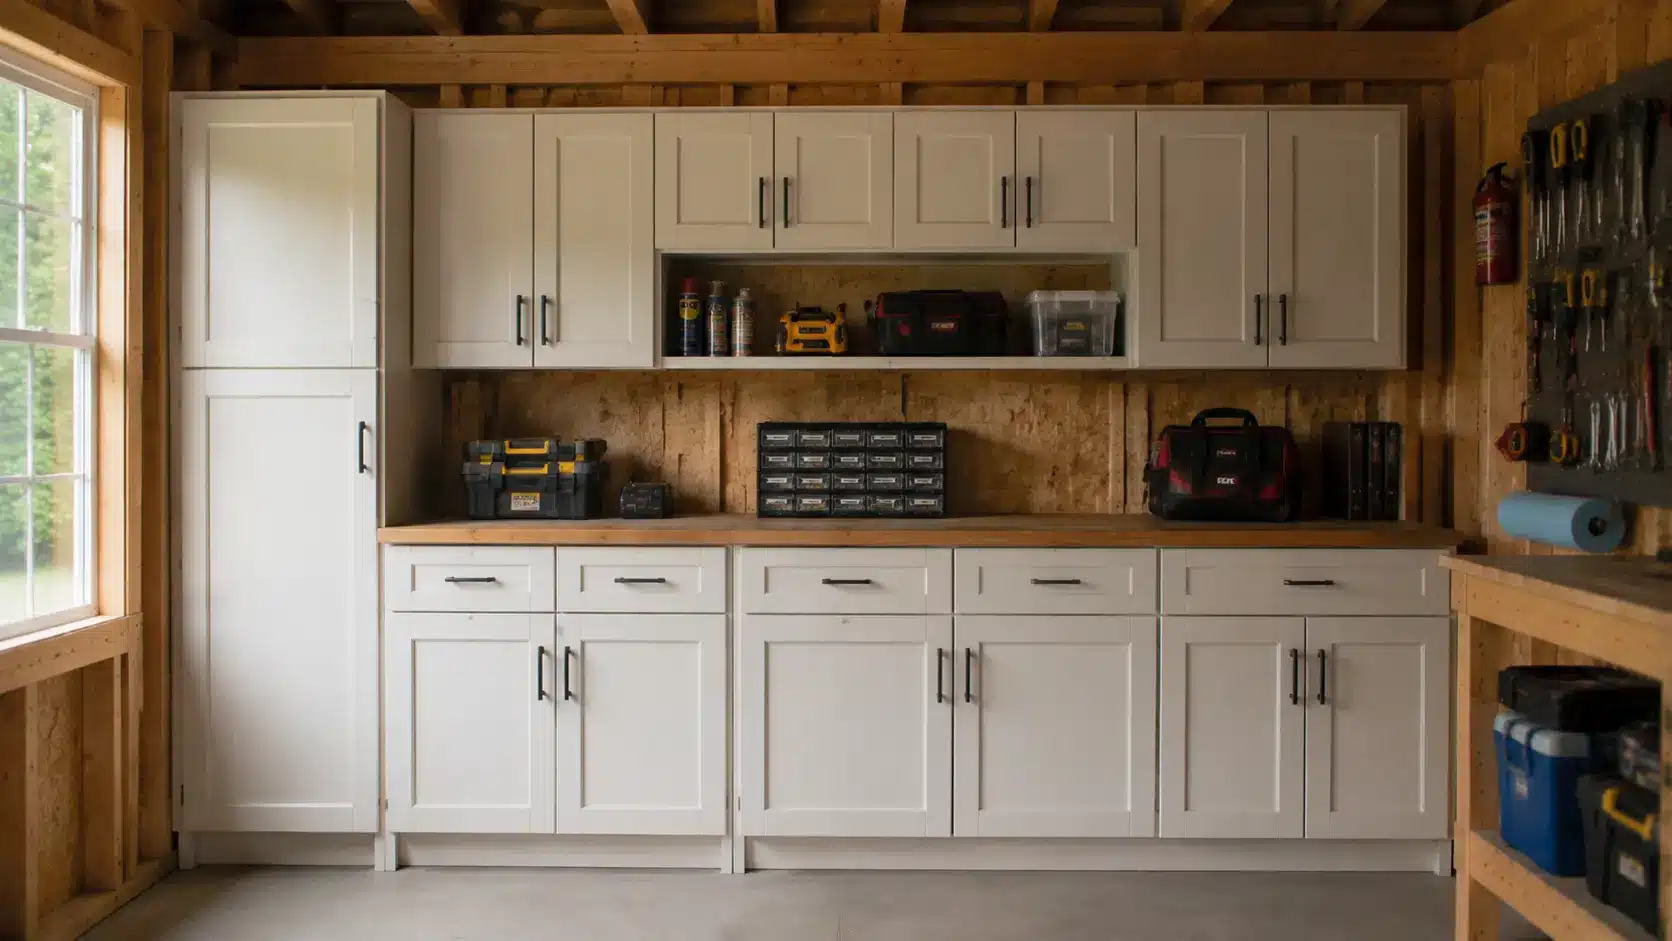
Old kitchen or bathroom cabinets work great in sheds. They provide enclosed storage that protects items from dust and moisture while keeping the shed looking neater than open shelves alone.
- Check backs and bottoms for rot before use
- Mount at a comfortable standing height
- Use for chemicals and paints is better kept out of sight
28. Add Pull-Out Storage Drawers
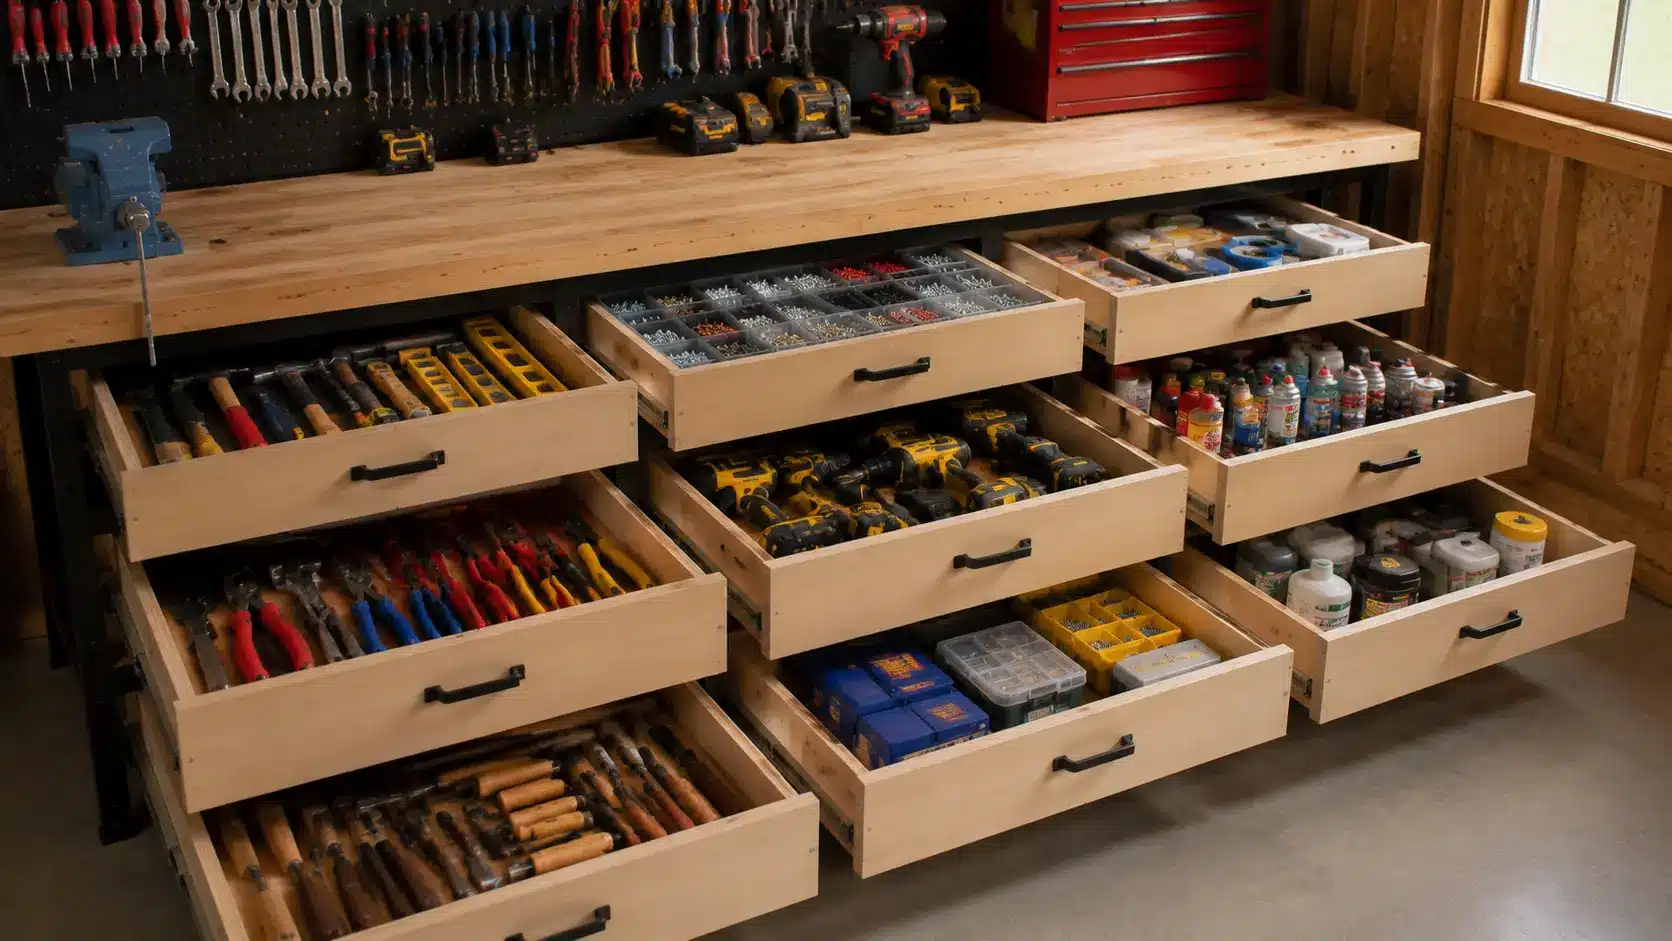
Drawers that slide out make it much easier to reach items stored at the back. They work especially well under workbenches or inside shelving units where deep storage tends to swallow small items.
- Use full-extension slides for full drawer access
- Shallow drawers for hardware, deeper for larger supplies
- Label the front of each drawer
29. Install Fold-Down Work Surfaces
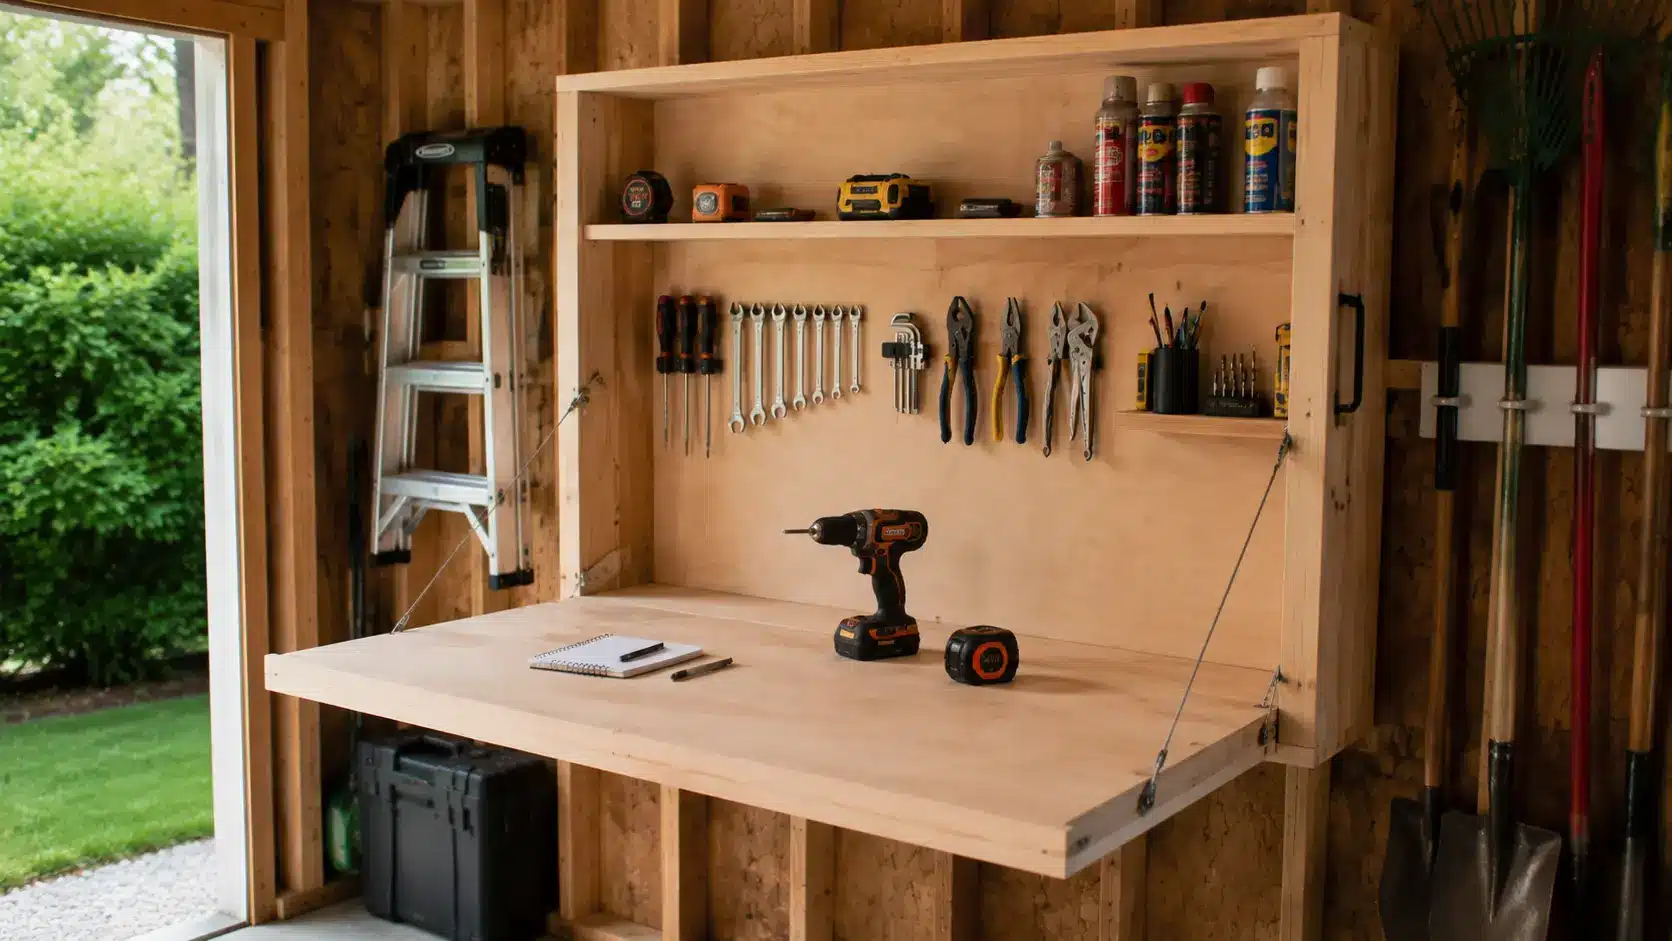
A fold-down shelf or workbench can double as a work surface when you need it and fold flat against the wall when you do not. This is one of the best space-saving ideas for small sheds.
- Use heavy-duty hinges and a support leg
- Mount at 34 to 36 inches from the floor
- Add a pegboard above for project tools
30. Store Frequently Used Items at Eye Level
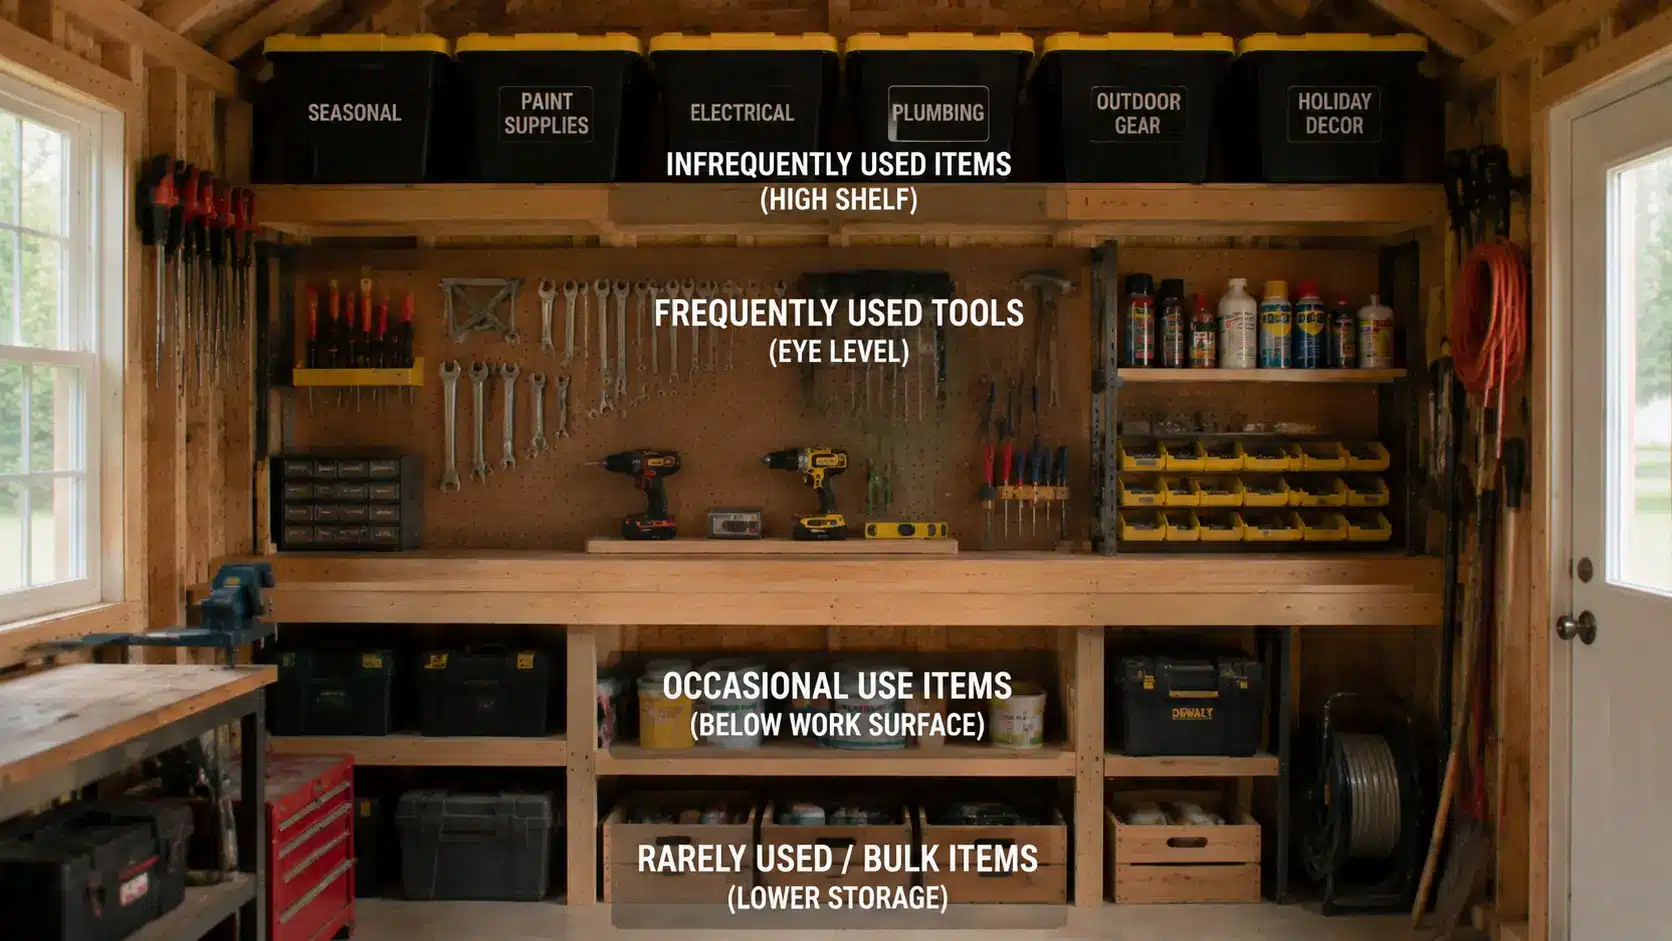
The items you reach for most often should sit between shoulder and waist height, where grabbing them is natural and easy. Reserve high and low storage for things you use less often.
- Audit what you use weekly and move it to eye level
- Push rarely used items to upper or overhead storage
- Reassign spots when your shed use changes
Budget-Friendly DIY Ideas
Organizing a shed does not have to cost a lot. Some of the most effective storage solutions can be built with basic materials you might already have.
31. Build DIY Crate Storage
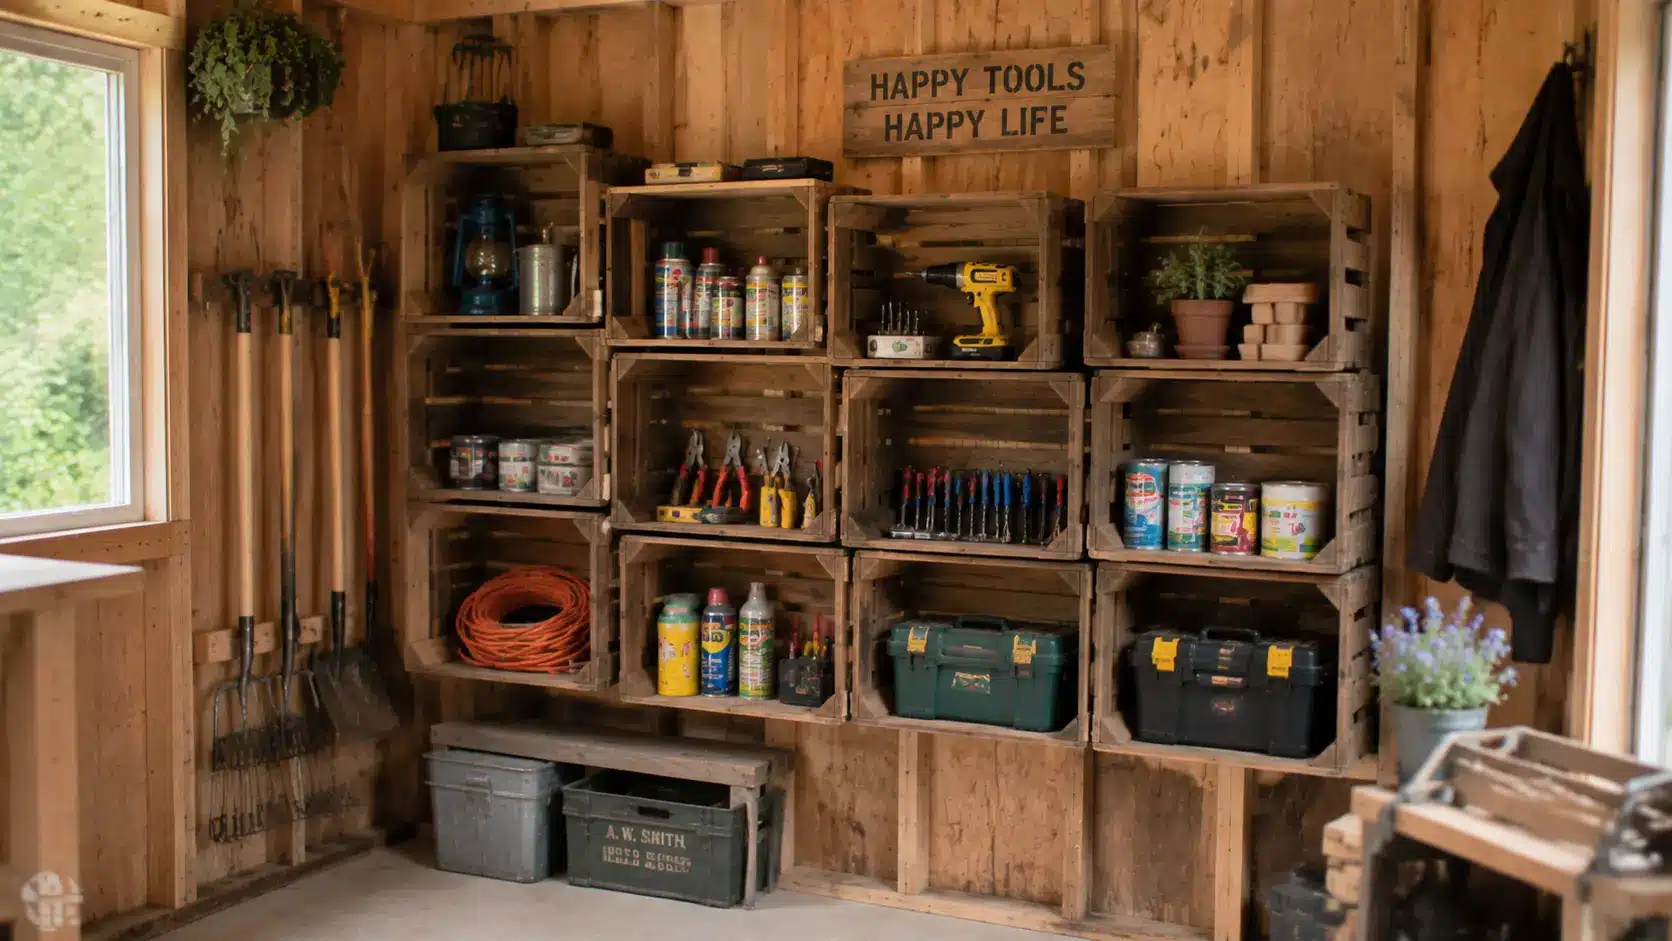
Wooden crates from hardware or craft stores can be stacked, nailed together, or mounted on the wall for instant storage. They are cheap, sturdy, and easy to customize for almost any shed layout.
- Sand and seal before use in a humid shed
- Mount sideways on the wall for cubby-style storage
- Mix orientations when stacking for more flexibility
32. Create Storage Using Reclaimed Wood
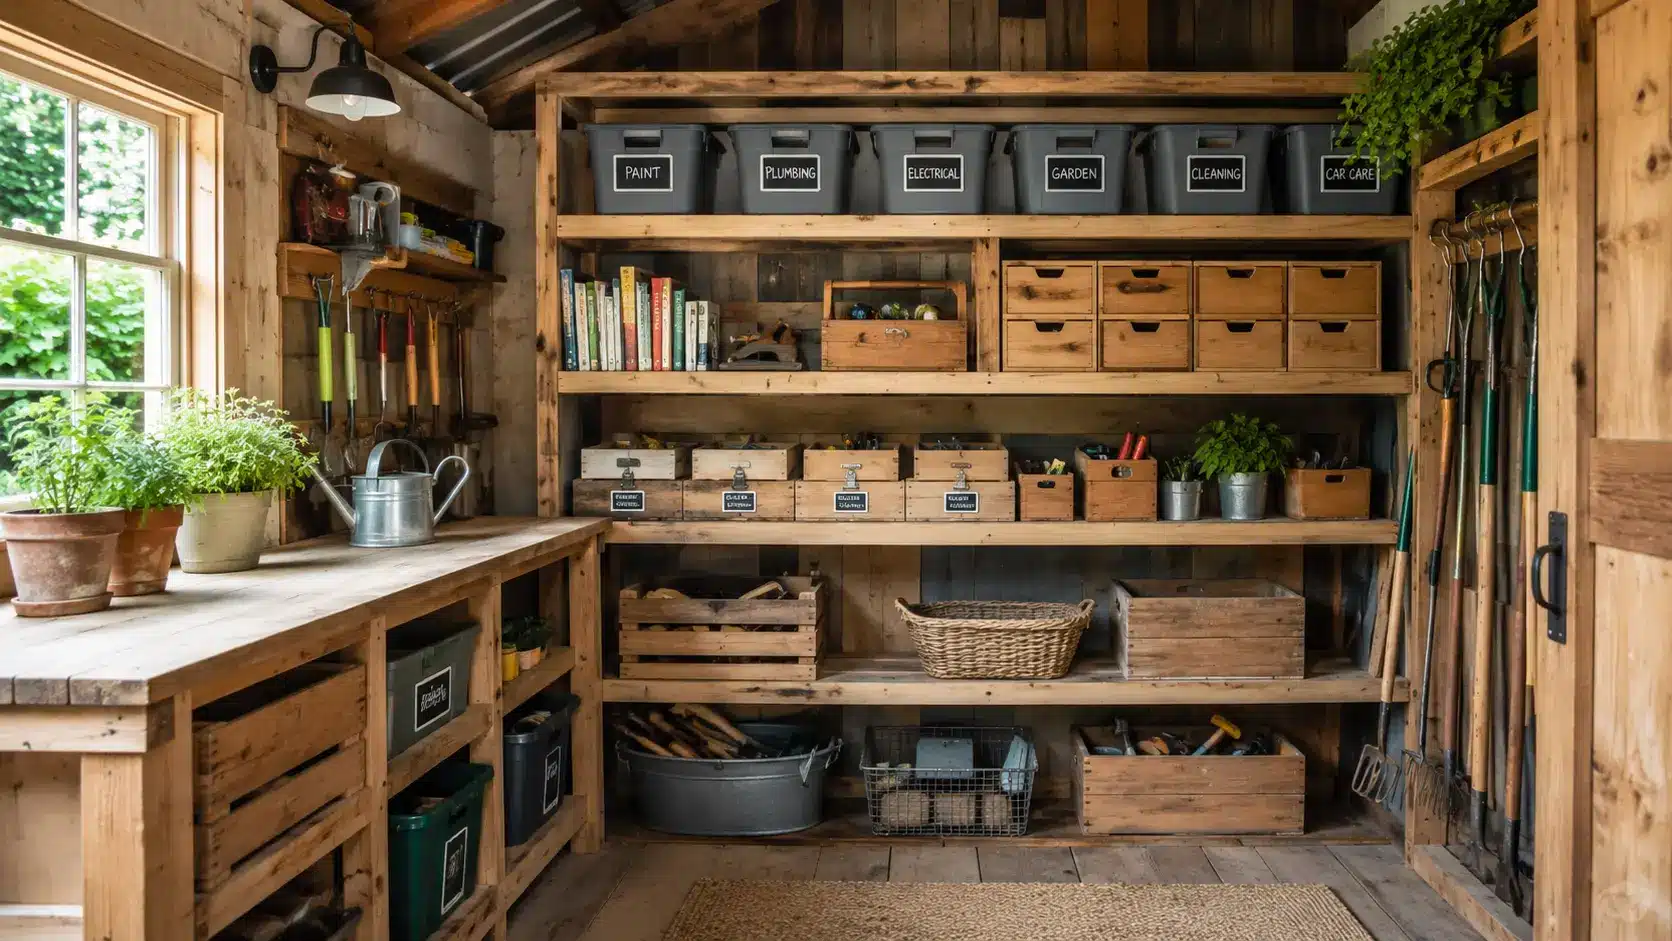
Old fence boards, pallets, or scrap lumber can be turned into shelves and wall organizers at very little cost. Reclaimed wood adds a practical, rugged look to shed storage.
- Check for rot, nails, and splitting before cutting
- Sand all surfaces smooth
- Use L-brackets for a secure, weight-bearing mount
33. Turn Pallets Into Wall Organizers
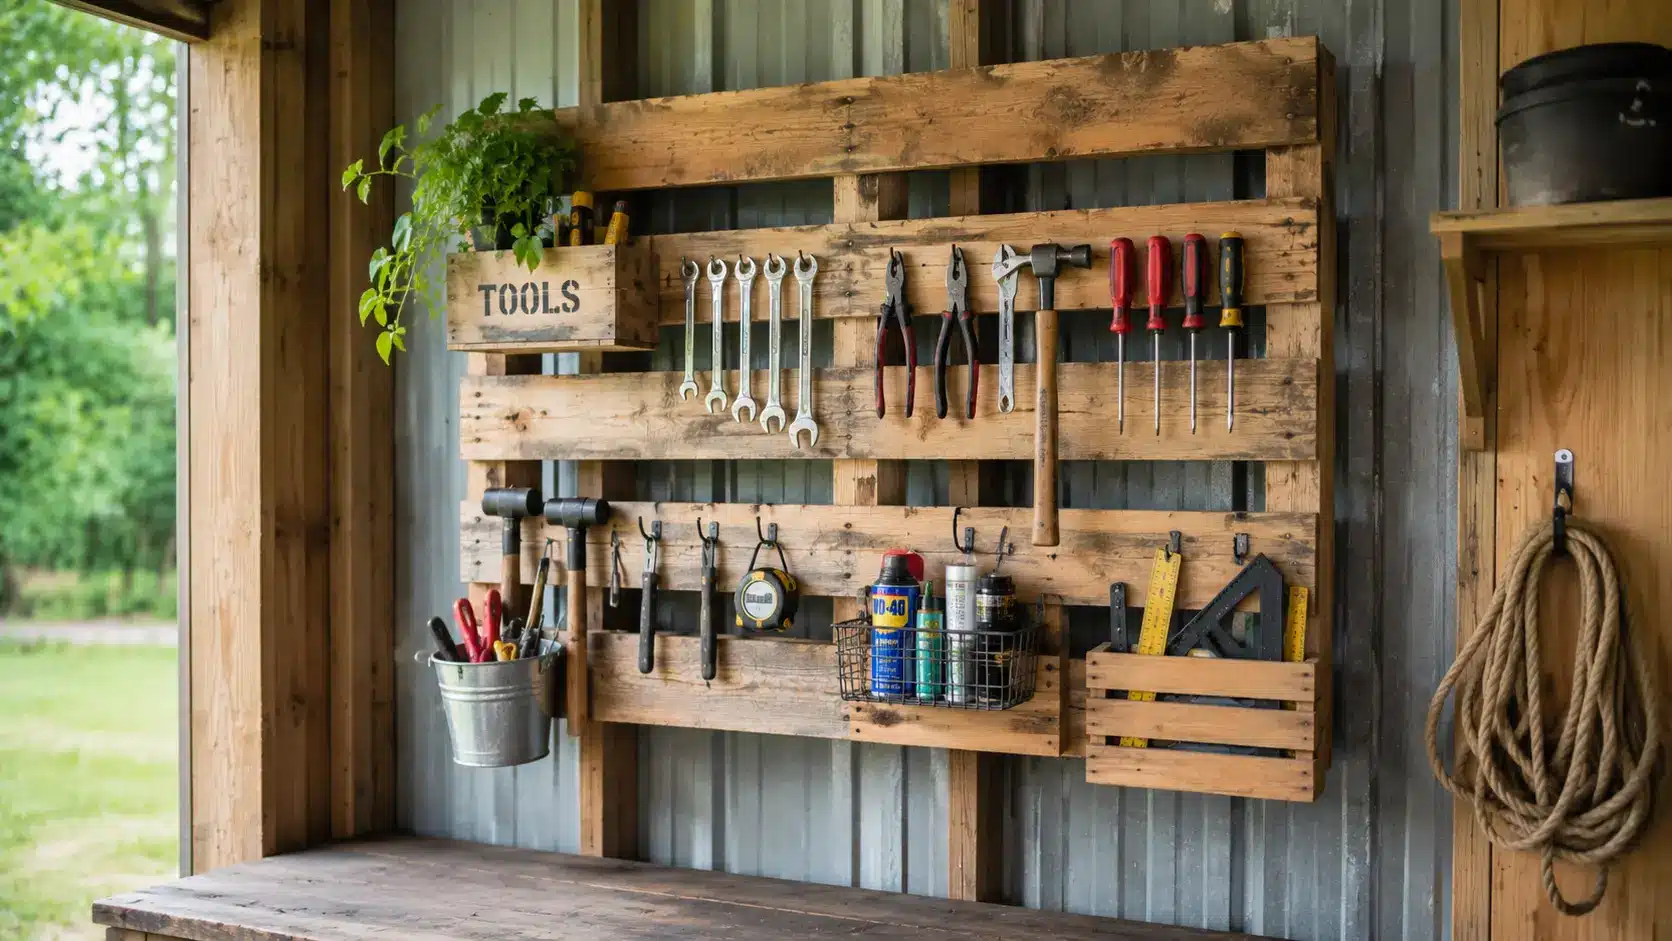
A single pallet mounted flat on the wall creates a ready-made storage grid. Slide tool handles between the slats, hang hooks from the boards, or staple wire mesh across sections to create bin-style compartments.
- Use heat-treated pallets marked HT only.
- Secure to at least two wall studs
- Paint or stain before mounting for a cleaner look
Small Shed Organization Ideas That Save Space
When every square foot counts, smart storage strategies can help you maximize capacity without making the shed feel cramped.
- Use Vertical Storage From Floor to Ceiling: In a small shed, floor space is limited. Using the full height of your walls with tall shelves and wall-mounted storage means you store more without taking up extra room.
- Turn Shed Doors Into Storage Space: The inside of your shed door is usable storage space. Hang a shoe organizer, mount hooks, or attach a small pegboard to the back of the door to free up space.
- Choose Multi-Purpose Storage Furniture: A workbench with built-in shelves or a storage bench that doubles as seating serves two functions in the same footprint.
- Store Seasonal Items Up High: Seasonal items that you only need a few times a year belong on the highest shelves or in overhead storage, keeping prime space free for everyday items.
- Use Narrow Shelving Instead of Deep Shelves: In tight spaces, deep shelves waste space because items at the back become hard to reach. Narrow shelves keep everything visible and accessible.
- Keep Floor Space Open Whenever Possible: Avoid storing things directly on the floor. Wall-mounted solutions and shelves free up the floor, making the shed feel larger and easier to move around in.
Even the smallest shed can feel spacious and functional when storage is planned around accessibility and efficient use of space.
Common Shed Organization Mistakes to Avoid
Many shed organization systems fail because of a few simple mistakes. Ignoring vertical space constraints and storage capacity for shelves and bins before decluttering can lead to unnecessary purchases.
Overcrowded shelves make items harder to find, and failing to create storage zones often results in clutter returning quickly.
Forgetting to label containers can make organization difficult to maintain, and storing rarely used items in prime locations wastes valuable space.
Avoiding these mistakes will help keep your shed organized, efficient, and easy to use.
Items You Should Never Store in a Shed
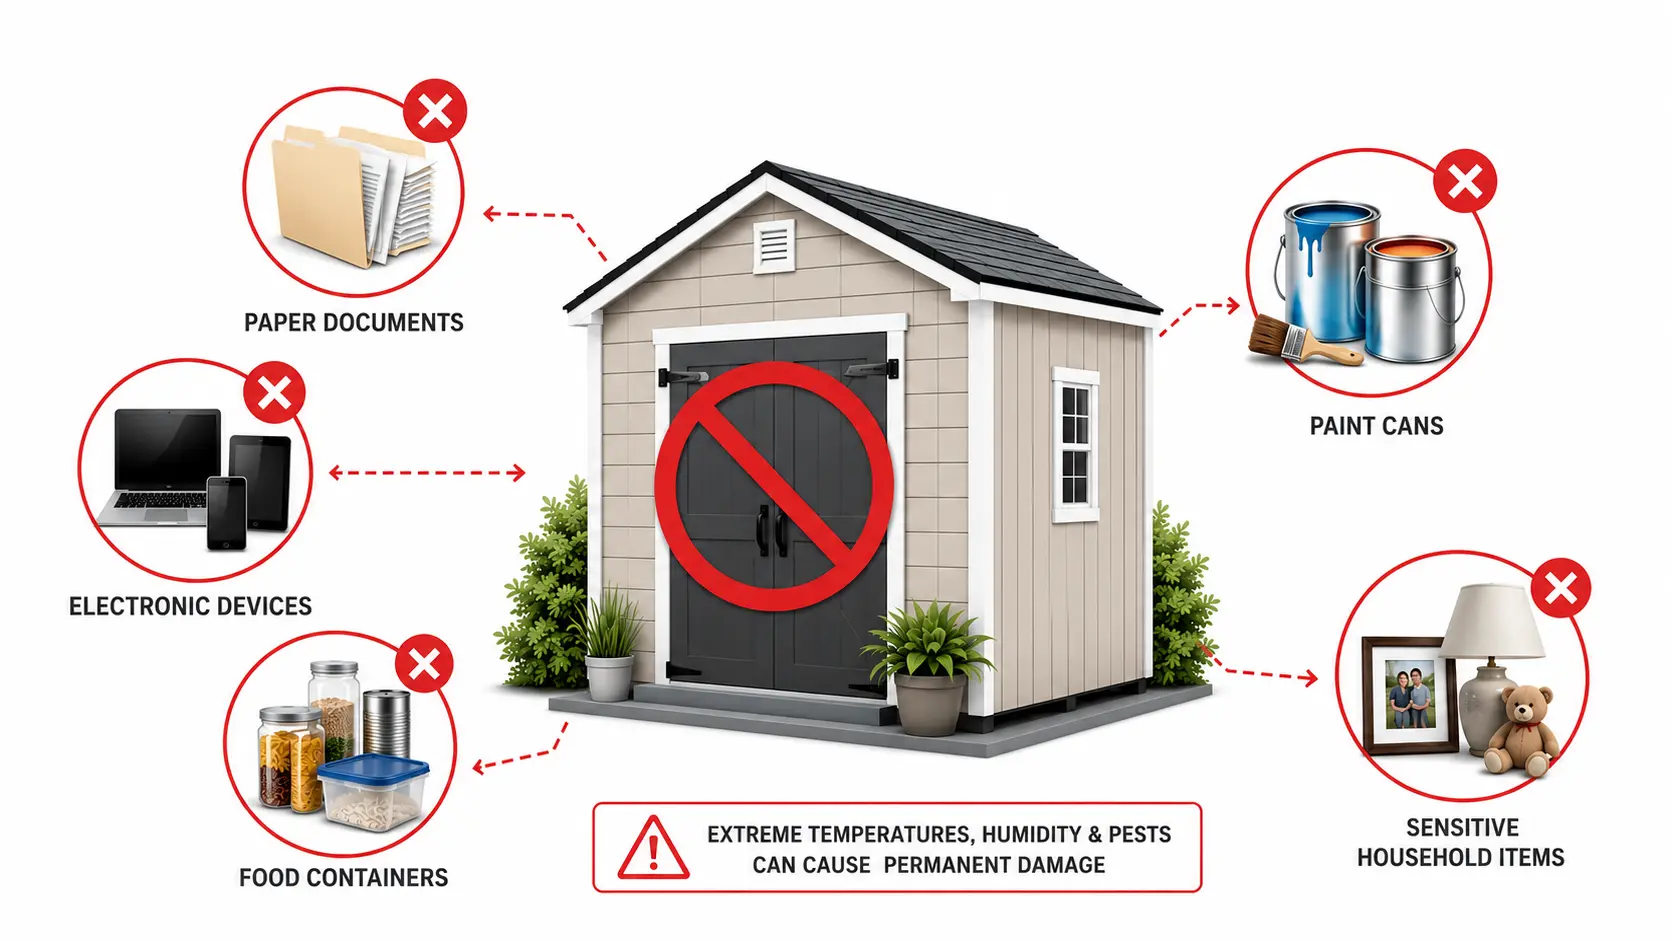
While sheds are great for storage, some items can be damaged or become safety hazards when exposed to changing temperatures and moisture.
- Important Documents: Paper degrades quickly in humid or temperature-changing environments. Keep documents inside your home.
- Electronics: Heat, cold, and moisture can permanently damage electronics. Store them indoors.
- Temperature-Sensitive Materials: Some materials crack, warp, or degrade when exposed to extreme heat or freezing temperatures.
- Paint and Chemicals: Most paints and chemicals should be stored at stable temperatures. Freezing or overheating can make them unusable or dangerous. The EPA has specific pesticide storage rules outlining how these products should be stored to avoid safety risks.
- Pet Food and Human Food: Food stored in sheds attracts pests. Keep all food inside your home.
Keeping these items out of your shed will help protect your belongings and reduce the risk of damage, spoilage, or safety issues.
Conclusion
An organized shed saves you time, reduces frustration, and makes every project easier to start. You do not need to do everything at once.
Pick a few ideas from this list, start with a full clear-out, and build from there. Focus on using your walls, ceiling, and corners before adding anything to the floor.
Small changes add up quickly, and once your shed has a system in place, keeping it tidy becomes simple. No matter the size of your shed, the right storage setup makes it a space you will actually want to use.
Frequently Asked Questions
How Much Weight Can Shelves Typically Hold?
The weight capacity depends on the shelf material and mounting method. Properly installed heavy-duty shelves can often support hundreds of pounds, while lightweight shelves are better suited for smaller items.
How Often Should You Reorganize Your Shed?
A quick review every few months helps prevent clutter from building up again. A more thorough reorganization is usually enough once or twice a year.
Is it Better to Use Open Shelves or Closed Cabinets in a Shed?
Open shelves make it easier to see and access frequently used items. Closed cabinets are better for protecting supplies from dust and creating a cleaner appearance.