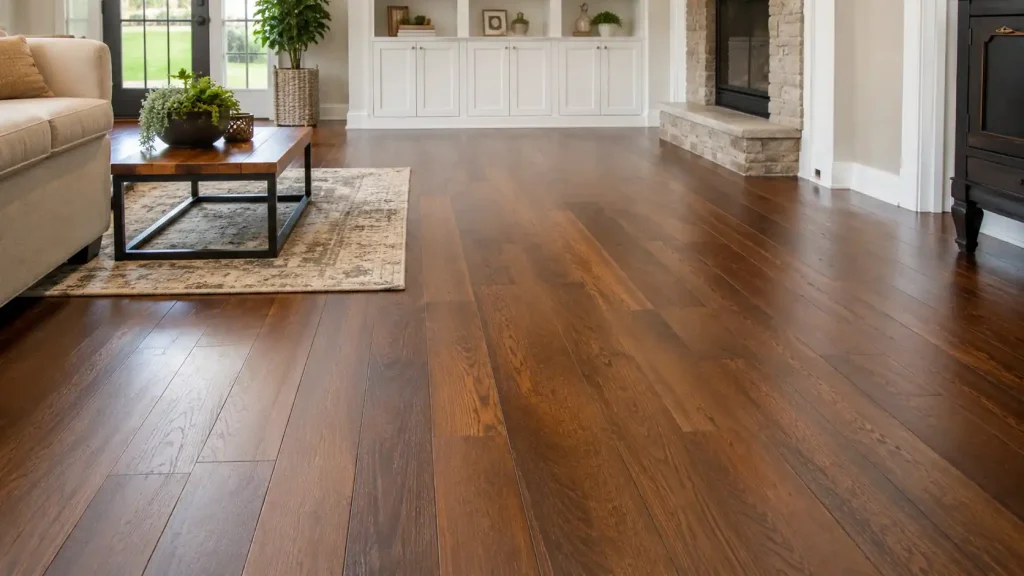
Hardwood floors are one of the first things people notice in a home. They look warm, last for decades, and add real value to any space.
But they also worry many people. Too much water and the boards swell. The wrong cleaner and the finish goes dull. A scratched or streaky floor can look worse after cleaning than before.
Hardwood floor maintenance does not have to be a guessing game. The right approach is simple once you know what your floor needs.
You should know how to identify your finish and fix common messes, so you can keep your floors looking great without causing damage.
Before You Start, Know Your Floor Finish
The type of finish on your hardwood floor changes how you should clean it.
Using the wrong method can cause dulling, swelling, or long-term surface wear.
Most modern floors have a surface seal, usually polyurethane or a factory-applied coating, and are generally safe for damp mopping.
Older floors are sometimes waxed or treated with penetrating oil. These finishes soak into the wood and need more careful handling.
Excess water can quickly damage them, so stick to dry methods or products designed for waxed floors.
Hardwood Floor Cleaning Safety Checker
Run through these quick checks first. This table helps you spot the right cleaning method for your specific floor condition so you do not cause accidental damage during routine cleaning.
| Question | If Yes | If No |
|---|---|---|
| Does water bead on the surface? | Damp mop lightly | Avoid water-based cleaning |
| Is the floor sticky after mopping? | Use less cleaner | Check the mop pad |
| Do boards have gaps or cracks? | Use very little moisture | A standard damp mop is safer |
| Is the finish dull after cleaning? | May need polish or recoat | Keep routine simple |
What You Need to Clean Hardwood Floors
|
Gather these items before you start:
|
How to Clean Hardwood Floors Easily
Cleaning hardwood floors the right way comes down to a few basic steps in the right order. Skipping any one of them is usually what leads to streaks, dullness, or leftover grime.
Follow this process, and your floors will come out clean and undamaged every time.
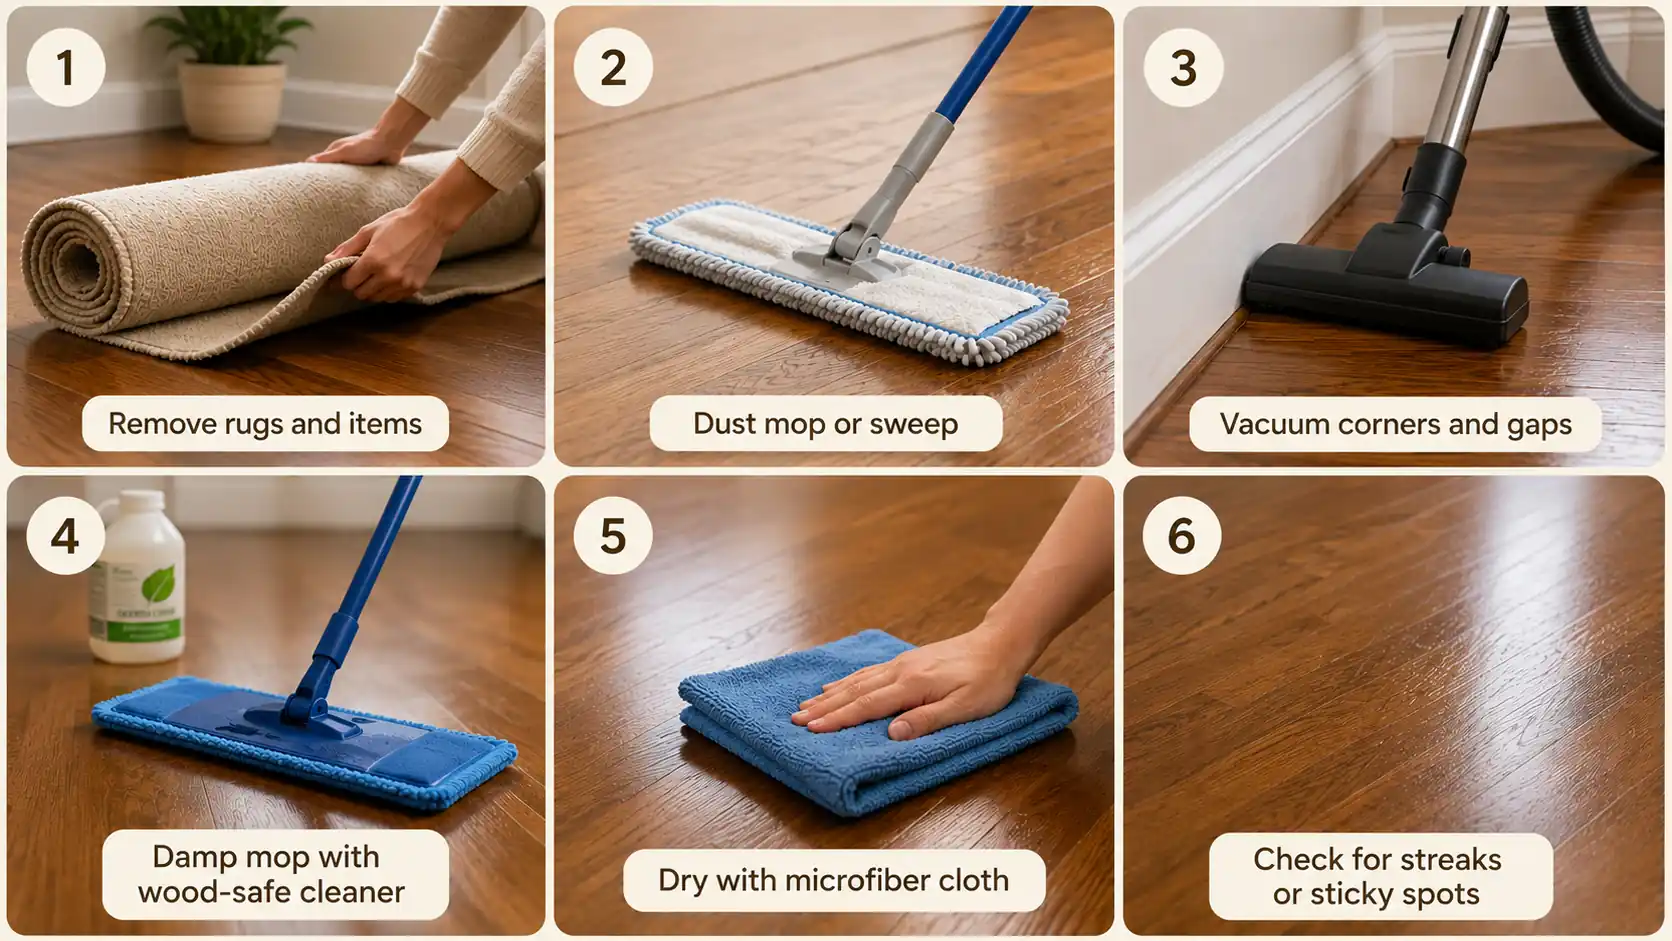
Step 1: Remove Rugs and Loose Items
Clear the area before you start. Pull back rugs, move chairs, and pick up anything sitting on the floor. This gives you full access to the surface and stops dirt from getting trapped under the edges of rugs while you clean.
Pro tip: Check under furniture legs for stuck-on debris before you move anything. It is easier to clean beneath furniture once rather than circling back.
Step 2: Dust Mop or Sweep
Run a microfiber dust mop over the entire floor before any moisture touches the surface. Work in the direction of the wood grain.
This picks up loose dirt, pet hair, and fine grit that would otherwise scratch the floor or turn into muddy streaks when wet.
Pro tip: A pre-treated microfiber dust mop picks up fine dust more effectively than a dry broom and does not send particles back into the air.
Step 3: Vacuum Corners and Gaps
Follow up with a vacuum set to the hard-floor setting. This lifts debris from corners, floor vents, and the gaps between boards that a dust mop can miss.
Make sure the brush roll or beater bar is turned off. A spinning brush can scratch the finish on hardwood.
Pro tip: Use a canister vacuum with a soft floor attachment for the best reach into tight edges without any risk of scratching.
Step 4: Damp Mop With a Wood-Safe Cleaner
Apply a pH-neutral hardwood floor cleaner to a microfiber mop. The mop should feel slightly damp to the touch, not wet.
Mop in the direction of the wood grain, working in small sections. Too much water is one of the most common causes of warped boards and a dull finish.
Pro tip: Use a spray mop that lets you control exactly how much solution hits the floor. It removes the guesswork from wringing out a traditional mop.
Step 5: Dry the Floor With a Clean Microfiber Cloth
Go back over the mopped area with a dry microfiber towel or a second dry mop. Do not let water sit on the surface.
Hardwood can absorb moisture quickly, especially in areas where the finish is worn or where boards have small gaps.
Drying immediately after mopping prevents water damage.
Pro tip: Work backward toward the room’s exit so you are never stepping on wet areas you have already dried.
Step 6: Check for Streaks or Sticky Spots
Once the floor is dry, walk through the room and check for any streaky patches or sticky areas.
A hazy streak usually means too much cleaner was used. A sticky patch can point to leftover residue.
Go over those spots with a barely damp cloth, then dry them again.
Pro tip: Check the floor in natural light or at an angle to spot haze that is easy to miss under overhead lighting.
Following these steps keeps your hardwood floors looking clean, shiny, and protected. Regular care prevents damage and extends the life of your flooring for years to come.
Schedule for Cleaning Hardwood Floors
Hardwood floor maintenance works best on a regular schedule rather than a deep clean only when the floor looks bad.
For daily upkeep, dry dust mop or sweep high-traffic areas like hallways and kitchens.
Every week, vacuum on the hard-floor setting and spot clean any spills or scuffs.
Busy rooms like the kitchen or living area benefit from a damp mop every one to two weeks.
Once a month, do a full damp mop of all hardwood areas using a pH-neutral cleaner.
Every three months, check for dullness, inspect furniture pads, and look for new scratches.
Once a year, inspect finish wear in high-traffic lanes and consider refinishing if needed. Small, consistent efforts protect the finish far better than occasional heavy cleaning sessions.
Hardwood Floor Maintenance Tips
Most hardwood floor damage is preventable. Add these to your routine, and the finish will last significantly longer.
- Wipe up spills right away: Blot liquid immediately with a soft cloth so moisture does not seep in, swell boards, or stain the finish.
- Use mats at entrances: Place mats near doors to catch dirt, grit, salt, and small stones before they scratch the wood surface.
- Add felt pads under furniture: Stick felt pads under chair and table legs to reduce scratches, then replace worn pads every few months.
- Keep pet nails trimmed: Trim pet nails regularly to limit small gouges, and use rugs where your pets walk or play most often.
- Avoid dragging furniture: Lift furniture instead of sliding it, since heavy pieces can scrape the finish even with felt pads underneath.
Small habits make hardwood floor maintenance much easier. With quick cleanup, gentle protection, and steady moisture control, your floors can stay cleaner, smoother, and better protected over time.
What Not to Use on Hardwood Floors
Several cleaning products and tools can permanently damage hardwood. Understanding what to avoid is just as important as knowing how to clean correctly.
| Product or Tool | Why It Causes Damage |
|---|---|
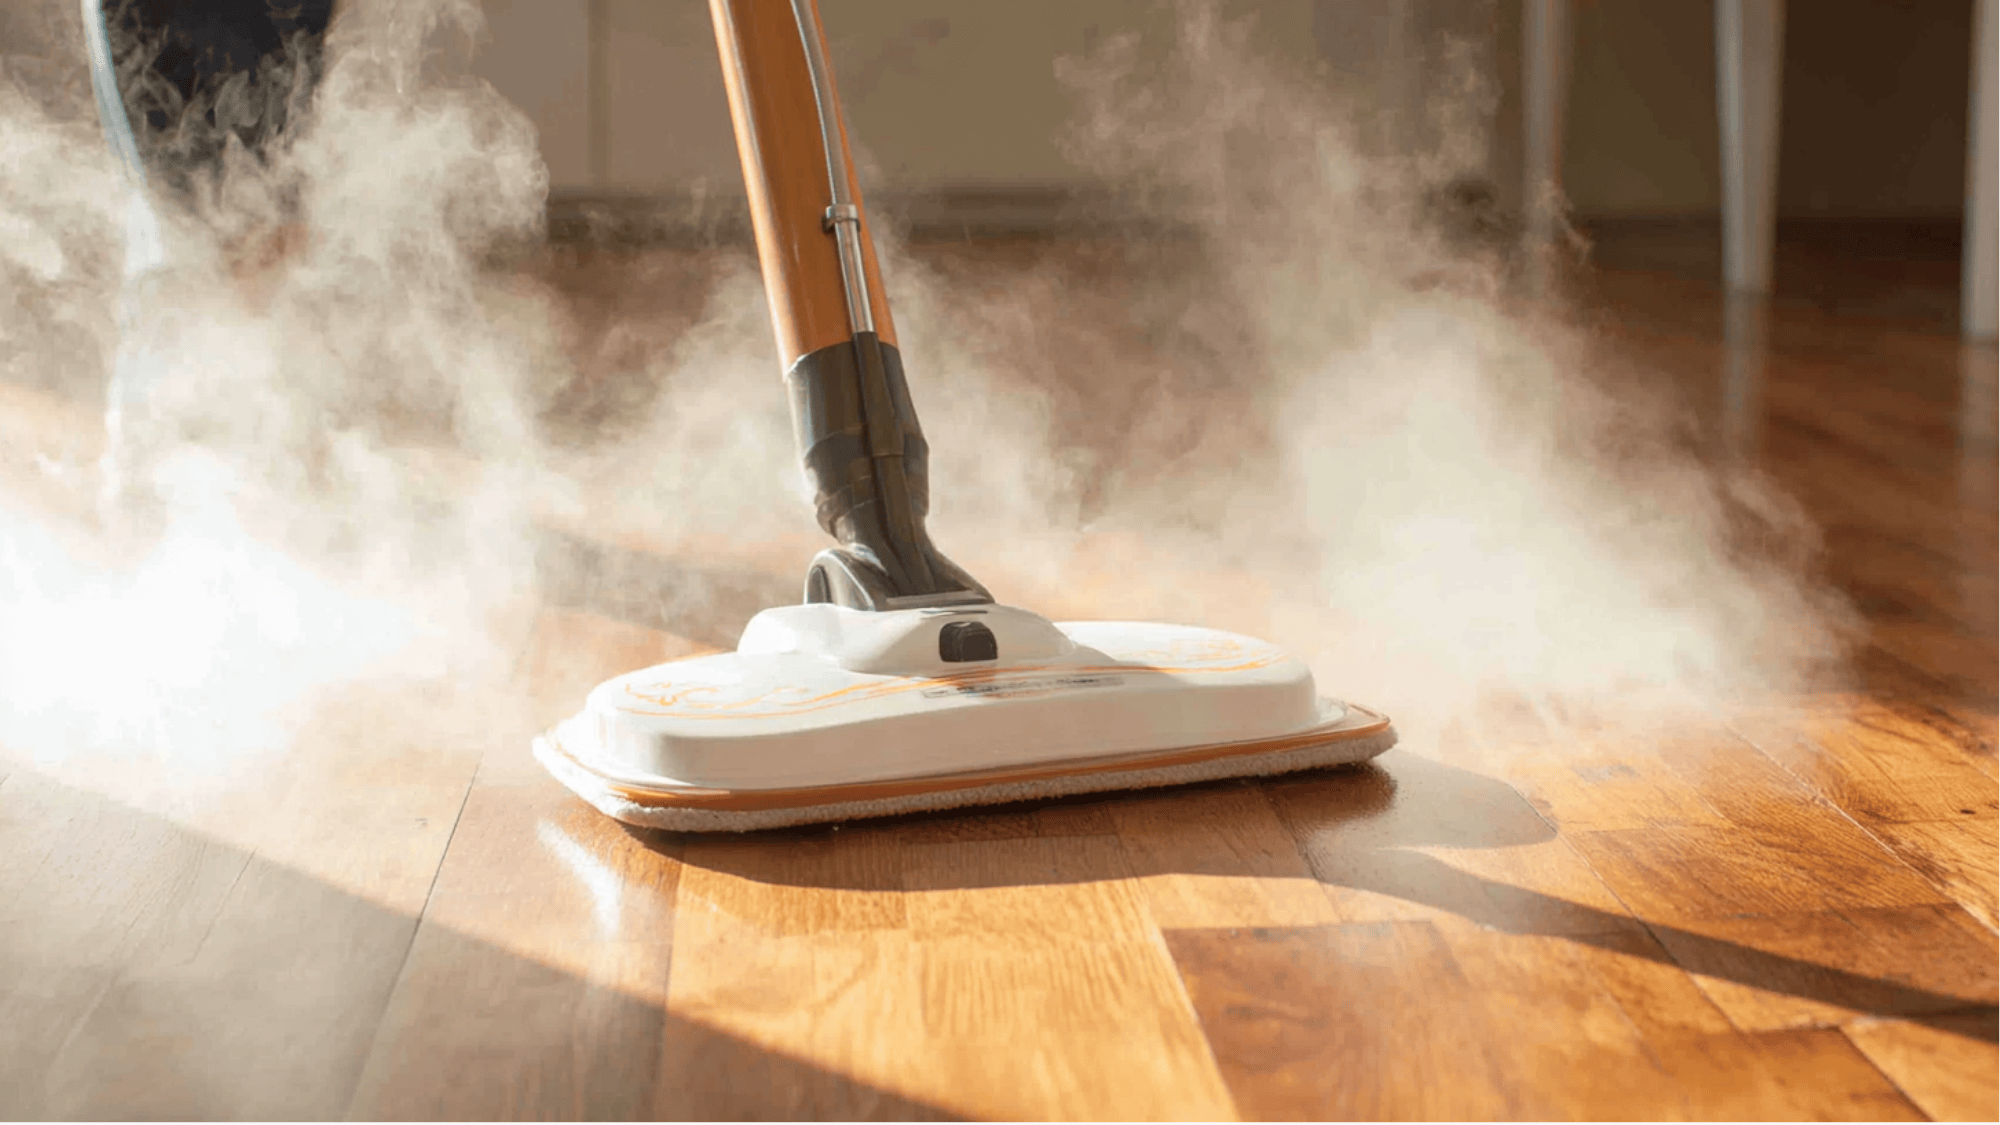
| Steam mops | Heat and steam force moisture deep into the wood, causing warping and finish damage |
| Soaking wet mops | Excess water swells boards and strips the finish over time |
| Abrasive scrubbers | Scratch and dull the protective surface coating |
| Bleach | Too harsh for wood finishes; causes discoloration and fiber breakdown |
| Ammonia-based cleaners | Strips finish and leave the surface dull and unprotected |
| Furniture polish | Leaves a slippery, waxy residue that is difficult to remove |
| Oil soaps on modern finishes | Leaves an oily residue on polyurethane finishes that attracts dirt and causes haziness |
| Too much vinegar | Acidic enough to break down the protective coating with repeated use |
When in doubt, use a pH-neutral cleaner made specifically for hardwood and follow the label instructions. Products designed for tile, vinyl, or general use are often not safe for wood.
How to Remove Common Marks
Most everyday messes on hardwood can be handled at home with the right approach. The key is to act quickly and use products that are safe for the floor’s finish.
- Scuff marks: Rub scuffs gently with a soft cloth, a microfiber pad, or a tennis ball; use cleaner only for stubborn marks.
- Sticky residue: Press a barely damp cloth with hardwood-safe cleaner over the sticky spot, then wipe and dry it immediately.
- Pet accidents: Blot the mess first, clean with a hardwood-approved cleaner, and dry fully so moisture does not sit on the wood.
- Water spots: Buff fresh water spots with a dry microfiber cloth; deeper stains may need a repair pen or a flooring professional.
A gentle approach is usually enough for small marks and messes. The main rule is simple: use less moisture, work slowly, and dry the area fully.
Why Mopped Hardwood Floors Look Dirty
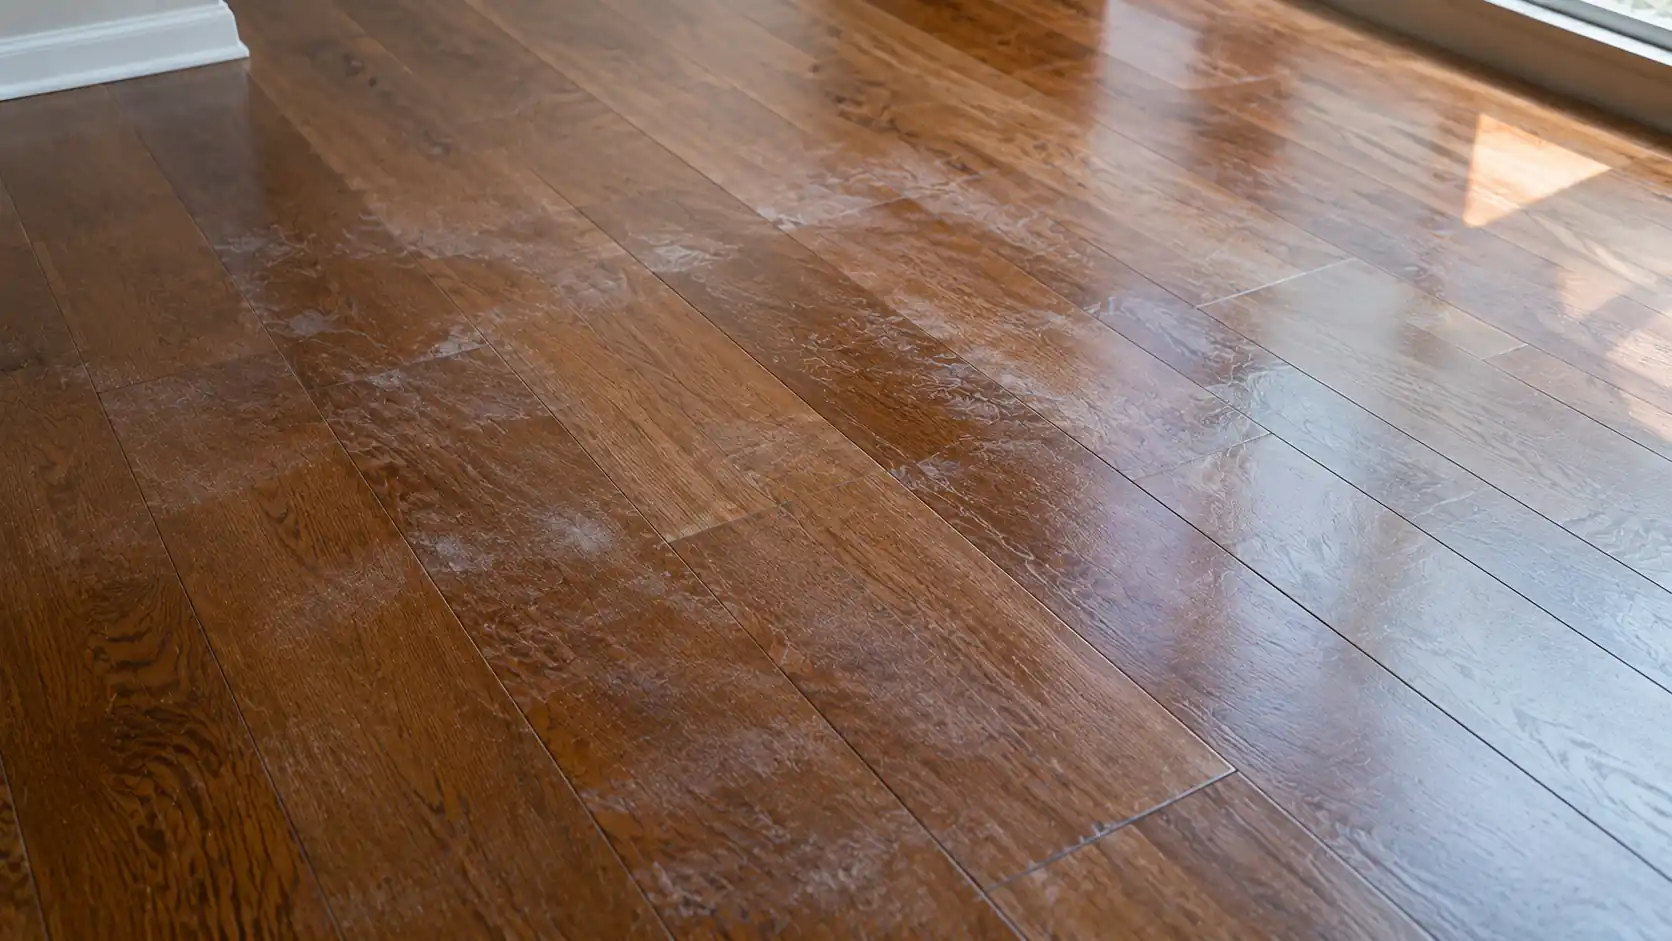
If your floors still look grimy after cleaning, the problem is almost always one of a few common causes.
A dirty mop pad spreads bacteria and old residue back onto the floor instead of lifting it.
Too much cleaner leaves a thin film that attracts more dust and makes the surface look hazy.
Too much water can deposit minerals from tap water as it evaporates, showing up as white spots or a dull film, especially on dark floors.
Skipping the dry-mop or vacuum step before mopping means loose grit turns into a muddy paste when wet.
Always start with a clean, barely damp mop pad, use the correct amount of cleaner, and dry the floor immediately after mopping.
When Cleaning is Not Enough
Sometimes a floor has issues that go beyond what regular cleaning can fix. Knowing the signs of finish wear helps you decide when professional care or refinishing is the next step.
- Gray patches on the surface: Gray areas after cleaning often mean the finish is worn through, leaving bare wood exposed to dirt and moisture.
- Deep scratches that cleaning does not fix: Deep gouges that cut through the finish usually require wood filler, touch-up work, or professional repair rather than more cleaning.
- Dullness that returns after cleaning: Quick-returning dullness may come from cleaner buildup or a thin finish and often needs screening and recoating.
- Water soaking in instead of beading: Fast-absorbing water means the finish has worn away, so continued mopping can push moisture deeper into the wood.
- Uneven color across the floor: Dark or light patches may result from moisture, sun exposure, or finish wear and often require a full refinishing.
These signs usually mean the issue has moved beyond regular cleaning. At that point, protecting the wood matters more than scrubbing harder.
Conclusion
Keeping hardwood floors clean comes down to using the right tools, the right cleaner, and the right amount of moisture at every step.
Regular hardwood floor maintenance, including daily dry mopping, weekly vacuuming, and careful damp mopping, protects the finish and keeps the wood looking its best for years.
If your floors still look dull after consistent cleaning, a professional recoat may be all they need.
If you notice gray patches, bare wood, or deep scratches, a full sand-and-refinish is likely the better next step.
Frequently Asked Questions
Can You Use Vinegar to Clean Hardwood Floors?
Vinegar is acidic and can slowly break down the protective finish on hardwood floors with repeated use. A pH-neutral hardwood cleaner is a safer and more effective option for regular cleaning.
Can You Mop Hardwood Floors With Water?
Plain water alone is not recommended. Too much water can swell the boards and damage the finish over time. Always use a barely damp microfiber mop with a hardwood-safe cleaner and dry the surface immediately.
What Is the Best Cleaner for Hardwood Floors?
A pH-neutral cleaner made specifically for hardwood floors is the safest and most effective choice. Flooring professionals and manufacturers widely recommend brands like Bona for routine cleaning without damaging the finish.
How Often Should Hardwood Floors Be Mopped?
Most households should damp-mop hardwood floors every 1 to 2 weeks, depending on traffic levels. High-traffic areas like kitchens may need it more often. Daily dry mopping reduces the need for frequent wet cleaning.
Is Steam Cleaning Safe for Hardwood Floors?
Steam cleaning is not safe for hardwood floors. The heat and moisture produced by steam mops can force water deep into the wood, causing warping, buckling, and finish damage even after a single use.