
Want to turn your boring walls into attractive displays? Learning how to hang plates on the wall is one of the easiest and most affordable ways to add personality to any room!
If you have beautiful vintage dishes hiding in cabinets or want to create eye-catching art with colorful plates, wall displays are trending for good reason
They instantly add texture, color, and charm to kitchens, dining rooms, or any space that needs a decorator’s touch.
What’s amazing is you don’t need expensive art or professional skills – just some basic supplies and this easy guide to create magazine-worthy results that will impress your guests!
Why Hang Plates on Your Wall?
Plates aren’t just for eating anymore – hanging them on your wall has become a hot home decor trend!
Instead of hiding beautiful dishes in cabinets, turn them into a pretty wall art that everyone can admire. Wall-mounted plates offer several amazing benefits.
They work as instant wall art that costs much less than expensive paintings. They add great texture and color to boring walls, especially when you mix different sizes and patterns.
If you collect vintage plates or have special family dishes, displaying them allows you to enjoy their beauty every day while showcasing your treasures.
It’s a simple way to make any room feel more personal and stylish without spending lots of money.
Materials You’ll Need
Before you start hanging plates, gather all your materials first. Having everything ready will make the project go much smoother and help you avoid multiple trips to the store.
| ITEM | PURPOSE |
|---|---|
| Plates | To display on the wall |
| Paper and Sharpie | For tracing layout templates |
| Scissors and Tape | To cut and place templates |
| Measuring Tape | For spacing and alignment |
| Plate Hangers (e.g., Tripar) | To securely hang the plates |
| Picture Hangers and Hammer | To mount plates on the wall |
Once you have all these materials ready, you’ll be able to complete your plate wall project in one afternoon without interruption or missing supplies.
Step-by-Step Instructions: How to Hang Plates on the Wall
Hanging plates on your wall might seem tricky, but it’s actually quite simple when you follow these easy steps. The key is taking your time to plan the layout before making any holes in your wall.
This method helps you create a perfect arrangement that looks professional and stays secure for years to come.
Step 1: Trace & Cut Out Plate Templates
Start by gathering all the plates you want to hang and some old newspaper or paper. Place each plate face down on the paper and trace around it with a dark pen or marker. Cut out each circle carefully with scissors.
If you have plates that look similar in size, write numbers on each template to avoid confusion later. These paper templates will serve as your guide for creating the perfect wall arrangement.
Step 2: Plan Your Wall Layout
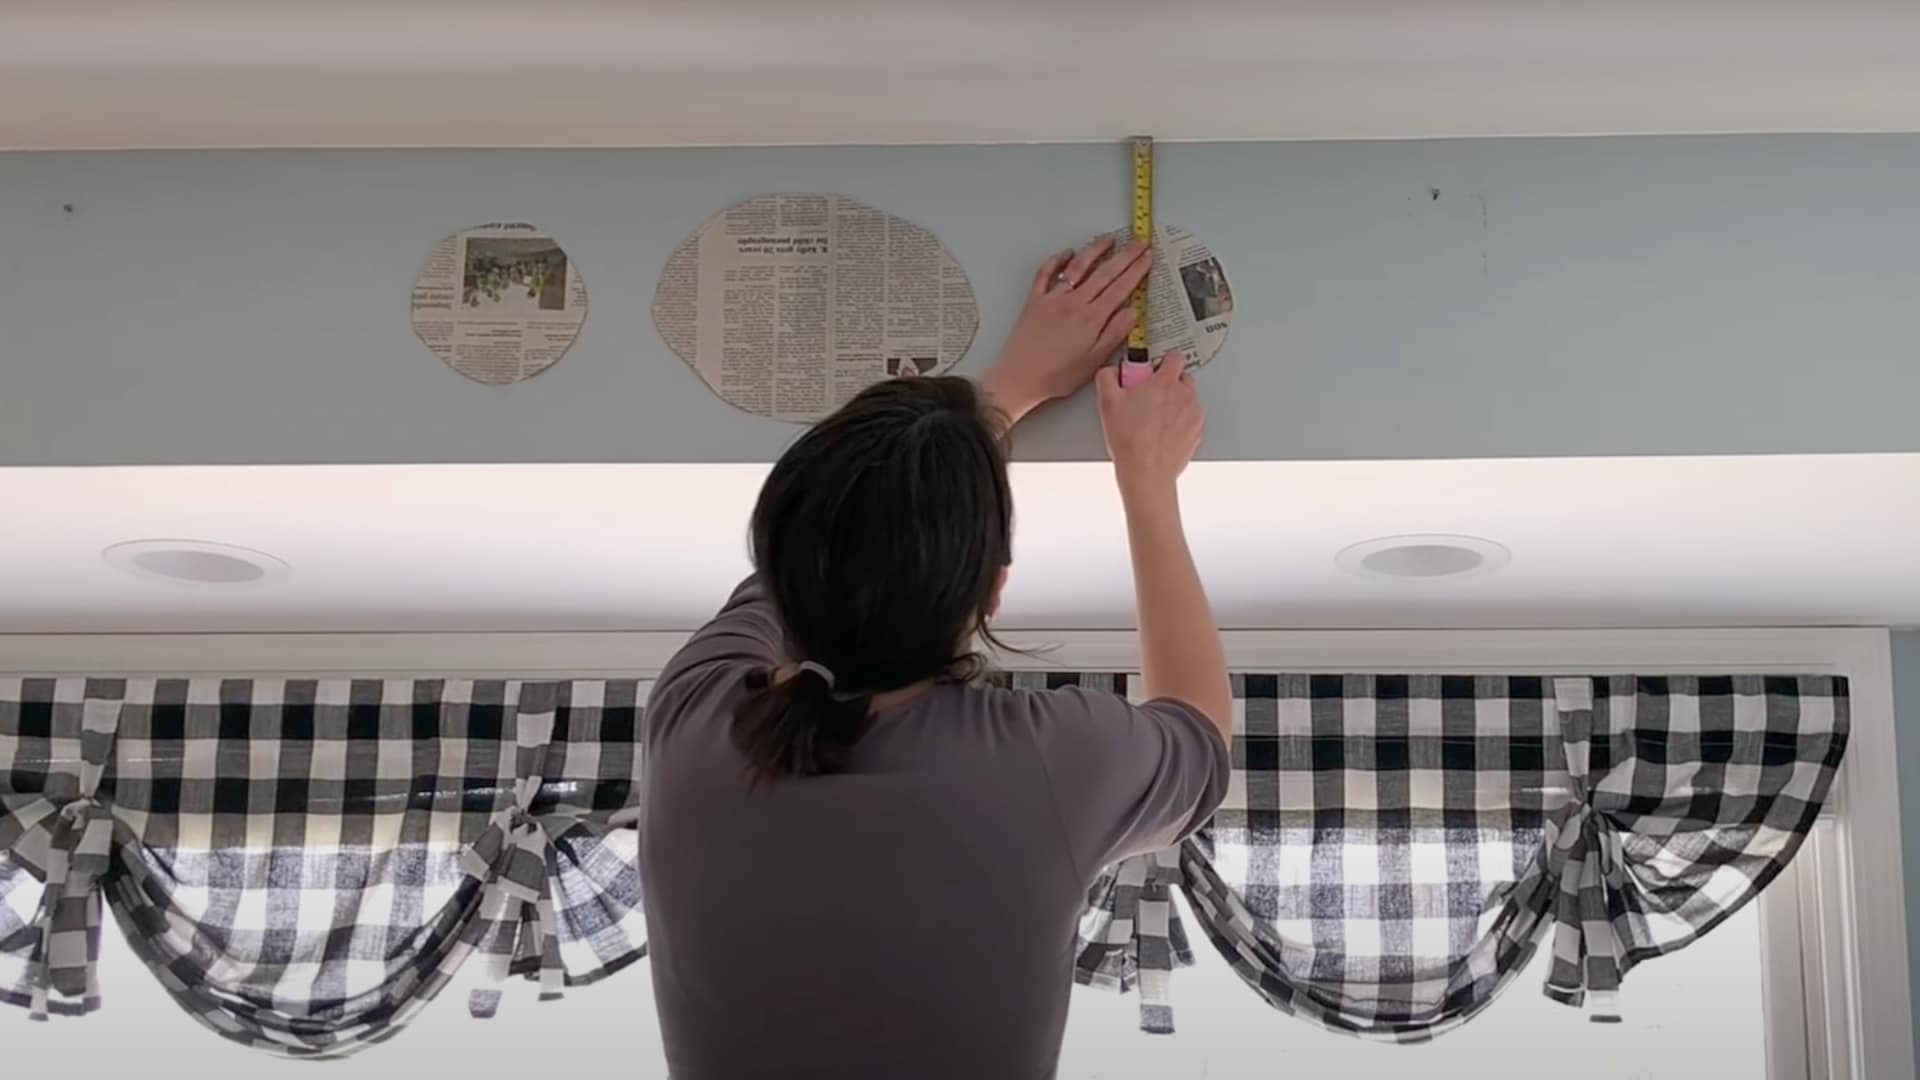
Now comes the fun part – designing your display! First, arrange your actual plates on the floor until you find a layout you love. Once you’re happy with the design, tape the paper templates on the wall in the same pattern.
Step back and examine your arrangement from various angles. Use a tape measure to make sure everything is centered and evenly spaced. Don’t rush this step, as it determines the appearance of your final display.
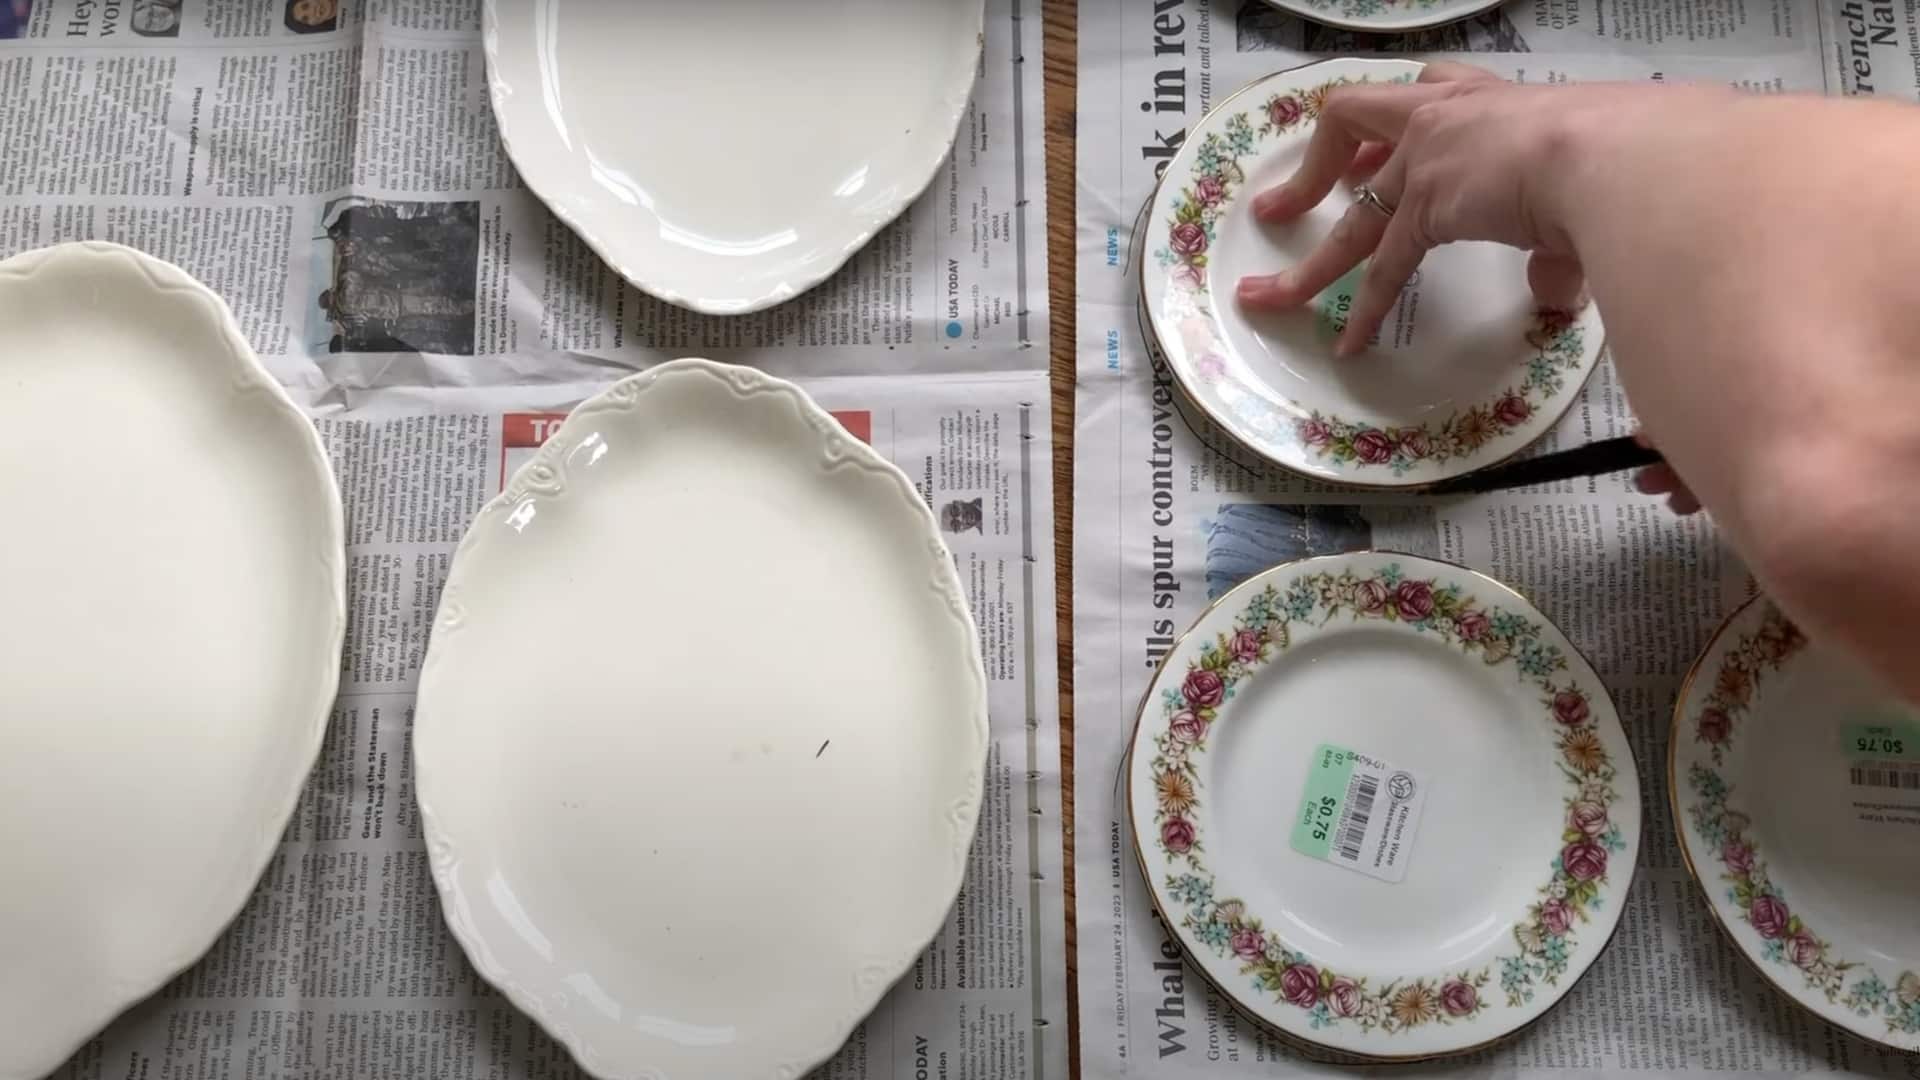
Step 3: Prep the Plates
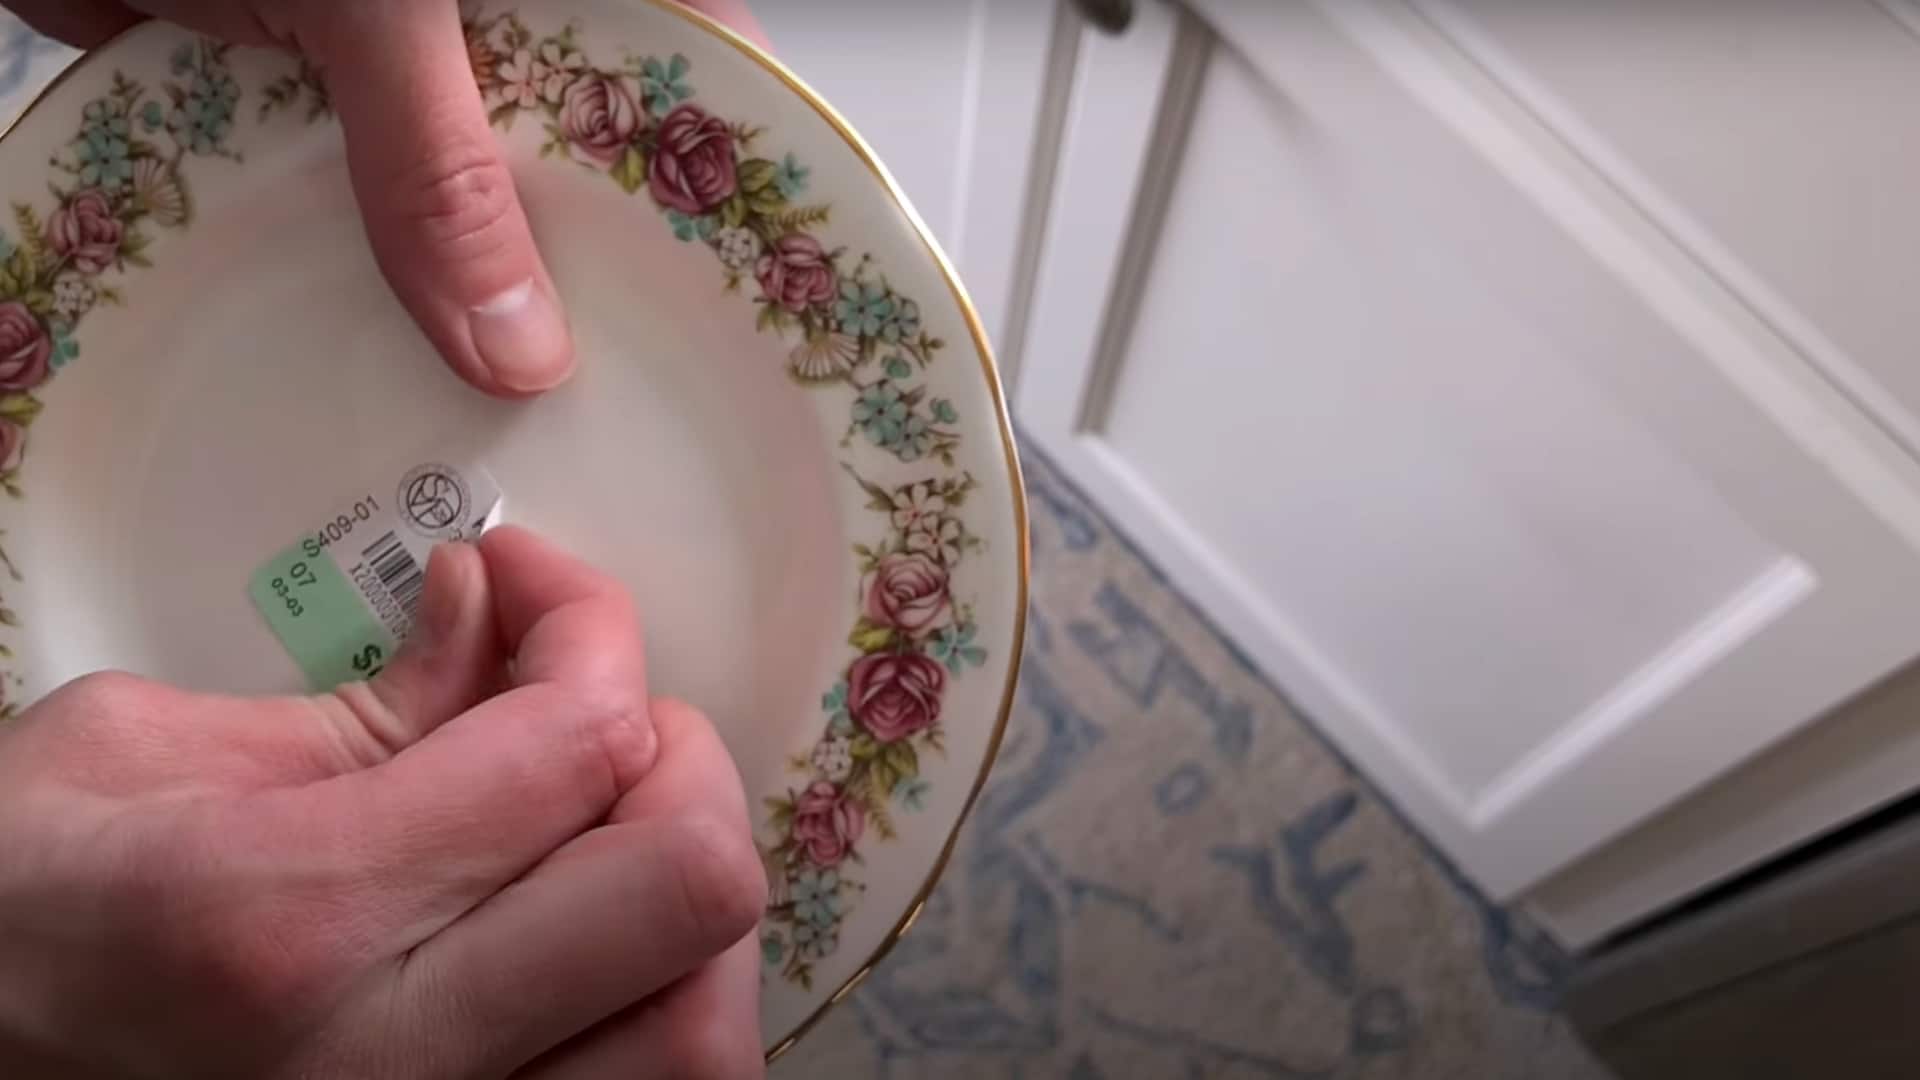
Before hanging, your plates need to be completely clean and ready. Check the back of each plate for stickers or price tags and remove them carefully.
If stickers won’t come off easily, soak the plates in warm soapy water for a few minutes. Use a plastic scraper to gently remove sticky residue without scratching. Make sure each plate is completely dry before the next step.
Step 4: Attach the Plate Hangers
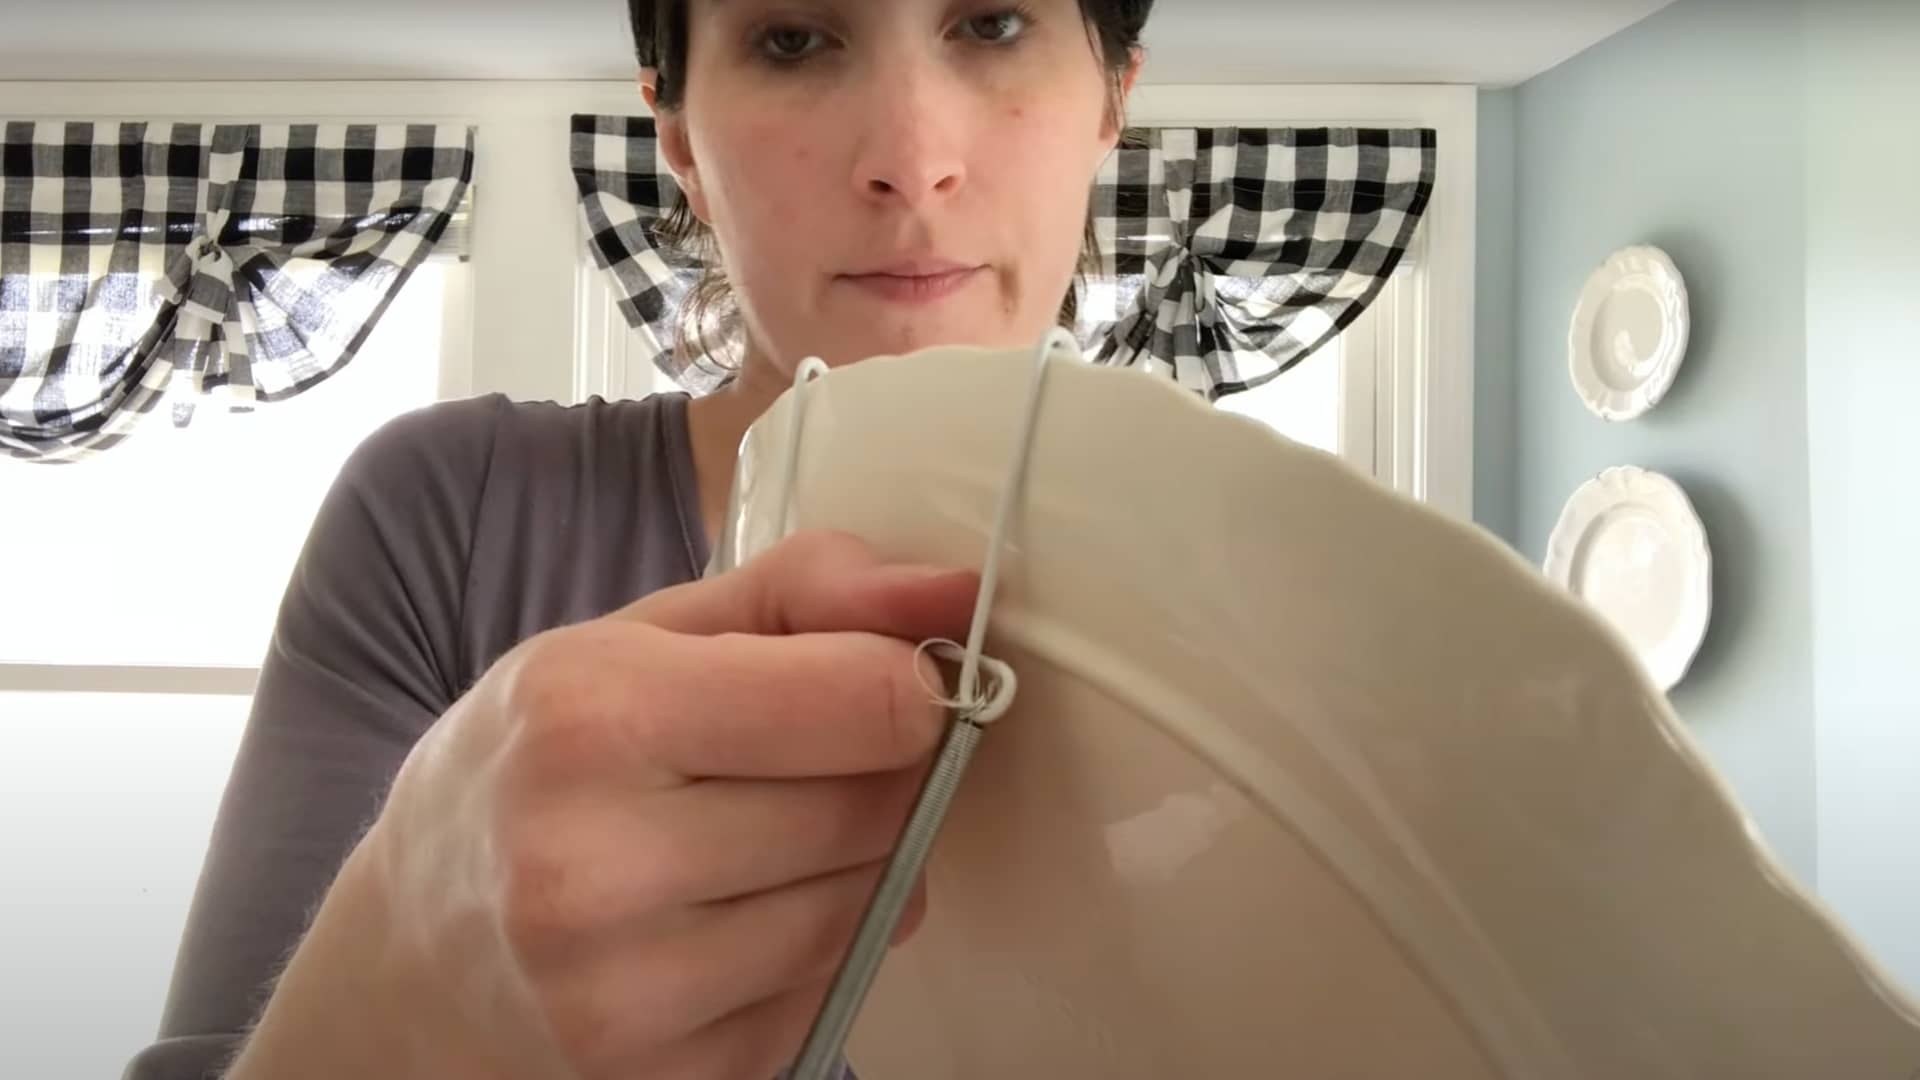
Select plate hangers that are slightly smaller than your plates for optimal grip. Hook the two top arms of the hanger over the top edge of the plate first. Then stretch the bottom arms down and hook them under the bottom edge.
The arched wire part should sit centered at the top of the plate. If the hanger feels loose, use small pliers to adjust the arms for a tighter, more secure fit.
Step 5: Mark and Hang
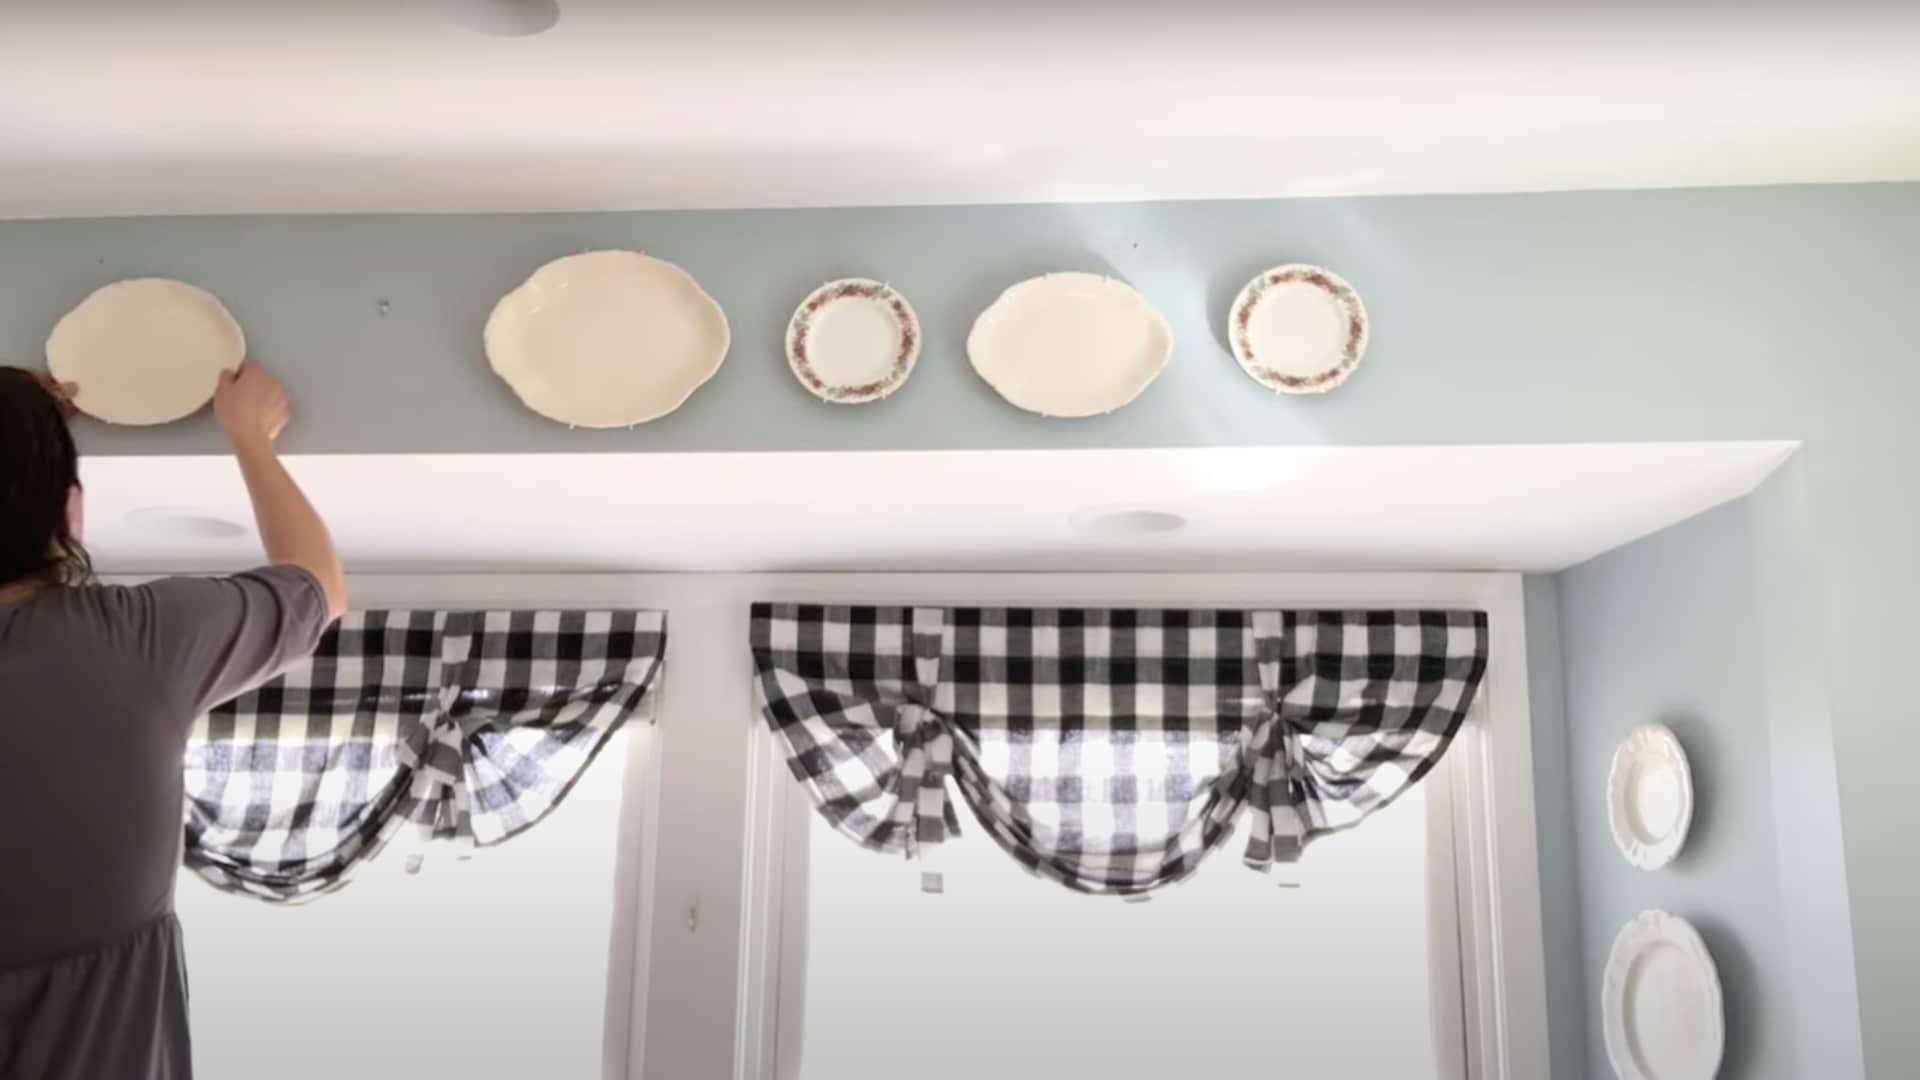
Time to get those plates on the wall! Hold each plate with its hanger and measure from the top edge down to the arched wire – this shows where your nail goes.
Mark this distance down from the top of each paper template. Hammer a small picture hanger nail at each marked spot. Remove the paper templates, hang each plate, and enjoy your beautiful wall display!
Video Tutorial
For more information, check out this video tutorial by Hymns & Home – Homemade Cottage Living
Some Other Methods to Hang Plates on the Wall
While wire plate hangers are the most common method, they’re not your only option! Depending on your plates, wall type, and living situation, other hanging methods might work better for you.
1. Adhesive Disc Plate Hangers (Minimal & Invisible)
- Clean the back of your plate thoroughly and let it dry completely.
- Peel the backing off the adhesive disc and press it firmly onto the center back of your plate.
- Wait 24 hours for the adhesive to set properly before hanging.
- Mark your wall where you want the plate and hammer in a small nail.
- Hang the plate using the hidden hook on the disc for an invisible, floating look.
2. Wire Plate Hangers (Secure & Reusable)
- Choose a wire hanger slightly smaller than your plate for the best grip.
- Hook the top two arms of the hanger over the top edge of your plate.
- Stretch the bottom arms down and hook them under the bottom edge of the plate.
- Ensure the arched wire part is centered at the top of the plate.
- Hang the plate on a wall nail using the arched wire, adjusting with pliers if needed.
3. Ribbon or Wire DIY Hangers (Creative Look)
- Cut two pieces of ribbon long enough to go around your plate, with extra for hanging.
- Attach ribbons to the back of your plate using strong adhesive or small clips.
- Ensure the ribbons are evenly spaced and securely fastened before hanging.
- Install small wall hooks or nails where you want your plates to hang.
- Hang your plates by the ribbons and adjust the length for perfect positioning.
4. Plate Stands or Racks Mounted on Wall
- Choose wall-mounted stands that fit your plate size and wall space.
- Mark where you want the stands and use a level to ensure they’re straight.
- Drill holes and securely mount the stands to the wall with appropriate screws.
- Test the stands with gentle pressure to make sure they’re firmly attached.
- Place your plates in the stands, making sure they sit securely and won’t slide out.
5. Command Strips or Velcro (Renter-Friendly)
- Clean both your plate and the wall surface with rubbing alcohol, then let them dry.
- Attach one half of the Command strip or Velcro to the back center of your plate.
- Press the other half firmly against your clean wall where you want the plate to be.
- Wait one hour for the adhesive to bond properly before hanging.
- Carefully press your plate against the wall strip, ensuring it’s secure and level.
Each method has its own benefits, so choose based on your plate weight, wall type, and if you’re renting or own your home. Don’t be afraid to mix different methods for different plates in the same display!
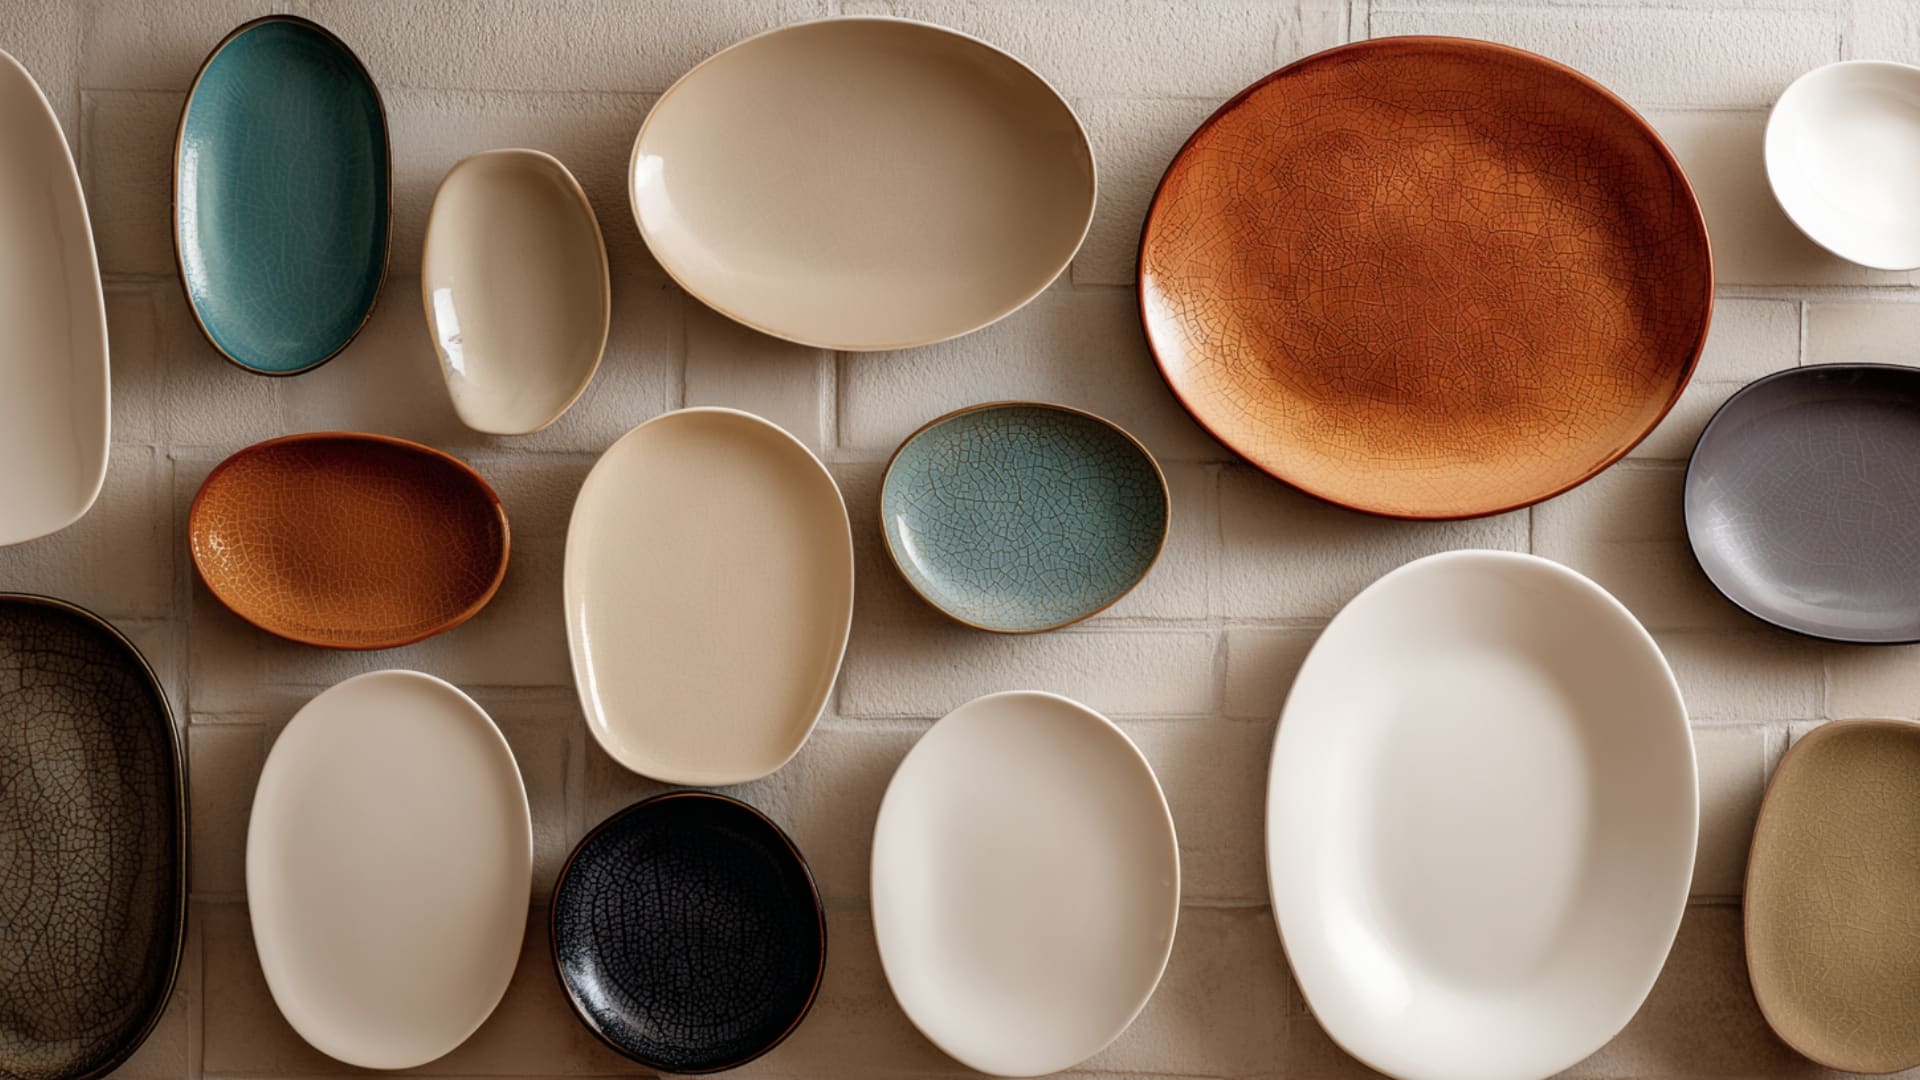
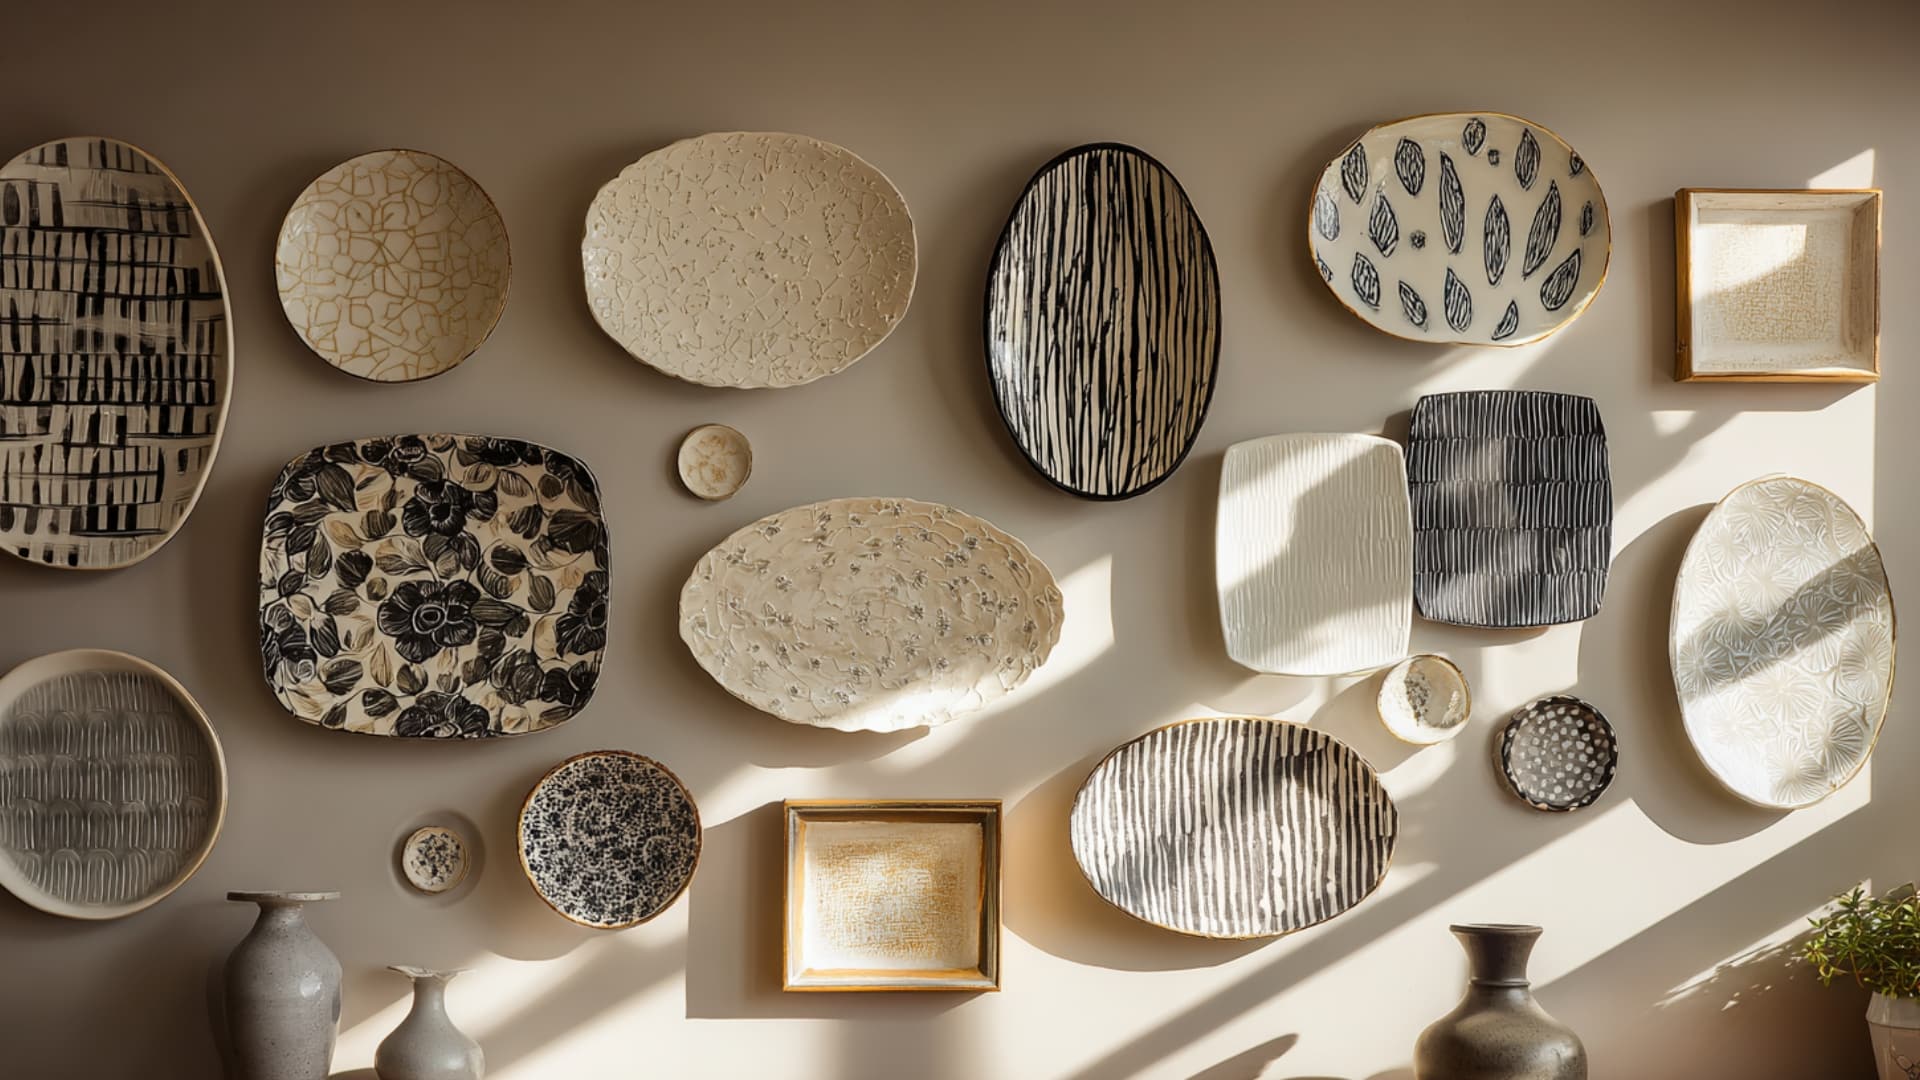
Styling Ideas for Your Plate Wall
Once your plates are safely hung, it’s time to make them look amazing! The right styling can turn a simple plate display into an attractive focal point for any room.
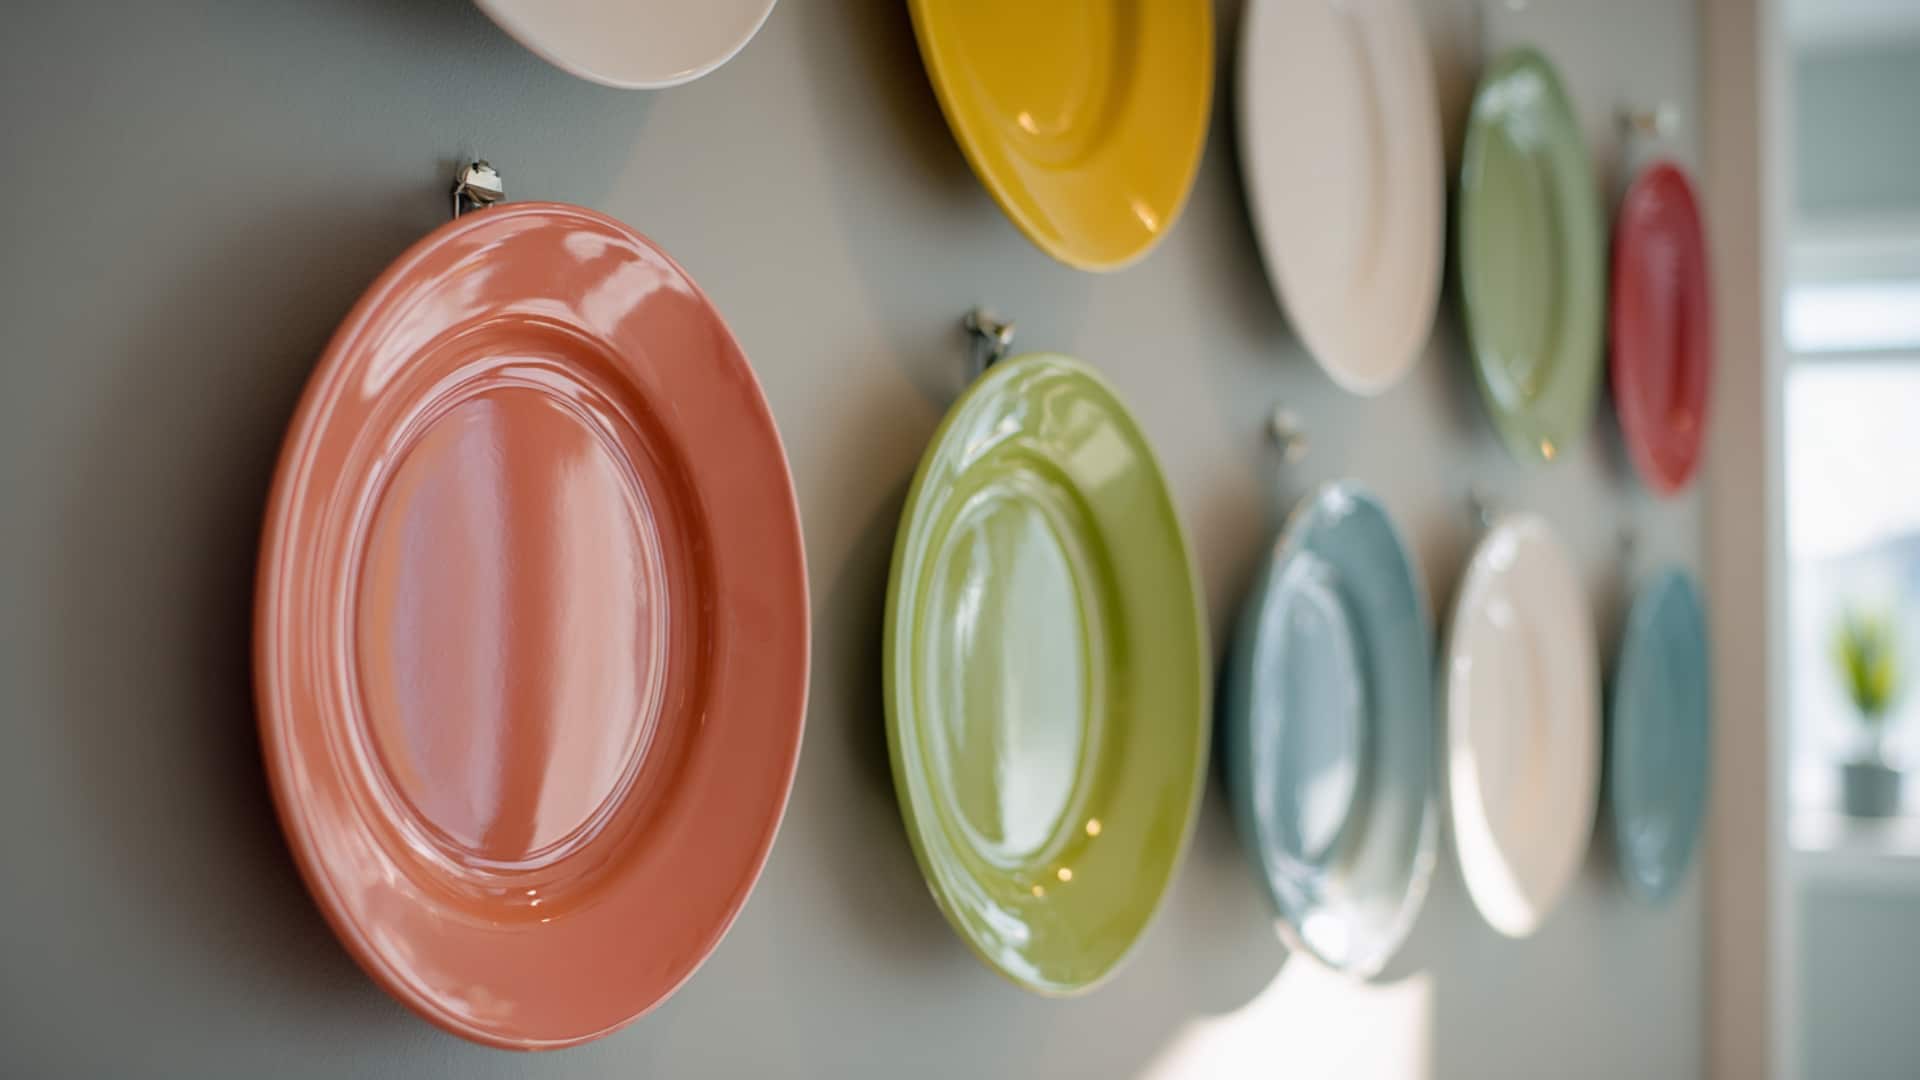
Start by thinking about color – you can either match your plates to your wall color for a calm, subtle look, or choose plates that contrast with the wall to make them really pop and stand out.
Mix different shapes and sizes together for visual interest, combining large dinner plates with smaller salad plates or unique oval platters.
For layout, try arranging plates in a neat grid for a modern feel, cluster them organically for a relaxed vibe, or create symmetrical patterns for a more formal look that draws the eye.
Common Mistakes to Avoid
Even simple projects like hanging plates can go wrong if you’re not careful. One of the biggest mistakes people make is choosing the wrong hanger size – too big and your plate will slip, too small and it won’t grip properly.
Many people also rush straight to hanging without planning their layout first, which leads to crooked displays and extra holes in the wall.
Another common problem is trying to hang plates on dirty or uneven walls, which makes everything look messy and can cause plates to fall.
Finally, always check weight limits for your hanging method. Heavy vintage plates need stronger hangers than lightweight decorative ones, and ignoring this can lead to broken dishes and damaged walls.
Summing It Up
Now you know exactly how to hang plates on the wall like a professional decorator!
From choosing the right hangers to creating perfect layouts, you have all the tools needed to change any blank wall into a beautiful focal point that reflects your style.
Remember to plan your design first, prep your plates properly, and choose hanging methods that match your plate weights and living situation.
If you go with classic wire hangers or try creative ribbon displays, your new plate wall will be the perfect conversation starter for years to come.
Ready to start your project? Share photos of your finished plate wall in the comments below – we’d love to see your amazing creativity and inspire others!