

Grout starts white and bright. Then life happens. Soap scum, hard water, and daily moisture slowly turn it gray, brown, or worse, spotty with mold.
Learning how to clean grout does not require expensive products or a professional cleaner. Most methods use simple ingredients already sitting in kitchen cabinets.
Cleaning grout with baking soda, for example, costs almost nothing and works better than most people expect.
Dingy kitchen floors, discolored bathroom tiles, stubborn stains creeping along shower walls, all of it is fixable. A few household ingredients, a stiff brush, and the right method make a visible difference fast.
Why Grout Gets Dirty So Fast
Grout is naturally porous, which means it can absorb moisture, dirt, and cleaning residue over time. In areas like bathrooms and kitchens, daily exposure to water, soap, and foot traffic can make grout look stained much faster than tile surfaces.
- Soap scum: Soap residue builds up along grout lines, creating a dull, dirty layer that traps more dirt and moisture over time.
- Hard water buildup: Minerals left behind by hard water can settle into grout, causing discoloration and making grout appear cloudy or stained.
- Mold and mildew: Damp areas with poor airflow encourage mold and mildew growth, especially in shower grout and bathroom corners.
- Dirt and foot traffic: Floor grout collects dust, mud, and debris from shoes, gradually darkening light-colored grout and making it harder to clean.
- Improper sealing: Unsealed or worn grout absorbs water and stains more easily, allowing dirt and cleaning residue to penetrate deeper.
Recognizing these signs early can help you choose the right cleaning method before stains become permanent. In some cases, deep cleaning or resealing grout may be necessary to restore its original appearance.
Cleaning Grout With Baking Soda and Water: Common Method
Before you start, gather a few simple items from your kitchen or cleaning cabinet. These tools help you make the paste, apply it neatly, and wipe away residue.
| Item | Why You Need It |
|---|---|
| Baking soda | Forms a gentle cleaning paste that helps lift light dirt from grout. |
| Warm water | Mixes with baking soda and helps soften surface grime. |
| Small bowl | Hold the baking soda paste while you work. |
| Old toothbrush or grout brush | Scrubs narrow grout lines without needing a large cleaning tool. |
| Microfiber cloth | Wipes away loosened dirt and leftover baking soda paste. |
| Clean sponge | Helps rinse the tile and grout after scrubbing. |
This method works best for light dirt and routine grout care. It may not remove deep mold stains, but it can make everyday buildup look cleaner and brighter.
Steps to Clean Grout With Baking Soda and Water
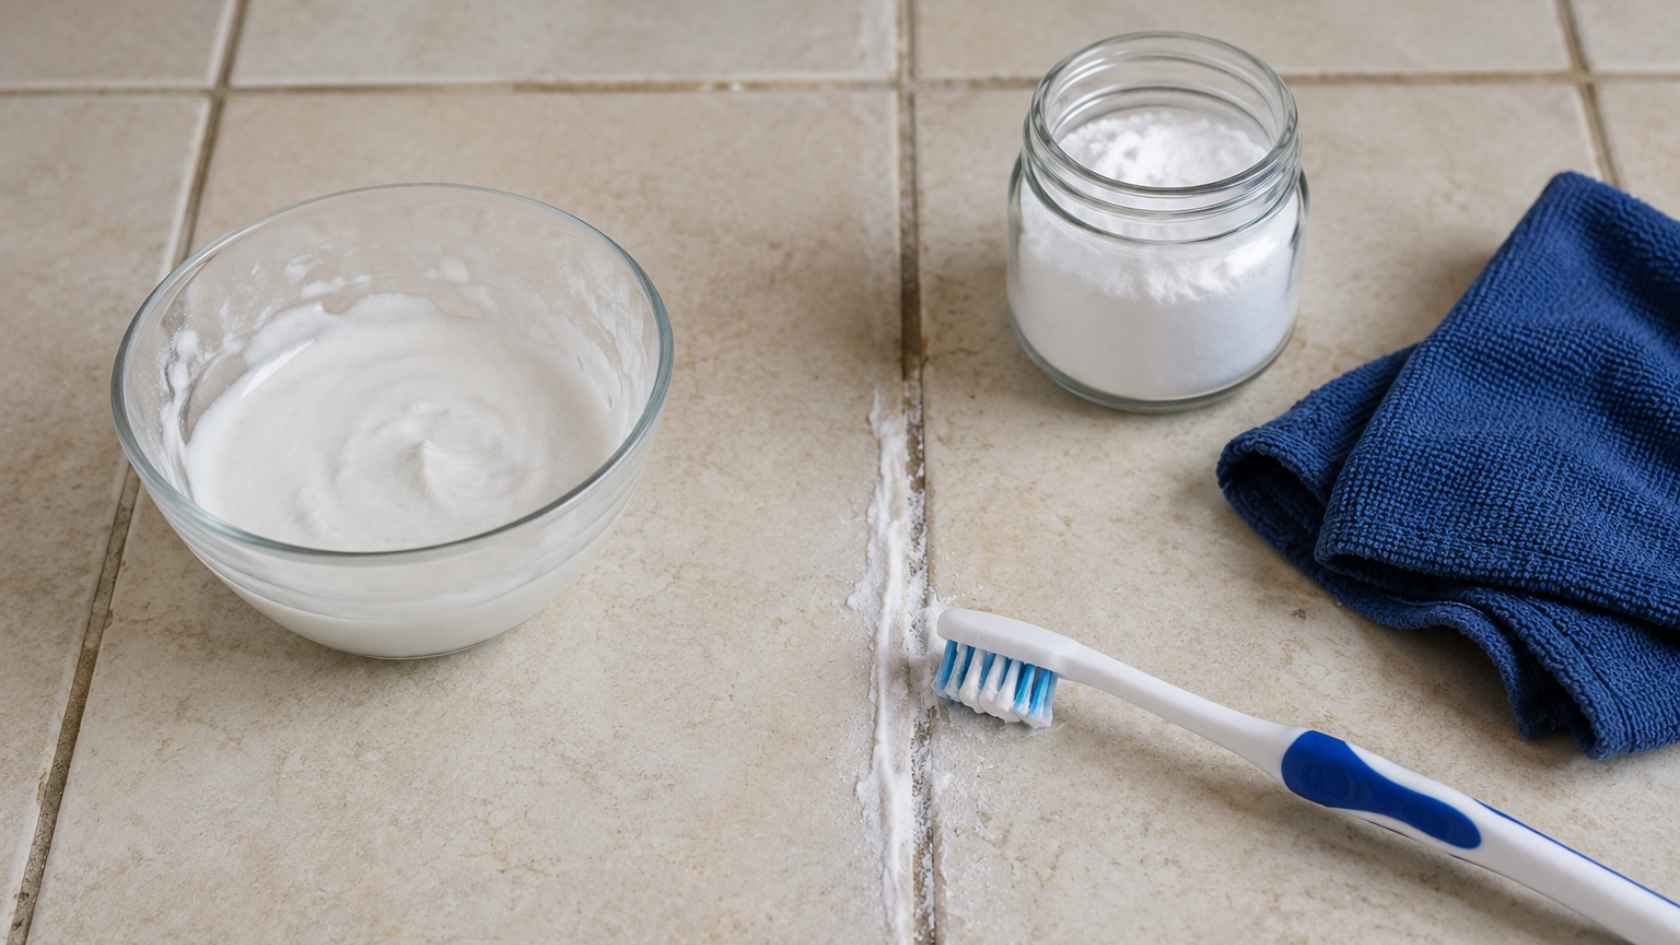
Start with a small section of grout before cleaning the entire area. This lets you check the results and adjust your scrubbing pressure if needed. Follow these simple steps to remove dirt and freshen grout using baking soda and water.
Step 1: Make a Baking Soda Paste
Place baking soda in a small bowl and slowly add warm water while stirring. Continue mixing until you have a thick paste that spreads easily without dripping.
The paste should be thick enough to stick to vertical grout lines, especially when cleaning shower walls.
Step 2: Apply the Paste to the Grout
Use your fingers, a spoon, or an old toothbrush to spread the paste directly onto the grout lines. Make sure the stained areas are fully covered.
Applying an even layer helps the baking soda stay in contact with dirt and grime, making it easier to loosen during scrubbing.
Step 3: Let the Paste Sit
Allow the baking soda paste to remain on the grout for 10 to 15 minutes. During this time, it begins breaking down surface dirt and soap residue.
Giving the paste enough time to work can reduce the amount of scrubbing needed and improve your overall cleaning results.
Step 4: Scrub the Grout Gently
Using an old toothbrush or grout brush, scrub the grout lines with small circular motions. Focus on areas with visible staining or discoloration.
Apply steady but gentle pressure to avoid damaging the grout. Continue scrubbing until the dirt begins lifting and the grout appears cleaner.
Step 5: Wipe Away the Residue
Use a damp microfiber cloth or sponge to remove the baking soda paste and loosened dirt. Rinse the cloth frequently while wiping to prevent spreading grime back onto the surface.
This step helps reveal the cleaned grout underneath and removes any remaining residue.
Step 6: Rinse and Dry the Area
Rinse the tile and grout with clean water to wash away leftover baking soda. Once rinsed, dry the area using a clean towel or cloth.
Allowing the grout to dry completely helps you see the final results and prevents moisture from attracting new dirt.
Cleaning Grout With Baking Soda and Vinegar
Baking soda and vinegar create a foaming reaction that can help loosen surface dirt, soap scum, and mild stains. This method is popular for routine grout cleaning and requires only a few household ingredients.
Steps to Follow
- Apply a thick baking soda paste along the grout lines.
- Spray white vinegar evenly over the baking soda paste.
- Allow the mixture to foam for about ten minutes.
- Scrub grout gently using a toothbrush or grout brush.
- Wipe away residue with a damp cloth or sponge.
- Rinse with clean water and dry the area thoroughly.
This method is inexpensive and easy for regular grout maintenance. While it can brighten dirty grout, heavily stained or moldy grout may need hydrogen peroxide, oxygen bleach, or professional-grade cleaners for better results.
Cleaning Grout With Hydrogen Peroxide
Hydrogen peroxide is a popular grout cleaner because it can tackle deeper stains than baking soda alone. Many homeowners use it to brighten discolored grout and remove stubborn dirt without relying on harsh chemical products.
Steps to Follow:
- Mix one-half cup of baking soda with hydrogen peroxide.
- Stir until a thick, spreadable paste forms.
- Apply the paste evenly over stained grout.
- Let it sit for fifteen minutes before scrubbing.
- Clean with a brush and rinse completely afterward.
- Repeat if stains remain visible after drying.
Hydrogen peroxide is often more effective than baking soda and water for older stains. While it may not restore severely damaged grout, it can noticeably improve grout appearance and reduce the need for aggressive cleaning products.
How to Clean Grout in a Shower
Shower grout faces constant exposure to moisture, soap residue, body oils, and poor ventilation. As a result, it often develops stains faster than grout in other areas of the home and requires more frequent cleaning.
Why Shower Grout Gets So Dirty
Shower grout is porous, which means it can absorb water and trap dirt over time. Daily showers leave behind soap scum, shampoo residue, and hard-water minerals.
When moisture lingers, mold and mildew can begin growing in grout lines, especially in corners and areas with limited airflow.

What to Do About Mold and Mildew in Shower Grout
If you notice black, green, or pink spots, mold or mildew is likely present. Treat it quickly before it spreads deeper into the grout.
| Step | What to Do |
| 1. Apply cleaner | Use hydrogen peroxide or a mold-removing cleaner. |
| 2. Let it sit | Allow 10–15 minutes for the solution to work. |
| 3. Scrub thoroughly | Focus on corners and grout joints. |
| 4. Rinse completely | Remove all cleaner residue. |
| 5. Dry the area | Reduce moisture that encourages regrowth. |
Pro tip: If mold keeps returning after multiple cleanings, the grout may be damaged internally and could need repair or replacement rather than another cleaning session.
How Often Should You Clean Grout?Grout cleaning depends on the room, moisture level, and daily use. Bathroom and shower grout need more attention because water and soap residue build up quickly. Kitchen grout should be wiped often to prevent grease stains. High-traffic floor grout may need weekly cleaning, while shower grout is best cleaned every one to two weeks. |
Common Grout Cleaning Mistakes That Can Cause Damage
Cleaning grout may seem straightforward, but using the wrong tools or products can cause lasting damage. Avoiding these common mistakes can help keep grout stronger, cleaner, and looking better for longer.
- Using bleach too often
Frequent bleach use can weaken grout over time and may cause discoloration or surface deterioration. - Scrubbing with metal brushes
Metal bristles can scratch grout and tile surfaces, making them more vulnerable to dirt and moisture. - Using vinegar on natural stone tile
Vinegar’s acidity can damage natural stone and may gradually wear down surrounding grout lines. - Skipping grout sealing
Unsealed grout absorbs water, stains, and dirt more easily, making future cleaning much harder.
Following proper cleaning methods helps protect grout from unnecessary wear and extends its lifespan. Using gentle tools, suitable cleaners, and regular sealing can prevent costly repairs and keep tiled surfaces looking their best.
What Homeowners Say Works Best for Cleaning Grout
Homeowners often share practical grout-cleaning tips in online communities, and a few patterns recur.
Many say baking soda and hydrogen peroxide work well for soap scum and light stains, especially when the paste sits for 10–15 minutes before scrubbing.
Others prefer steam cleaners because they loosen grime without strong chemicals. Failed attempts usually involve metal brushes, too much bleach, or skipping grout sealing after cleaning.
For more user-tested advice, browse the Reddit grout cleaning community and check the X grout cleaning community.
Wrap Up
Clean grout does not require expensive products or hours of scrubbing. A simple paste of baking soda and hydrogen peroxide handles most stains.
For shower grout, clean every one to two weeks and dry the surface after every shower. Tackle mold the moment you spot it; waiting only makes it harder to remove.
The biggest mistake most people make is skipping the sealer after cleaning. Unsealed grout absorbs dirt right back in and undoes all your hard work.
Start with the method that matches your grout type and level of dirtiness. Small, regular efforts beat one big deep clean every few months.
Which method worked best for you? Drop a comment below and help others find what actually works.
Frequently Asked Questions
Does the Color of Grout Affect Which Cleaner I Should Use?
Yes. Avoid chlorine bleach on colored grout. It fades the tint. Stick to oxygenated bleach or baking soda paste instead.
Can I Clean Grout without Scrubbing?
A steam cleaner loosens dirt using heat and pressure alone. No paste, no brush, no heavy scrubbing required.
How Long Does Clean Grout Stay Clean?
Sealed grout stays cleaner for six to twelve months. Unsealed grout picks up dirt and stains within weeks of cleaning.
Is It Safe to Mix Different Grout Cleaners Together?
Never mix bleach with vinegar or ammonia. The combination releases toxic fumes. Use one cleaner at a time and rinse fully before switching.