Want beautiful, floral nails without spending lots of money at the salon?
DIY floral nail stickers are the perfect solution! These pretty decorations are easy to make at home and give you pretty nail art in minutes.
If you love roses, daisies, or cherry blossoms, you can create your own custom designs. Making DIY floral nail stickers is fun, cheap, and lets you express your style.
Get ready to convert your nails with gorgeous flowers that look like they came from a professional nail artist!
Why DIY Floral Nail Stickers?
Floral nail art remains a popular choice – especially in spring and summer when light, fresh designs are everywhere. Instead of booking a salon appointment, making your own floral nail stickers is a fun and affordable way to achieve similar results at home.
You can personalize the colors, patterns, and styles to suit your look.
If you’re looking for ideas to get started, this collection of spring-summer nails offers a range of seasonal trends that complement floral themes and can help you decide what kind of look you’d like to create.
What You’ll Need
Before you get started, make sure you have all the basic tools and materials ready. You don’t need anything fancy – just a few simple supplies that are easy to find and perfect for beginners.
| Item | Use |
|---|---|
| Sticker/decal paper | Base for designs |
| Floral designs | Printed or hand-drawn art |
| Nail polish or paint | For manual designs |
| Scissors/craft knife | Cutting out stickers |
| Tweezers | Precise sticker placement |
| Base coat & top coat | Nail prep and sealing |
Once everything is gathered, you’re ready to start creating your own floral nail stickers in just a few simple steps. It’s easier than you might think – and the results are totally worth it.
Floral Nail Stickers: Step-by-Step Guide for Beginners
Making floral nail stickers at home is a simple and fun way to try creative nail art. You don’t need any special skills or expensive tools. Follow these beginner-friendly steps to create custom designs that show off your personal style.
Step 1: Choose or Create Your Floral Designs
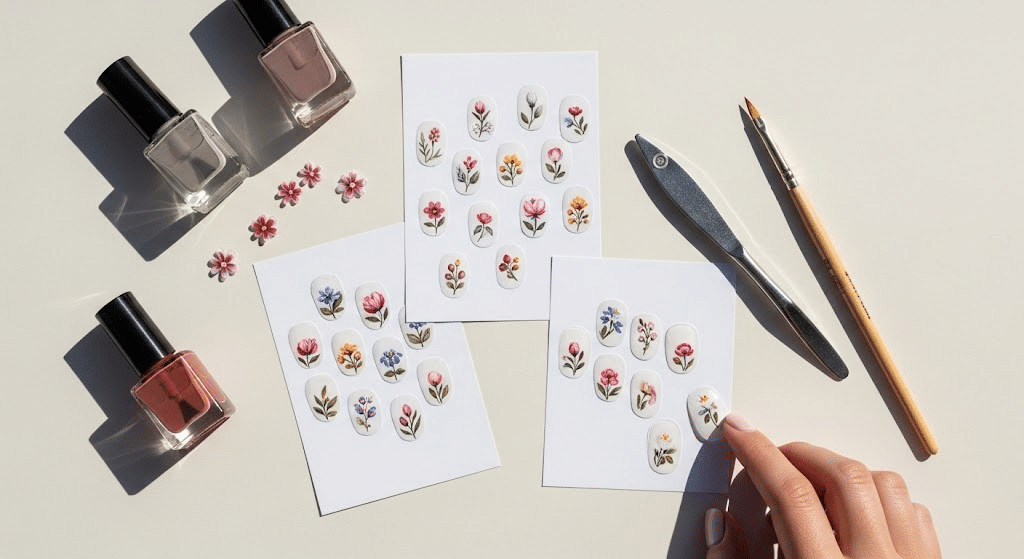
Pick flower designs you want – drawn or printed. Small, clear images like daisies or roses work well. Since nail shape affects how designs appear, it helps to know about nail shaping tips for the best results.
Flowers like daisies, roses, and tulips are great for beginners. Keep the designs small and use clear, high-quality images when printing to ensure they look neat on your nails.
Step 2: Print or Paint Your Stickers
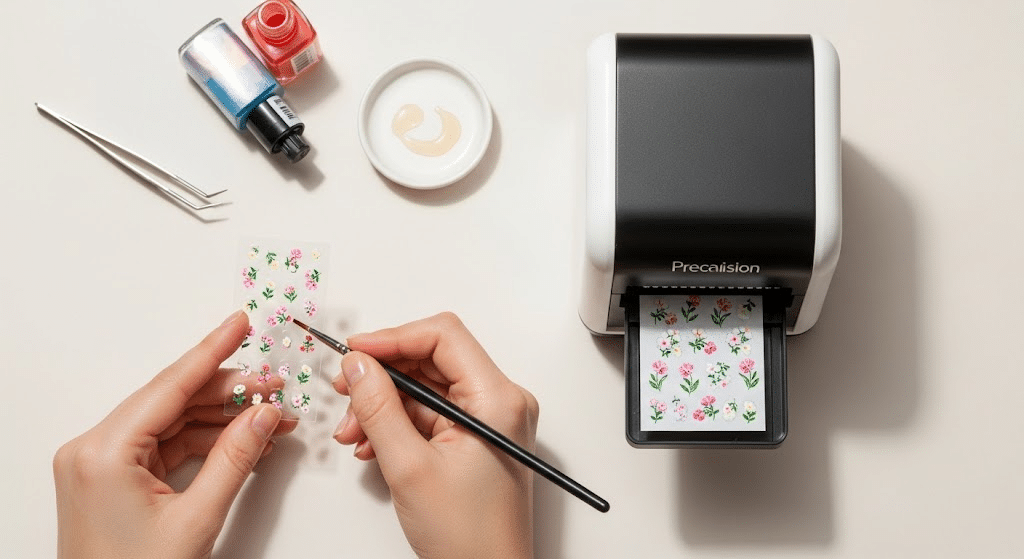
If you’re printing your flowers, use clear or white sticker paper made for nails. If painting by hand, apply your design directly to the sticker paper.
Let the designs dry completely before continuing. Dry stickers are easier to cut and apply without smudging. Take your time to make sure each design is clean and smooth.
Step 3: Cut Out the Floral Stickers
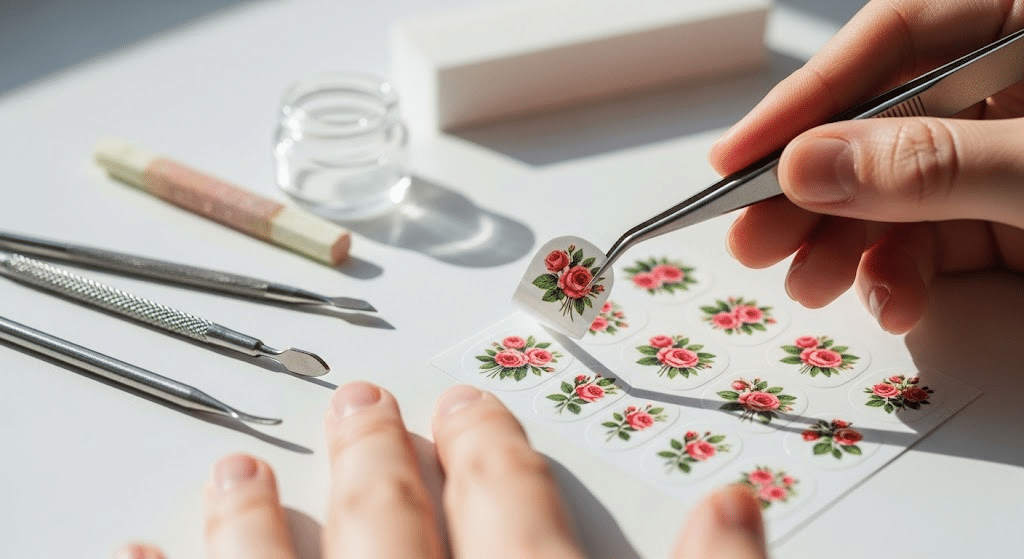
Once your designs are completely dry, use small scissors or a craft knife to carefully cut around each flower. Try to follow the shape closely so the sticker fits nicely on your nail.
Avoid cutting too large. You can also group the stickers by size, making it easier to choose the right one for each nail. Take your time to ensure clean edges for a neat finish.
Step 4: Prep Your Nails
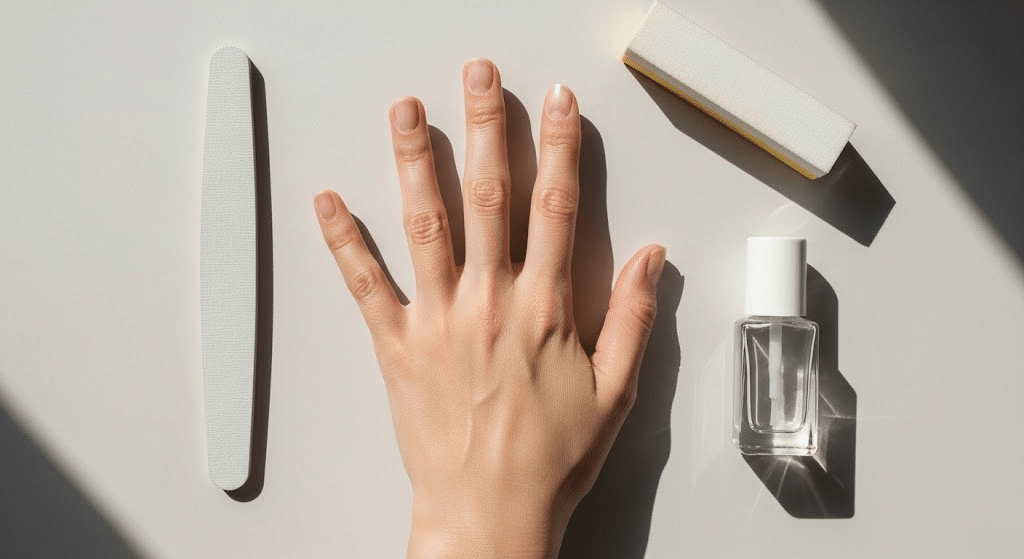
Start by washing your hands and cleaning your nails to remove oil or dust. Then, gently file and buff each nail until the surface is smooth.
Apply a thin layer of base coat and let it dry fully. This step is important because it helps the sticker stay on longer and keeps your natural nails safe.
Step 5: Apply & Seal the Stickers
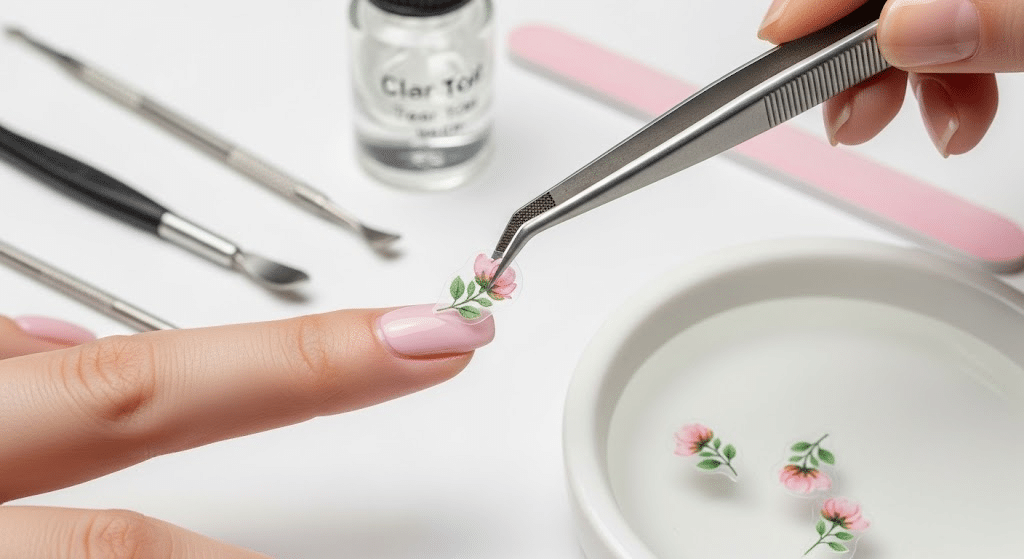
Use tweezers to place the floral sticker on your nail where you want it. Press it gently to flatten it and remove any bubbles.
Once it’s set, apply a top coat to protect the design and help it last. Let it dry completely, or cure under a UV lamp if using gel polish. Enjoy your fresh nail look!
Tips for a Flawless Finish
Applying your DIY floral nail stickers is just the start. To keep them looking fresh and lasting as long as possible, follow a few easy care tips. These simple habits will protect your nails and keep your design neat.
- Avoid water for a few hours after applying stickers.
- Use a peel-off base coat for easy removal.
- Store unused stickers flat in a cool place.
- Don’t overcrowd the nails; leave some space in between.
If you’re starting out with DIY nails, affordable nail kits can be a great way to collect essential tools without overspending.
By following these tips, your floral nail art will stay beautiful and last longer, so you can enjoy your creative look without worry. Taking a little extra care makes all the difference in keeping your nails looking fresh and polished.
Wrapping It Up
Creating DIY floral nail stickers at home is simple and rewarding. You now have all the tips to make beautiful flower designs for your nails.
These homemade stickers save money and let you customize your nail art perfectly. With just basic supplies, you can create endless floral patterns that match any outfit.
Making DIY floral nail stickers gives you salon-quality results without the high price. Start creating your own today and enjoy gorgeous nails anytime. Have you tried making nail stickers before?
Share your favorite floral designs and tips in the comments below – we’d love to see your ideas!