Building a DIY workbench is one of the smartest projects you can tackle as a beginner woodworker.
If you’re fixing bikes, building birdhouses, or organizing tools, having your own custom workbench makes a significant difference. Store-bought workbenches cost hundreds of dollars and might not fit your space or needs.
But when you build your own DIY workbench, you get exactly what you want for much less money.
This step-by-step instruction shows you how to create a strong, practical workbench using basic tools and materials. Even if you’ve never built anything before, you can do this project in just one weekend.
Why You Need a DIY Workbench: Benefits Beyond the Basics
A DIY workbench is more than just a table – it’s your personal command center for all projects. Building your own workbench means you get exactly what you need.
You can choose the perfect size for your space, add storage drawers where you want them, and pick materials that fit your budget. A well-organized workbench keeps your tools in order and provides a stable surface for safe work.
When you have a sturdy workbench, your projects become easier and safer. You can clamp materials securely, measure accurately, and work at the right height without hurting your back. This means fewer mistakes, faster work, and better results.
Plus, having everything in its place saves time searching for tools and materials.
Materials and Tools You’ll Need
Before you begin building your DIY workbench, gather all the necessary materials and tools. Having everything ready makes the build go much smoother and faster.
Don’t worry if you don’t own every tool – you can borrow from friends or rent them from your local hardware store.
| TOOLS | HARDWARE | LUMBER |
|---|---|---|
| Impact driver/screw gun | 5/16″ x 5″ lag bolts | 3 × 4×4 posts (35.5″ length) |
| Chop saw / circular saw | 2½” outdoor screws | 4 × 2×4 boards (93″, 23″, 19″) |
| Table saw (optional) | 1⅝” construction screws | 7–8 × Deck boards (5.5″ wide) |
| Chisel & mallet | 3″ lag bolts | 6 × 2×8 boards (for benchtop) |
| Speed square | Washers (for lag bolts) | 1 × 1×2 or 1×1 strip (41″ length) |
With these materials and tools ready, you’re all set to build an amazing DIY workbench! Double-check your lumber measurements before cutting, and don’t forget to pick up extra screws just in case.
Step-by-Step Instructions: How to Build a DIY Workbench
Building your own workbench might seem scary, but this project is perfect for beginners. You don’t need expensive tools or a huge workshop to get started.
When you’re done, you’ll have a strong, reliable workbench that will last for years.
Step 1: Cut and Notch the 4×4 Legs
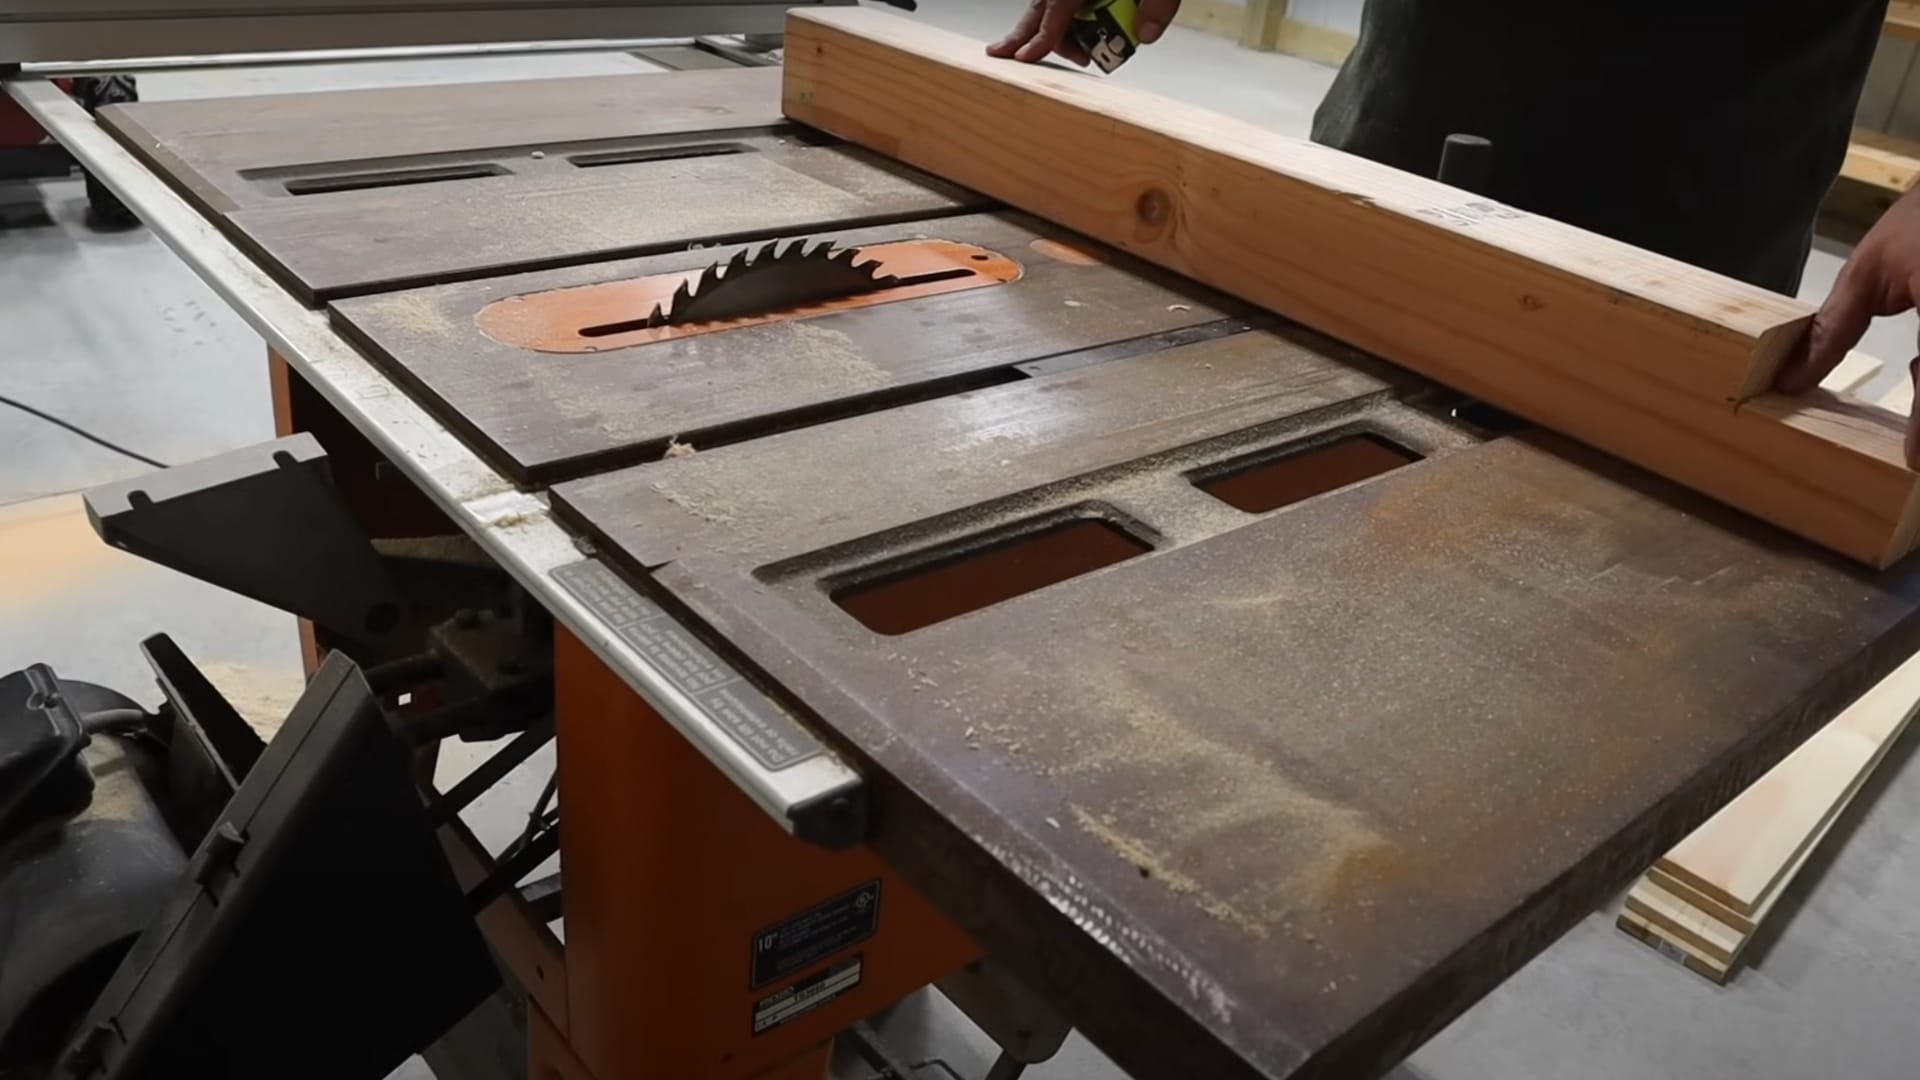
Start by cutting six legs from your 4×4 posts, each exactly 35½ inches long. Next, you’ll make two notches in each leg using a saw and chisel.
The first notch goes 3½ inches from the top, and the second sits between 20½ and 24 inches down. Both notches should be 1½ inches deep. Take your time with this step since accurate notches make everything else easier.
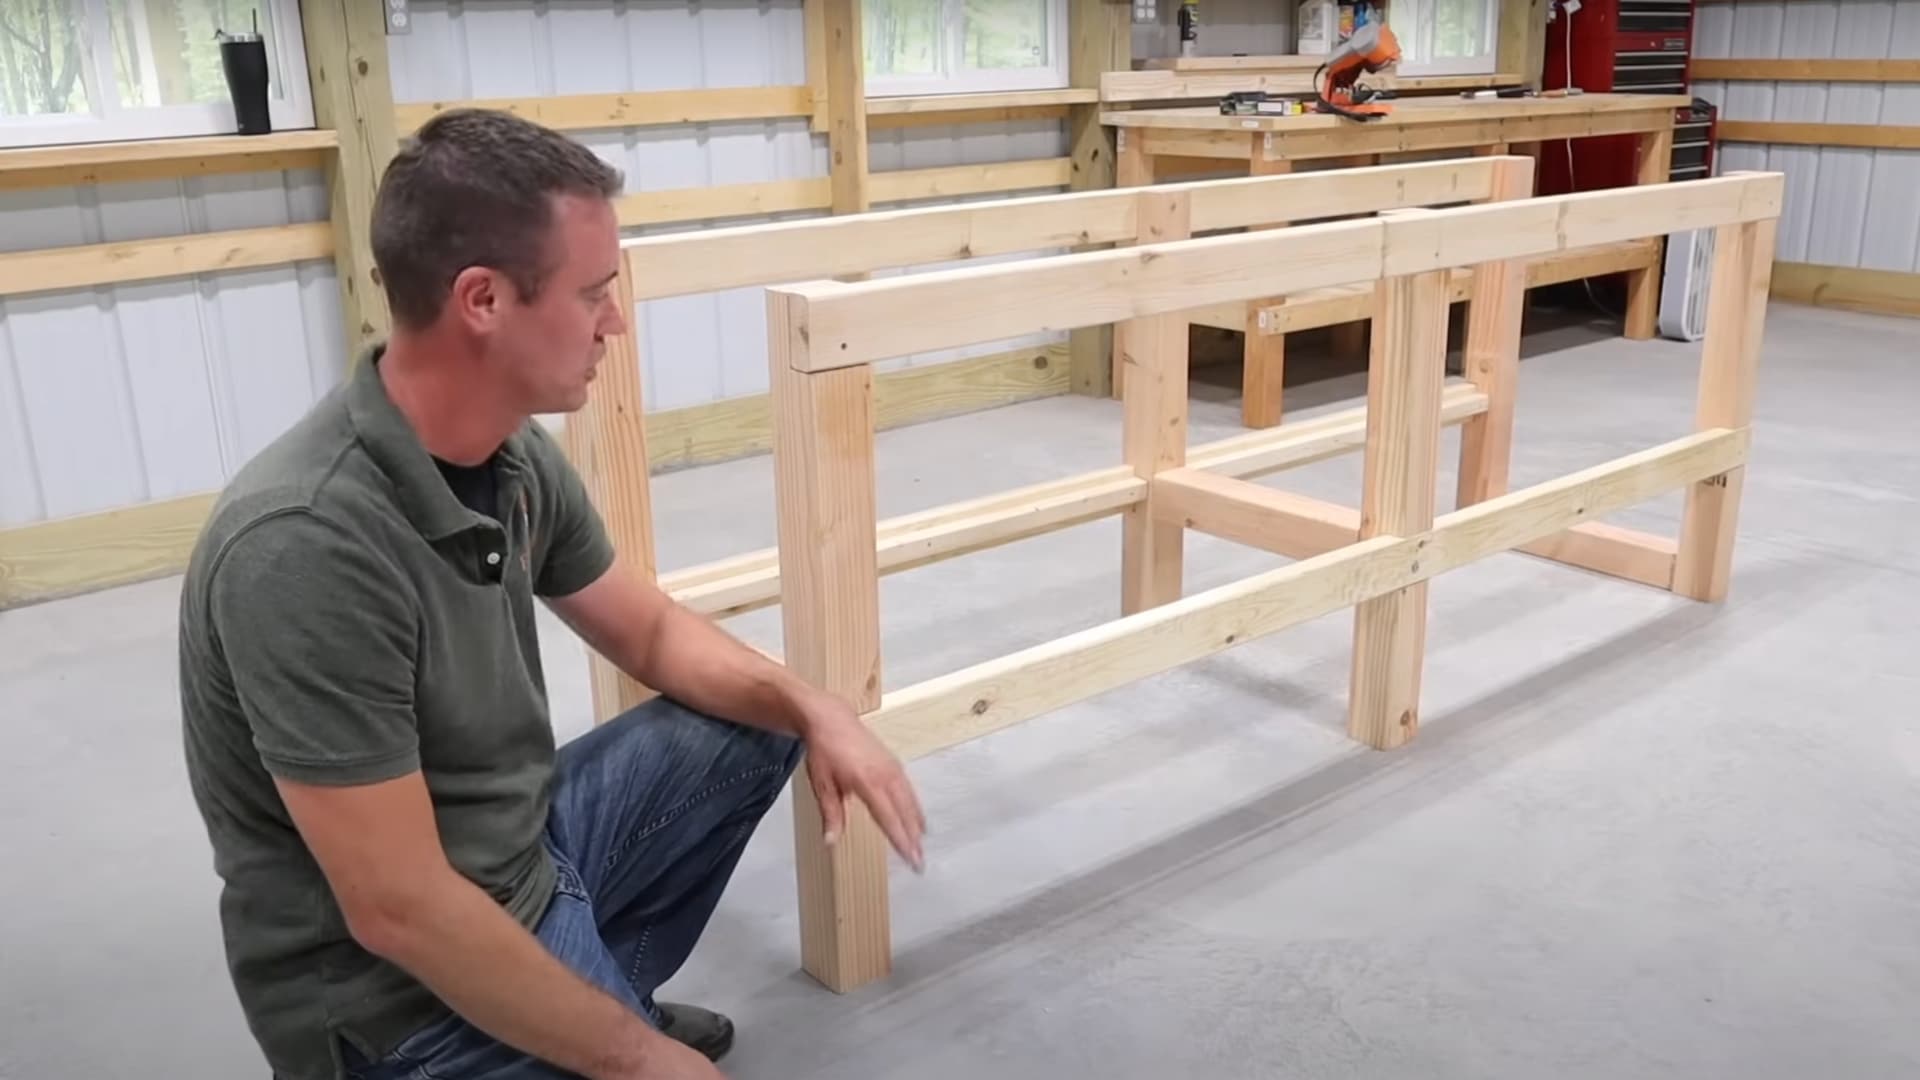
Step 2: Build the Side Frames
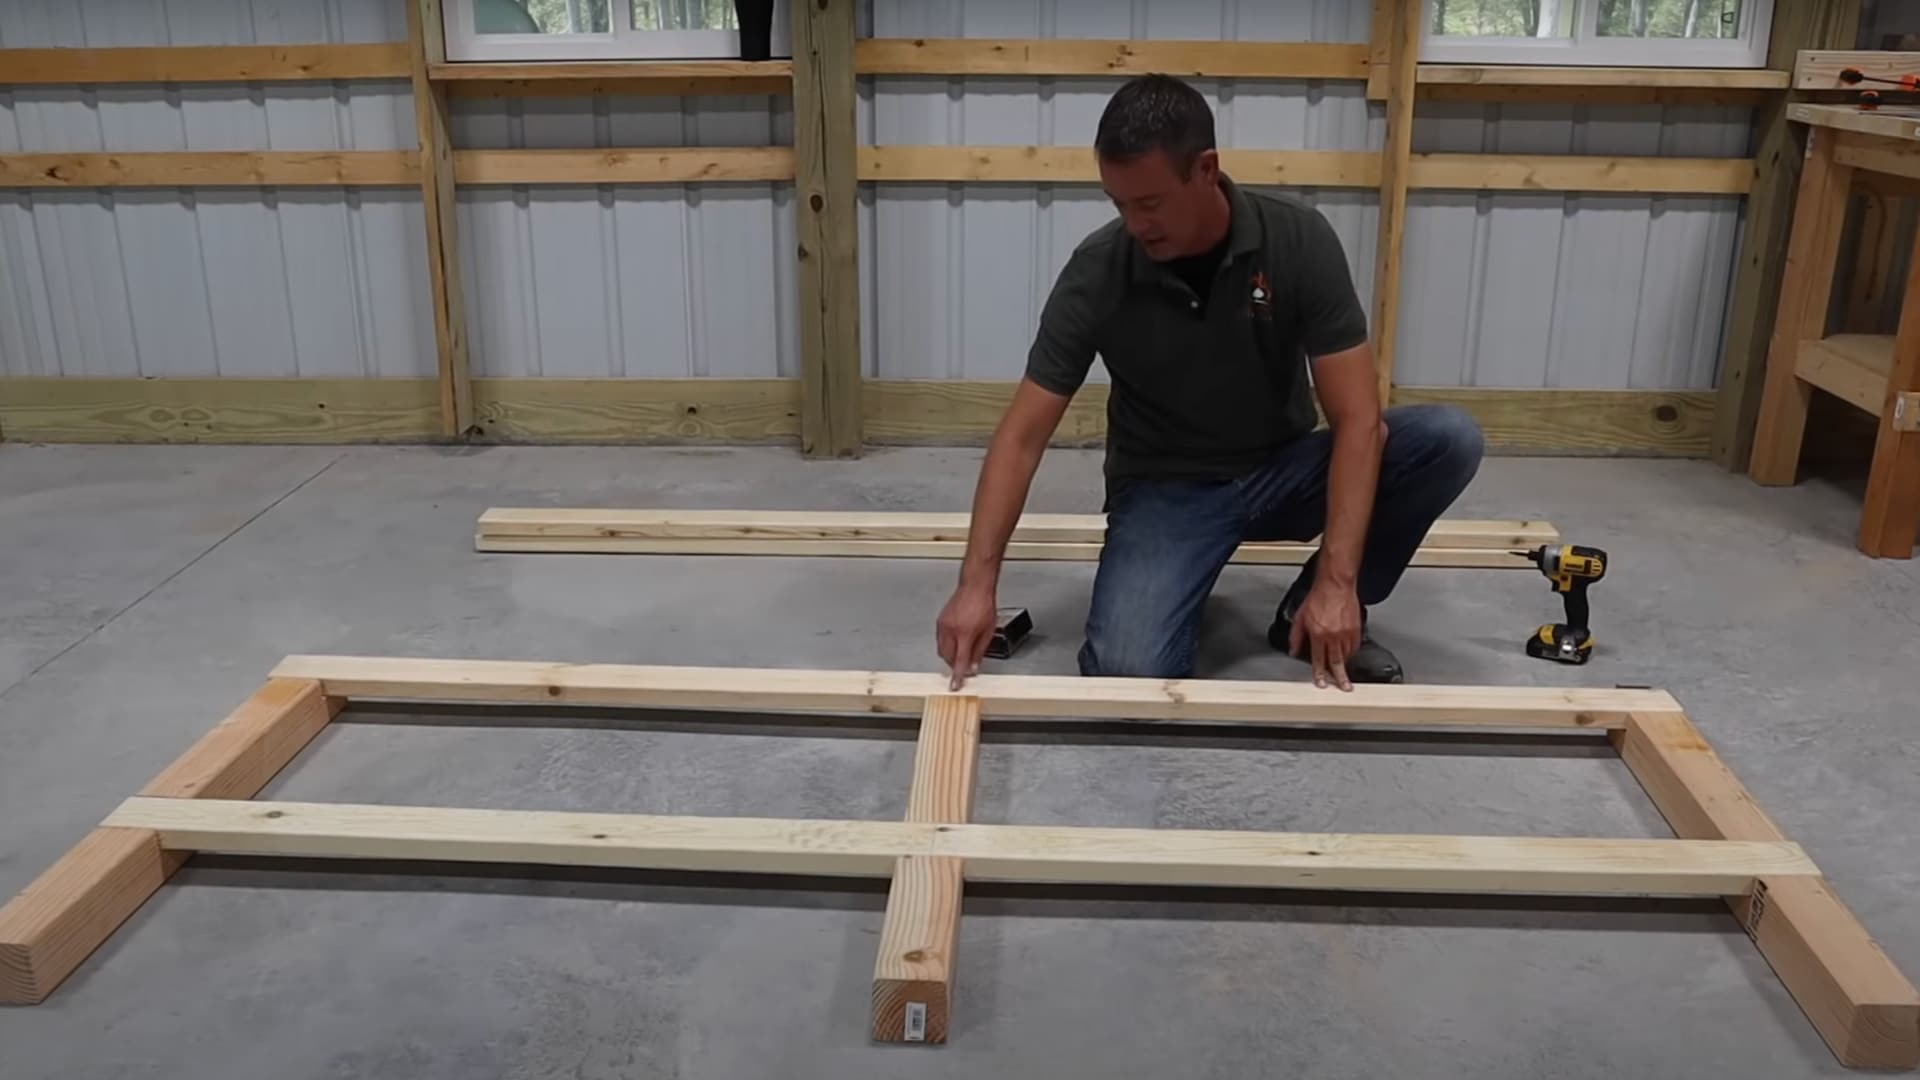
Cut four 2×4 boards to 93 inches long for your frame pieces. Attach these long boards to your notched legs using temporary screws first. This lets you check that everything lines up perfectly before making it permanent.
Use a speed square to make sure your frames are straight and square. Once you’re happy with the fit, replace those temporary screws with strong 5-inch lag bolts and washers.
Step 3: Add Shelf Supports and Connect Frames
Attach thin wood strips called shelf ledges inside your bottom frame, about ¾ inch down from the notch top. Use 2½-inch screws to secure these ledges, but drill pilot holes first to prevent the wood from cracking.
Now, stand both frame sides up and connect them with three 19-inch pieces of 4×4 lumber. These cross braces make your workbench rock-solid, so secure them well with lag bolts.
Step 4: Install Bottom Shelf
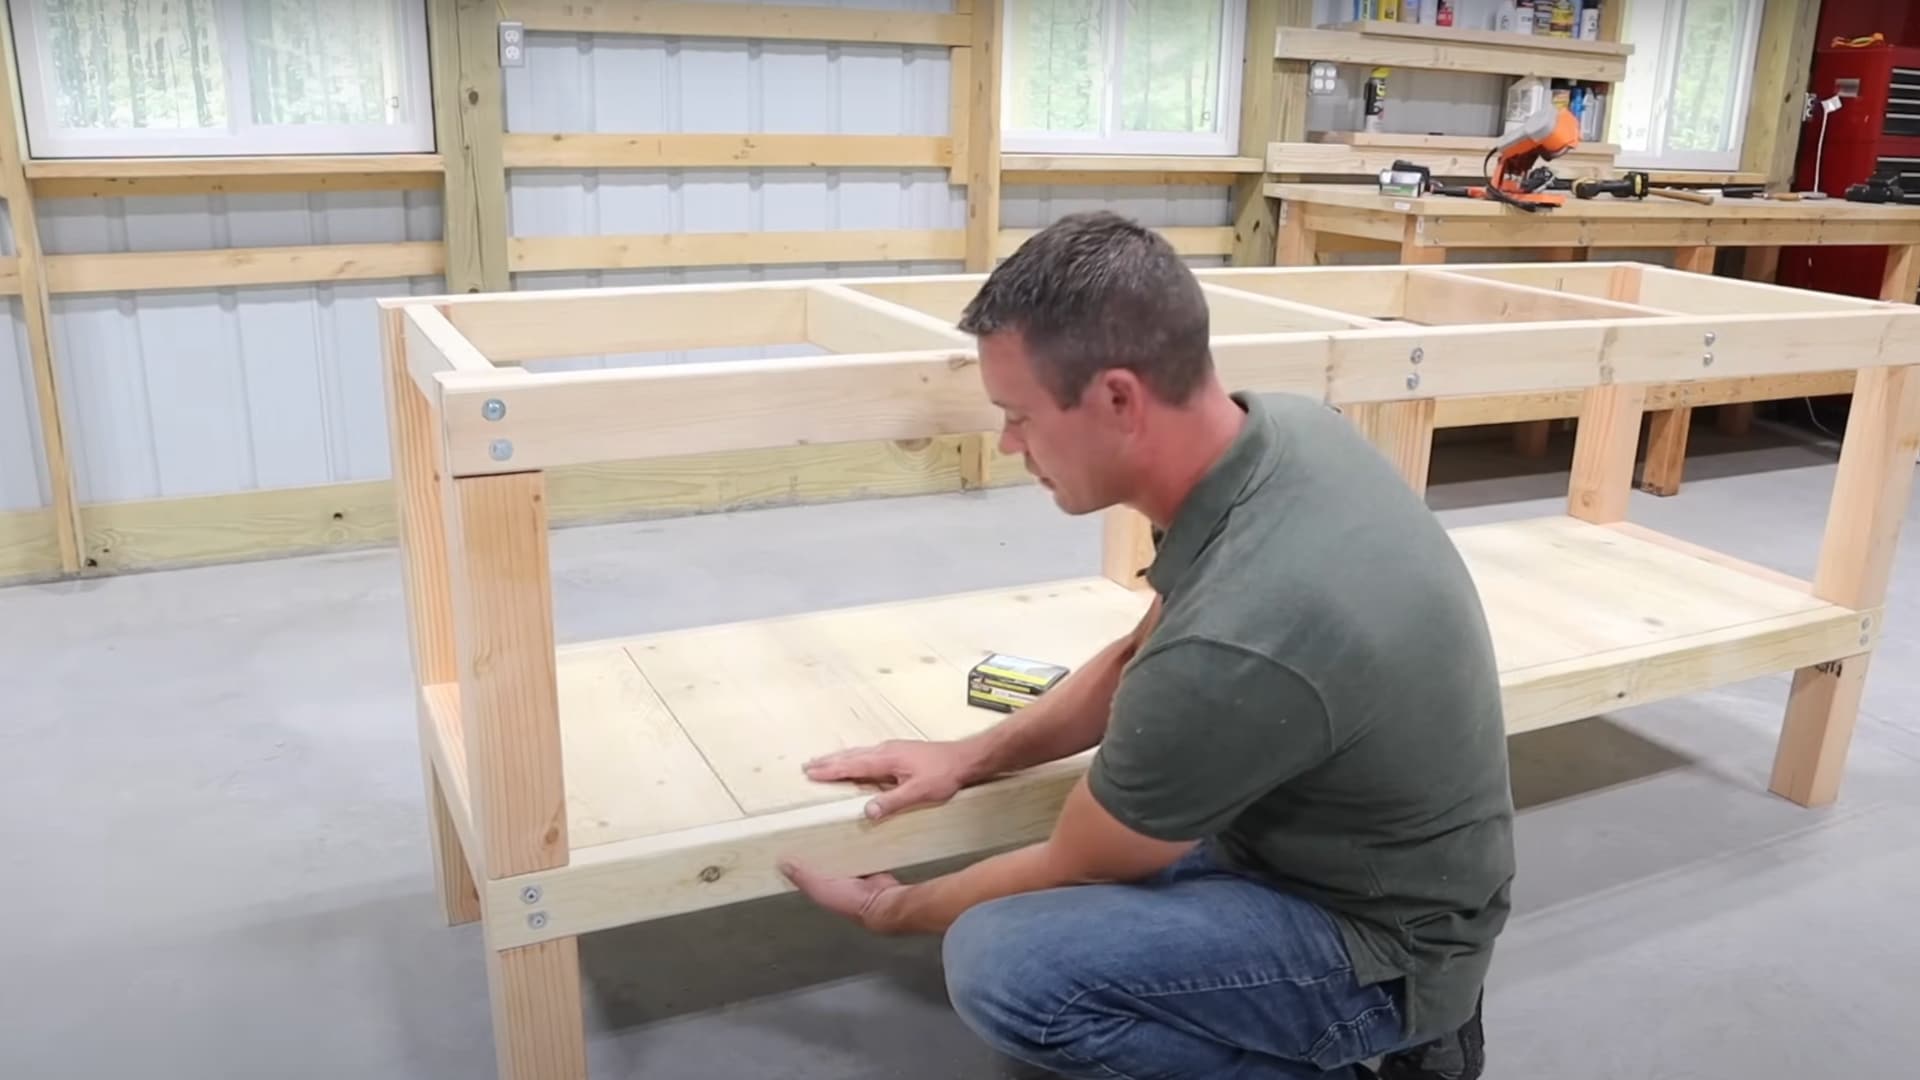
Place your deck boards across the shelf supports you just installed. The boards should fit snugly between the frame sides. If the last board is too wide, you can trim it down with a saw.
You can either screw the boards down with 1⅝-inch screws for a permanent shelf, or leave them loose so you can remove them later if needed for cleaning or repairs.
Step 5: Install the Workbench Top
Lay your 2×8 boards across the top frame to create your work surface. Make sure they’re lined up evenly and cover the entire frame. Attach each board to the front frame, back frame, and center brace using 3-inch screws.
The screw heads should sit flush with the wood surface so they don’t catch on your projects. Sand the edges smooth for a professional finish that feels great to work on.
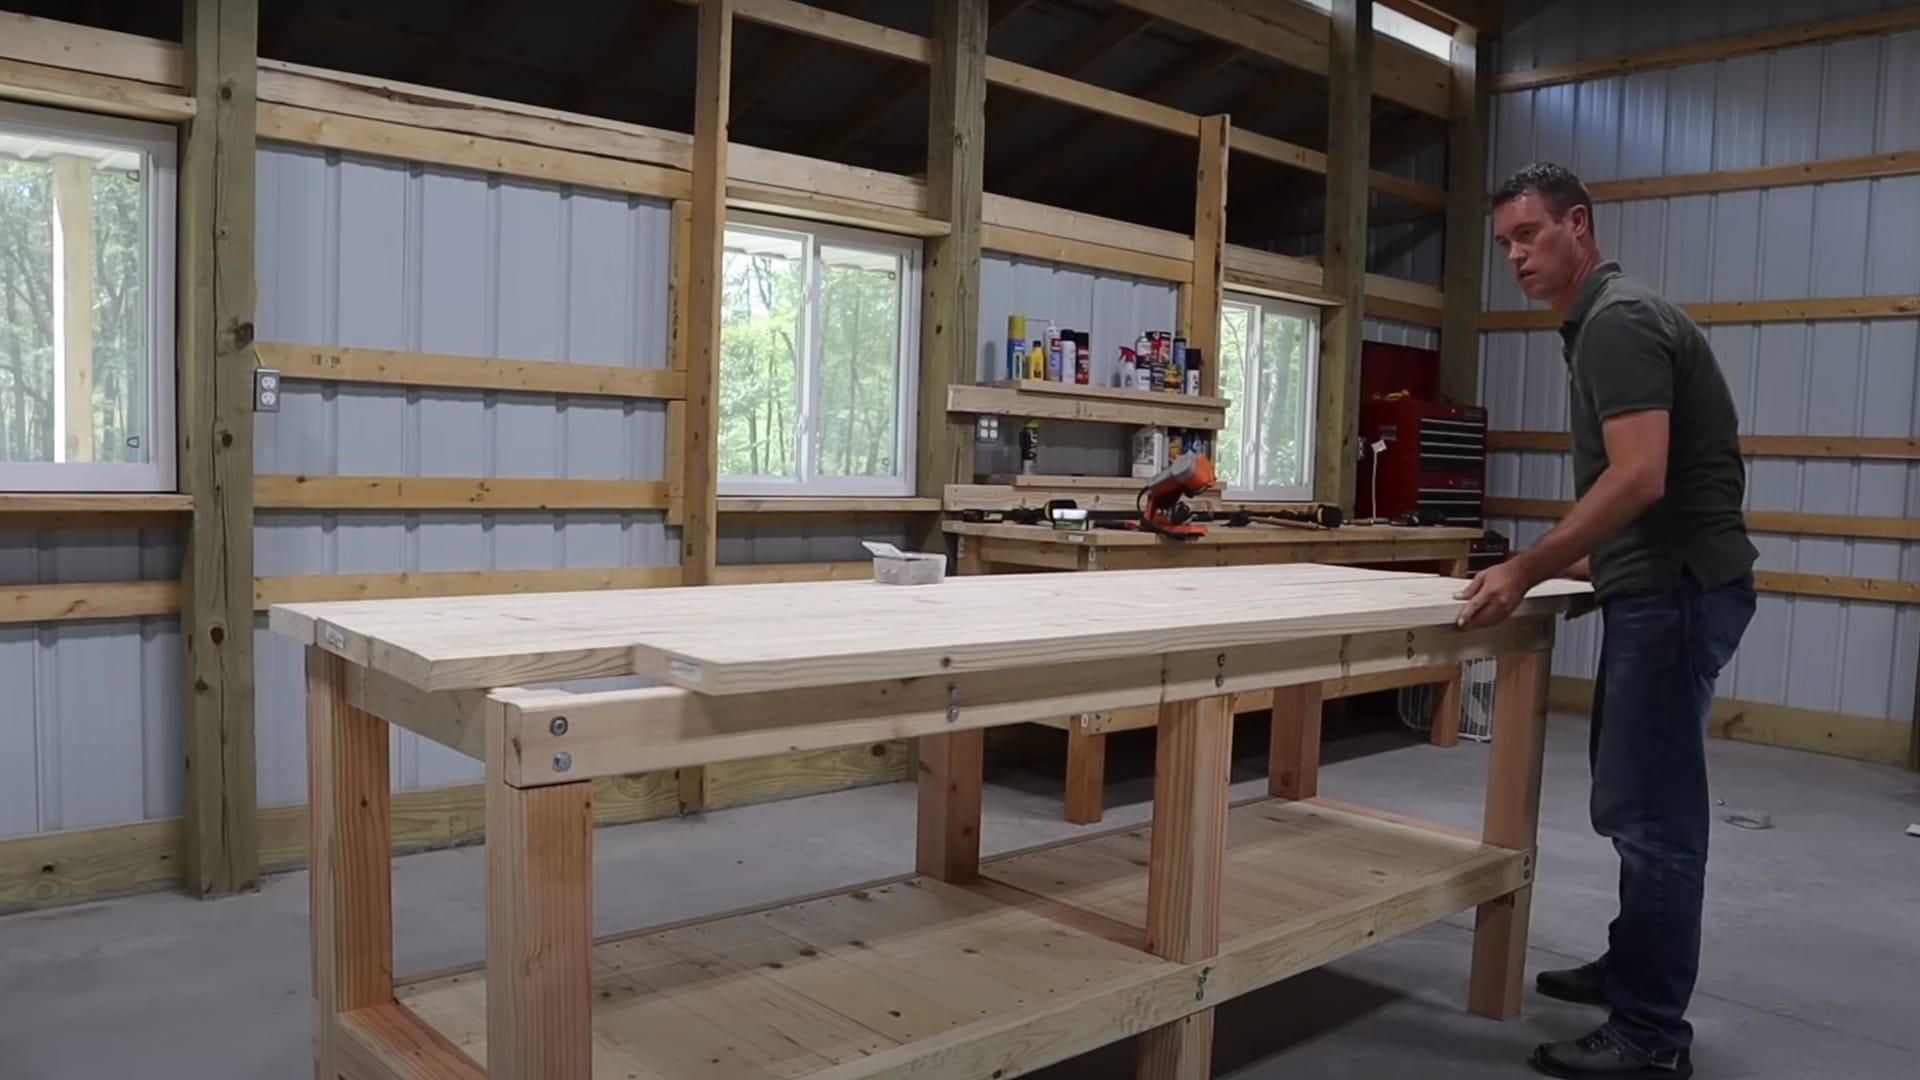
Video Tutorial
For more information, check out this video tutorial by Firewood For Life
Where to Find Workbench Plans: Ready-to-Follow Blueprints
If you want even more workbench ideas or prefer following detailed plans, there are numerous great resources available online.
These trusted sources offer free blueprints, helpful videos, and step-by-step guides that make building your DIY workbench even easier.
| SOURCE | DESCRIPTION | WEBSITE/YOUTUBE |
|---|---|---|
| Ana White | Easy-to-follow plans with visuals & cut lists for beginners | ana-white.com |
| Instructables | Community-driven tutorials with step-by-step photos | instructables.com |
| April Wilkerson | Practical, beginner-friendly workbench builds | YouTube – April Wilkerson |
| Jay Bates | Downloadable plans with build videos | YouTube – Jay Bates |
These resources give you plenty of options to find the perfect workbench plan for your skills and space. If you like written instructions with pictures or prefer watching videos, you’ll find something that works for you.
Tips for Customizing Your Workbench
Now that you’ve built your DIY workbench, it’s time to make it truly yours! These simple customization tips will help you create a workspace that fits your needs perfectly.
- Adjust the Height: Ensure your workbench is at the right height for comfort. A good height is around waist level to avoid back pain.
- Add Storage: Utilize bins, shelves, or a pegboard to keep tools organized and easily accessible.
- Protect the Surface: Apply a clear coat or varnish to protect your workbench from scratches and stains.
- Keep Things Tidy: Create spots for everything so tools and materials don’t get lost or cluttered.
- Personalize It: Add your own touches, like a custom tool rack or a light above the bench for better visibility.
These customization ideas will turn your basic DIY workbench into a personalized workspace that works perfectly for you. Start with one or two changes and add more features as you learn what you need most.
Summing It Up
Your new DIY workbench will become the heart of all your future projects. From simple repairs to creative builds, having a dedicated workspace makes everything easier and safer.
The best part? You built it yourself, so you know exactly how strong and reliable it is. This DIY workbench will serve you for years to come, saving money and giving you satisfaction every time you use it.
You’ll love showing it off to friends and family who visit your workshop. Plus, building this workbench teaches you skills you can use on other projects. Ready to start building?
Share your workbench plans or ask questions in the comments below – we’d love to see what you create.